18 Creative Color Me Mine Ideas Inspiration for Unique Pottery
You can elevate your Color Me Mine experience by blending techniques like ombre glazing, slip-trailing, and underglaze painting with durable, high-fired ceramics. Apply wax resist for crisp designs, use handprints or stencils for personalized flair, and experiment with earth tones, botanical motifs, and metallic accents for visual depth.
Integrate mixed materials, carve details, or embed charms for added dimension. Using food-safe, eco-friendly glazes guarantees lasting, everyday pieces. Explore more unique ideas and techniques for truly standout pottery.

1. Mother’s Garden Platter With Personalized Handprints
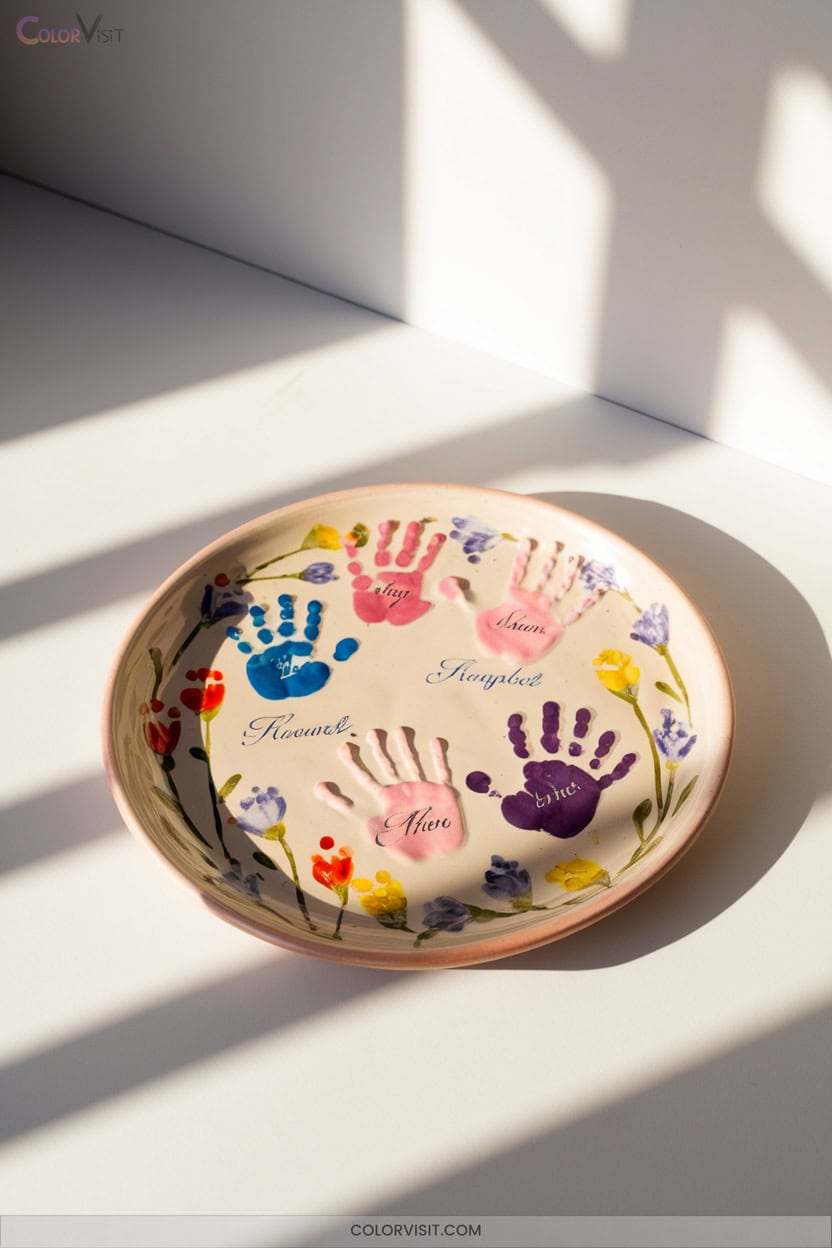
A handprint platter becomes a personalized keepsake when you incorporate ceramic glazing techniques and thoughtful color selection.
Begin by selecting a white or cream bisque platter to maximize handprint visibility.
Apply underglaze or glaze in earthy greens and blues, evoking a botanical theme.
Press handprints firmly, then detail with fine brushes—add floral accents or textured leaves using layered glazes.
Personalize with names, dates, or messages like “Mom’s Best Creations” using slip-trailing for precision.
After drying, seal the design with a food-safe clear glaze.
Fire the piece to maturity for durability.
Display the finished platter as a functional or decorative heirloom.
2. Butterfly Vase Featuring Metallic Highlights
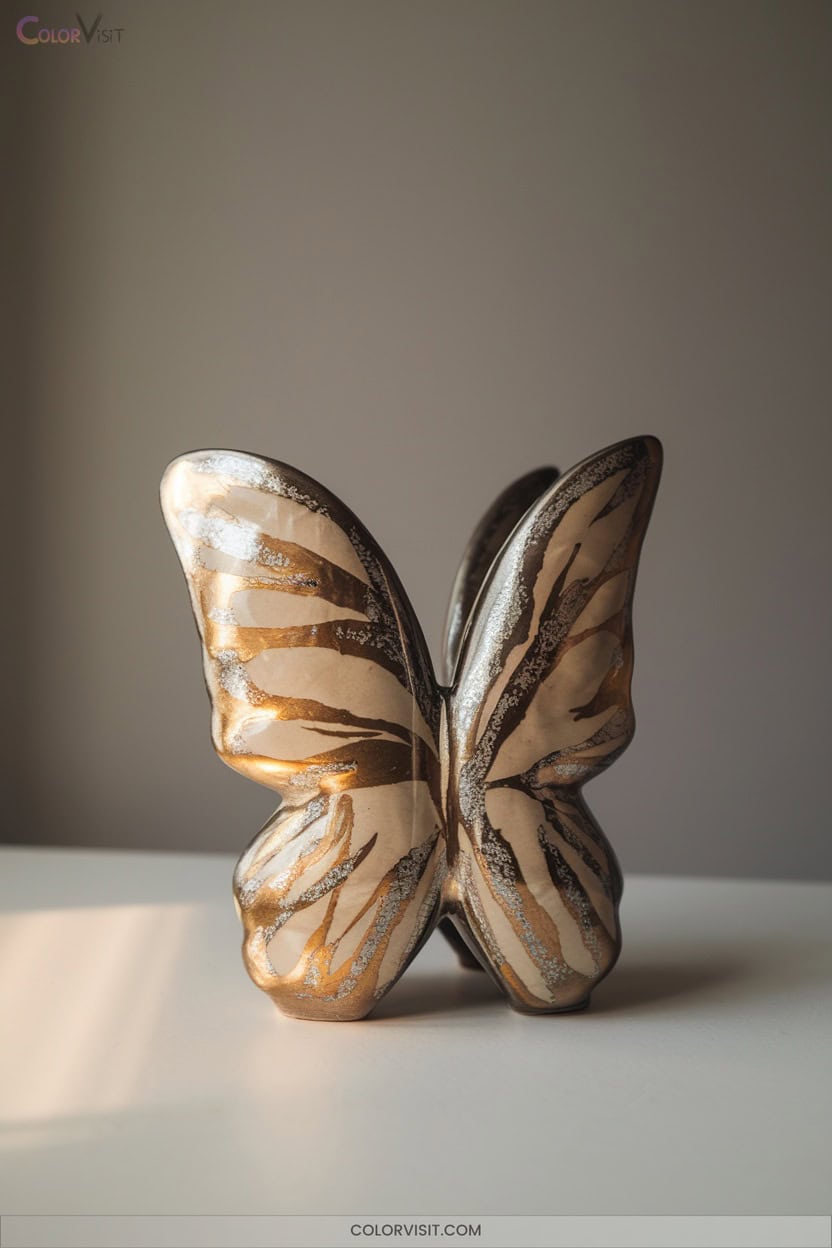
To craft a butterfly vase with metallic highlights, select a ceramic bisque vase as your base and prepare a color scheme featuring teal blue, yellow, and white glazes.
Begin your butterfly vase by choosing a ceramic bisque base and vibrant teal, yellow, and white glazes for a striking palette.
Incorporate innovative techniques and material awareness to achieve a professional finish:
- Hand-paint butterfly and floral motifs using fine liners and glaze brushes for precision.
- Apply gold or gold lustre to accentuate butterfly wings and edges, creating metallic highlights.
- Employ glossy porcelain glaze to seal designs and enhance vibrancy.
- Cure the vase in a kiln, monitoring temperature for ideal glaze fusion and metallic adherence.
Embrace nature-inspired aesthetics while focusing on technical mastery.
3. Retro Utensil Holder in Vintage Color Palettes

Retro utensil holders leverage earthy vintage color palettes—think olive green, terracotta, and mustard yellow—applied to durable ceramic or stoneware bases for both function and style.
Begin with slip casting to achieve a uniform vessel, then utilize underglaze painting for geometric shapes, floral motifs, or polka dots inspired by vintage kitchenware.
Apply a monochromatic, complementary, or analogous palette for visual impact.
Integrate metallic accents in brass or copper for a luxe touch.
Use matte or gloss glazes, emphasizing texture and depth.
Add functional elements like handles or lids, and finish with sgraffito or relief designs for intricate, one-of-a-kind character.
4. Handprint Bee Plate for Family Keepsakes
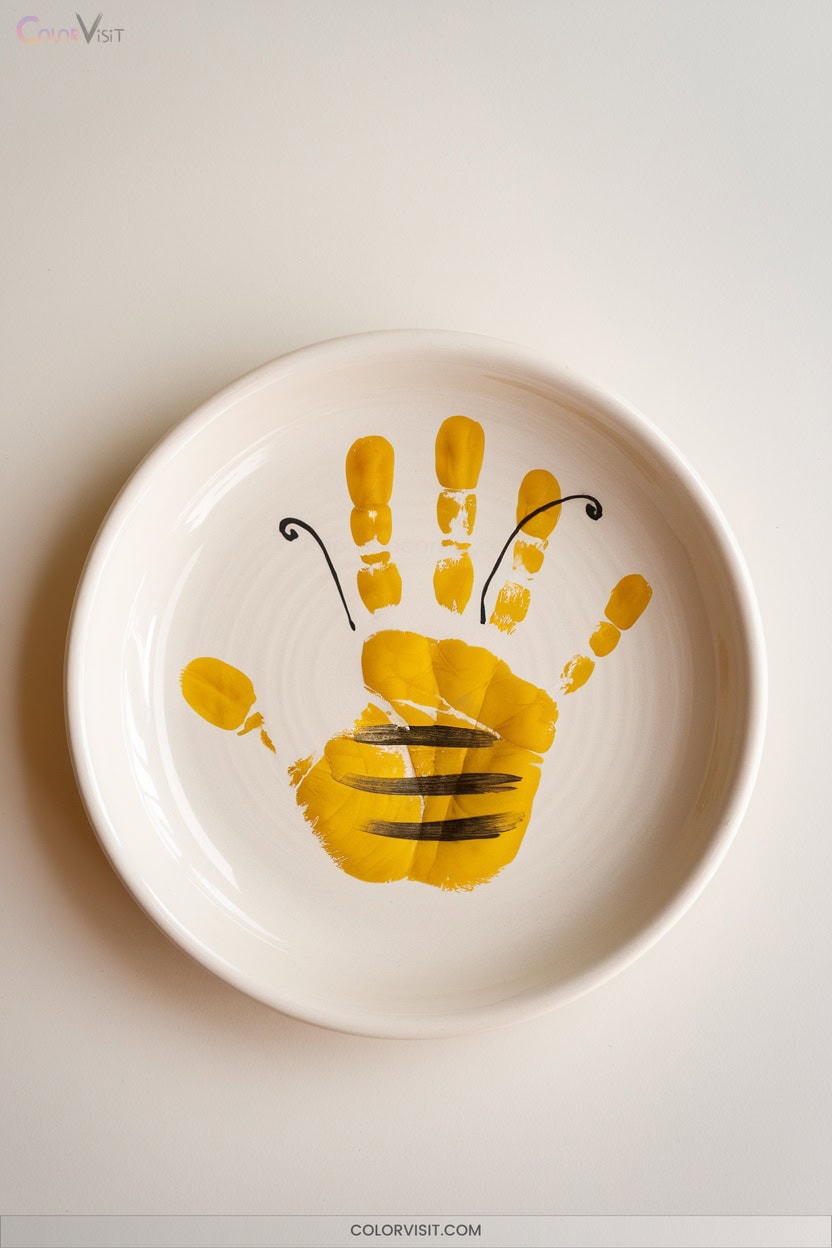
Handprint bee plates transform a simple ceramic piece into a personalized family keepsake by integrating colorfast underglazes, layered handprints, and detailed brushwork.
You’ll orchestrate a vibrant bee motif by executing precise handprint placement and using sponges for even paint application.
Select a circular glazed plate for ideal layout and longevity.
Here’s your materials and process roadmap:
- Apply yellow and black ceramic paints with sponges and detail brushes for bee bodies and stripes.
- Use stencils to maintain crisp text or dates.
- Surround central bee art with child handprints for a unified border.
- Finish with kiln-fired glaze for archival durability.
5. Ombre Glazed Bowls for Modern Tableware
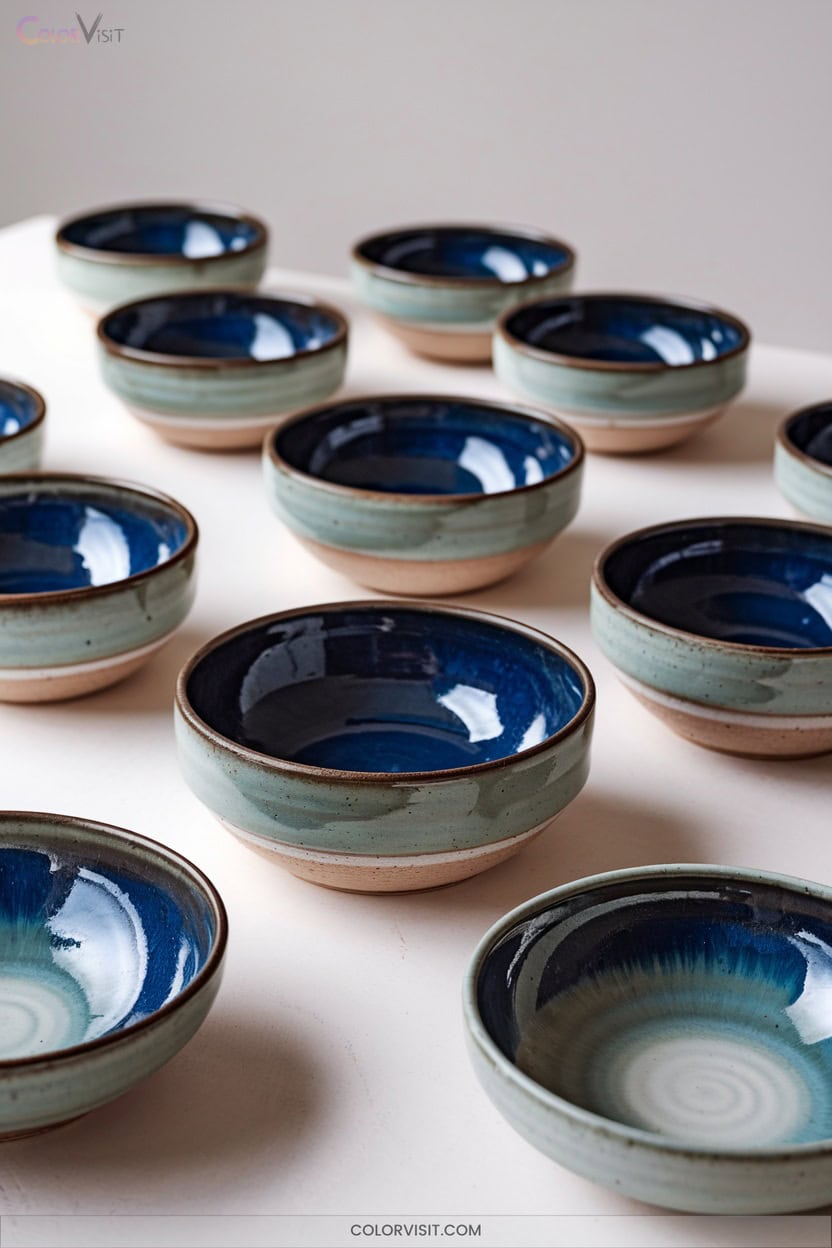
A well-executed ombre glaze transforms simple ceramic bowls into striking modern tableware by leveraging controlled color gradients and layered application techniques.
Start by mapping your gradient—white to vibrant hues—then apply a translucent base coat for luminosity.
Employ sponges or airbrushes for seamless gradations, using 3-4 thin layers per color zone.
Rotate bowls on a banding wheel to achieve even blending, and use wax resist for crisp rims.
Choose highly pigmented underglazes or low-fire Cone 05/06 glazes like Amaco Snapdragon for maximum vibrancy.
Test tiles are essential to confirm color interactions and glaze maturity, guaranteeing your ombre bowls achieve innovative, professional results.
6. Layered Floral Motif Mugs With Stencil Designs

Moving from ombre gradients to surface decoration, layered floral motif mugs showcase the technical versatility of stencil design and glaze application.
You’ll master depth and intricacy by precisely layering stencils, decals, and glazes.
Enhance your material awareness and process control with these innovative steps:
- Cut custom stencils using a Cricut machine for multi-layer floral motifs.
- Apply underglaze or infusible ink with sponges or brushes, allowing each layer to dry fully for crisp edges.
- Integrate ceramic decals or overglaze for vivid, detailed blooms.
- Combine matte and gloss glazes, or incorporate negative space, to amplify dimensionality and visual interest.
7. Neon and Metallic Geometric Planters
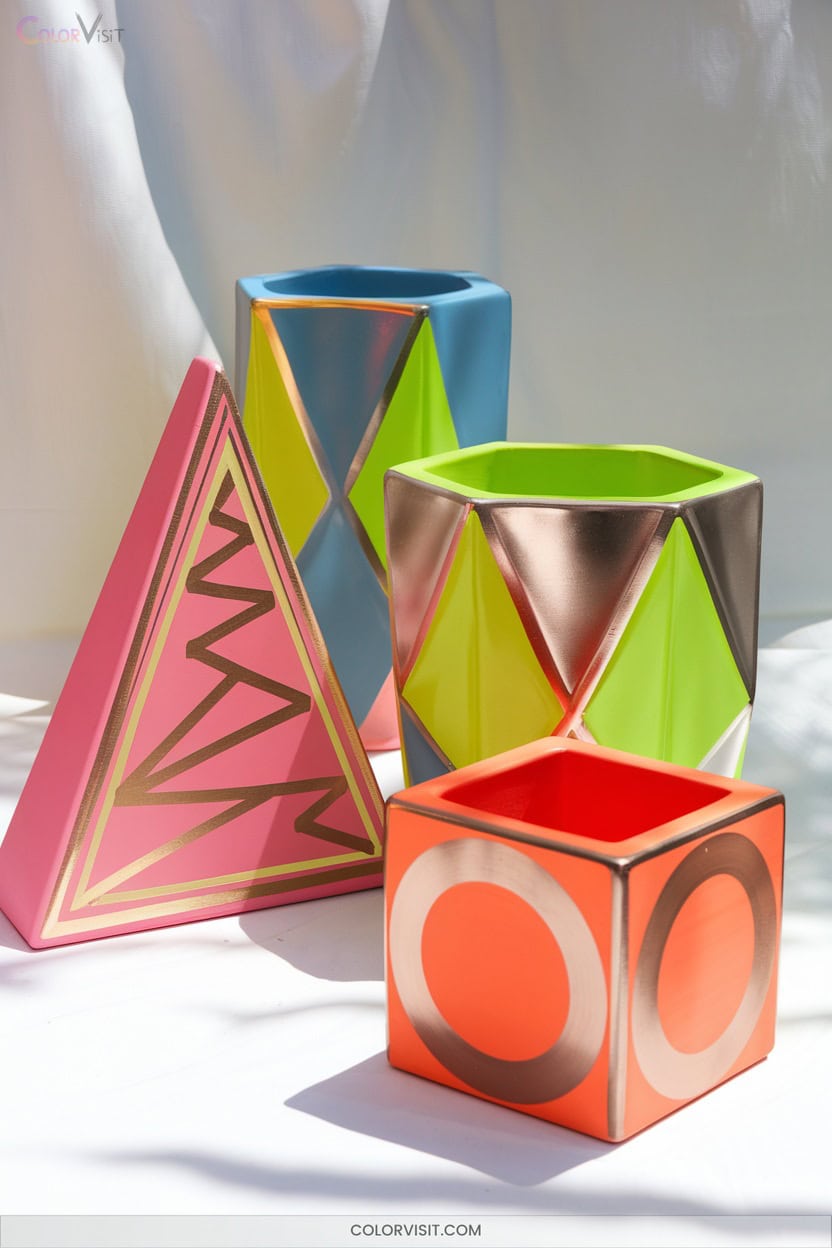
Geometry defines the aesthetic of neon and metallic geometric planters, where faceted forms—pentagons, polygons, and sharp-edged prisms—elevate structural interest and modern appeal.
Select premium glazed ceramics for robust weather resistance; fire them in wood-burning kilns to guarantee color retention.
Apply neon and metallic acrylics: use marbled techniques for dimensionality, or contrast metallic rims against matte bases.
Modify metal decor globes with gold spray paint and integrate smaller pots inside for a modular effect.
Always include drainage for plant health.
Combine varied sizes in sets for layered displays, and seal metal surfaces to maintain finish against environmental wear.
8. Holiday-Themed Pumpkin Centerpieces
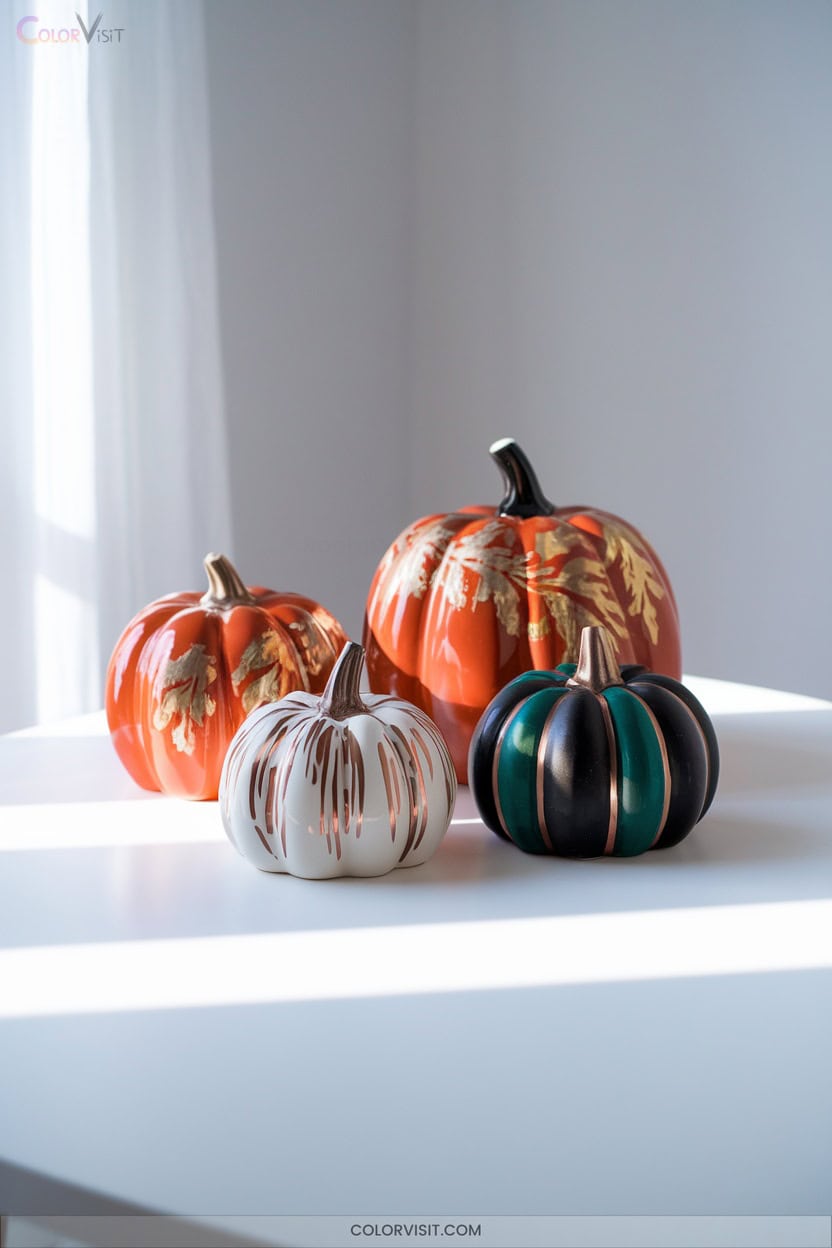
Shifting focus from the crisp lines and reflective finishes of geometric planters, holiday-themed pumpkin centerpieces emphasize tactile ceramics and botanical integration.
You’ll engage with materiality by selecting from glazed, textured, or monochromatic ceramic pumpkin bases to anchor your design.
Prioritize structural integrity and seasonal adaptability with advanced assembly techniques and modular accents.
For innovative execution, consider:
- Drill cavities in stacked pottery pumpkins for foam-free floral stability.
- Integrate magnetic lids for rapid centerpiece refreshment.
- Employ seeded eucalyptus and dried lotus pods to diversify botanical texture.
- Utilize weighted ceramics and embedded candle openings for functional, sculptural presence.
9. Custom Name and Date Commemorative Platters
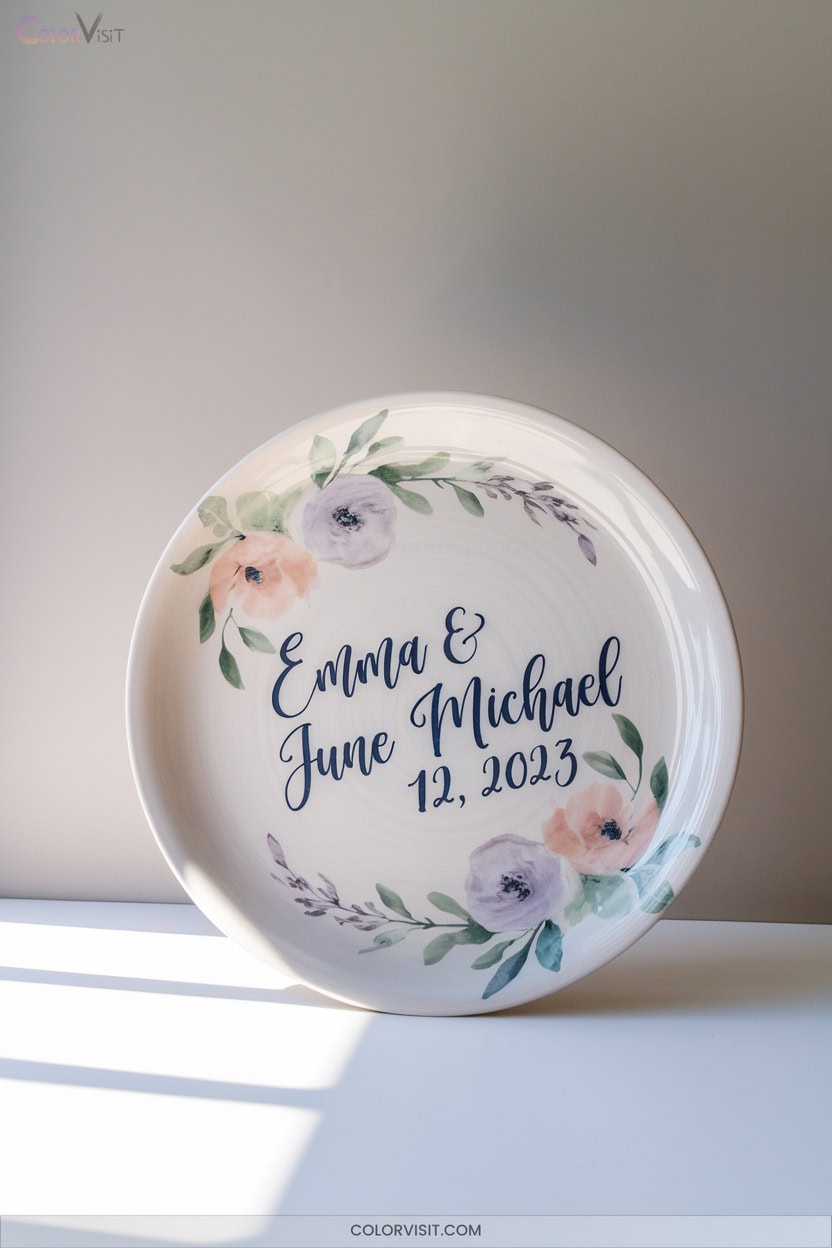
A custom name and date commemorative platter merges functional ceramics with precise personalization, offering a canvas for hand-engraved names, dates, or monograms.
A commemorative platter seamlessly combines everyday function with personalized artistry through hand-engraved names, dates, or monograms.
You’ll choose from stoneware or other durable ceramics, then specify your preferred engraving format—single family name, double initials, or a three-letter monogram.
Artisans utilize hand-engraving for accuracy, sometimes pairing it with painted detailing.
Select from gloss glazes like clear or soft white for a modern, food-safe finish.
Handles and varied shapes, such as large ovals, enhance versatility.
These platters become distinctive gifts for weddings, anniversaries, or retirements, blending artisanal quality with innovative, custom design.
10. Bold Primary Color Soup Bowls
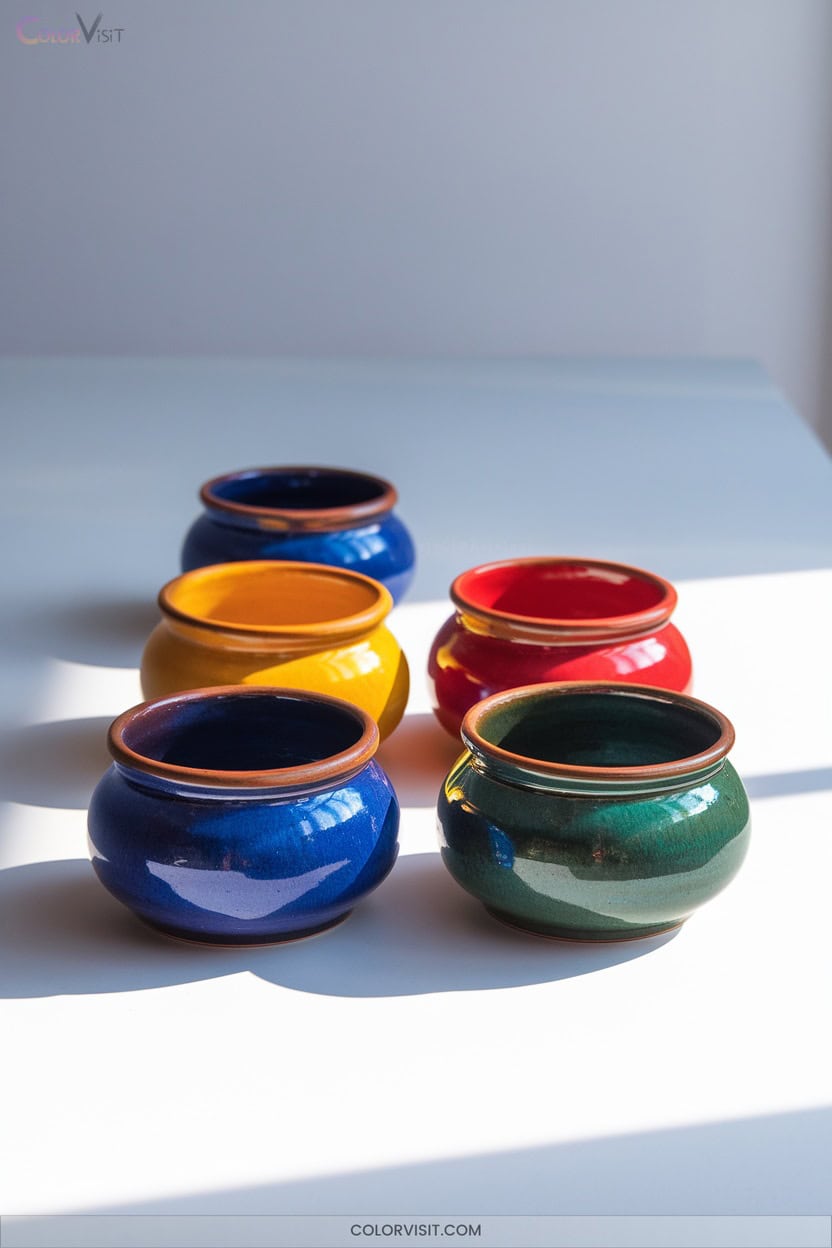
Bold primary color soup bowls instantly energize your tableware collection through high-saturation glazes in red, blue, and yellow.
To elevate your pottery, apply process-driven techniques and material awareness for both aesthetics and durability. Incorporate these innovative steps:
- Select high-fire ceramic clay to guarantee thermal stability and longevity.
- Utilize underglaze painting for crisp, vibrant primary hues and combine with sgraffito for intricate patterning.
- Experiment with geometric stenciling to introduce dynamic, modern motifs.
- Evaluate ergonomic design—opt for stackable, dishwasher-safe forms to maximize functionality.
Prioritize eco-friendly glazing and customizable finishing for a distinctive, future-forward result.
11. Monochrome Textured Vases for Minimalist Decor
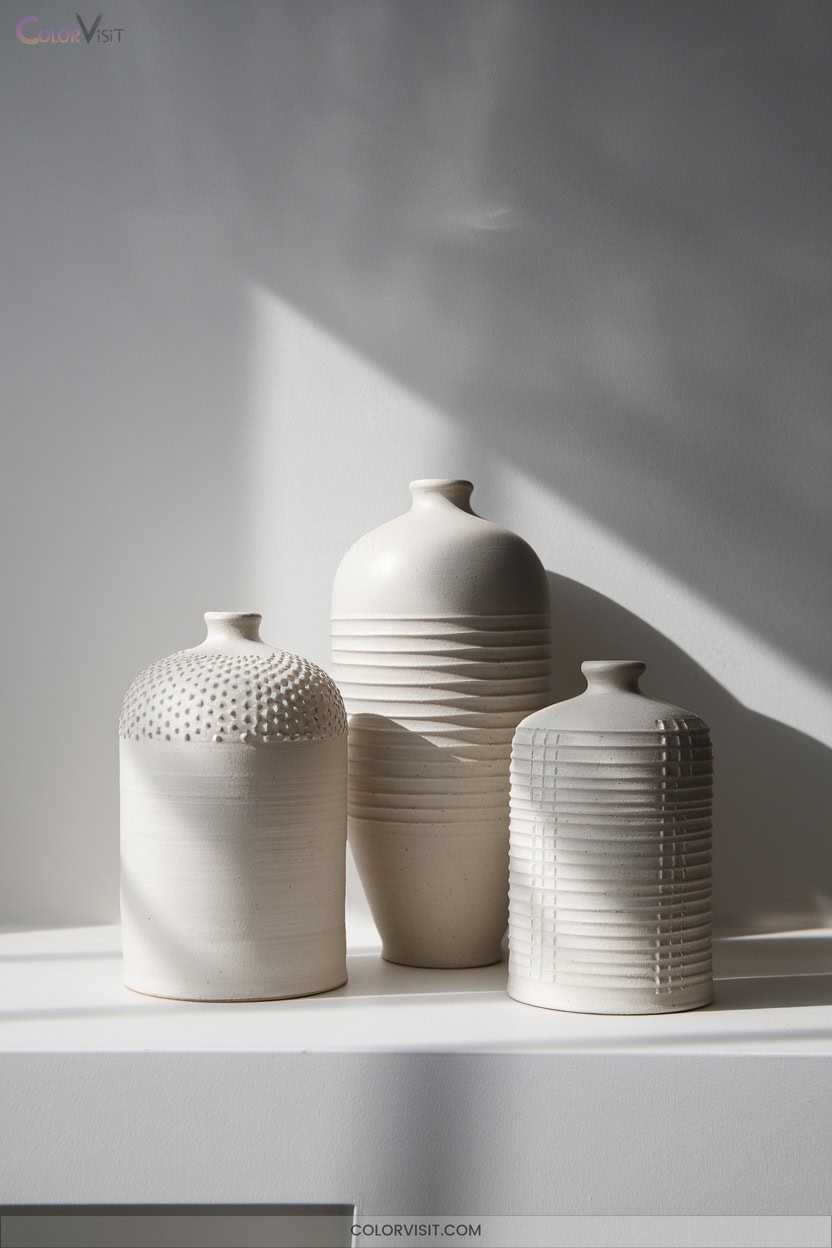
Monochrome textured vases embody minimalist decor through their refined ceramic construction and expertly crafted surfaces.
You’ll select high-quality ceramics, shaping them into orb, conical, or asymmetrical forms for modern silhouettes.
Apply matte glazes in black, white, or gray, ensuring a harmonious monochrome palette.
Employ hand-finishing techniques—ridges, grooves, embossing—to achieve tactile depth without visual clutter.
Avoid gloss; instead, aim for organic, wabi-sabi-inspired textures that evoke calm.
Integrate these vases as functional sculpture, displaying single stems or grouping varied sizes for modular flexibility.
Align your process with sustainable values and premium craftsmanship, responding to the growing demand for artisanal, enduring minimalist decor.
12. Light-Up Pottery Sculptures With Functional Elements
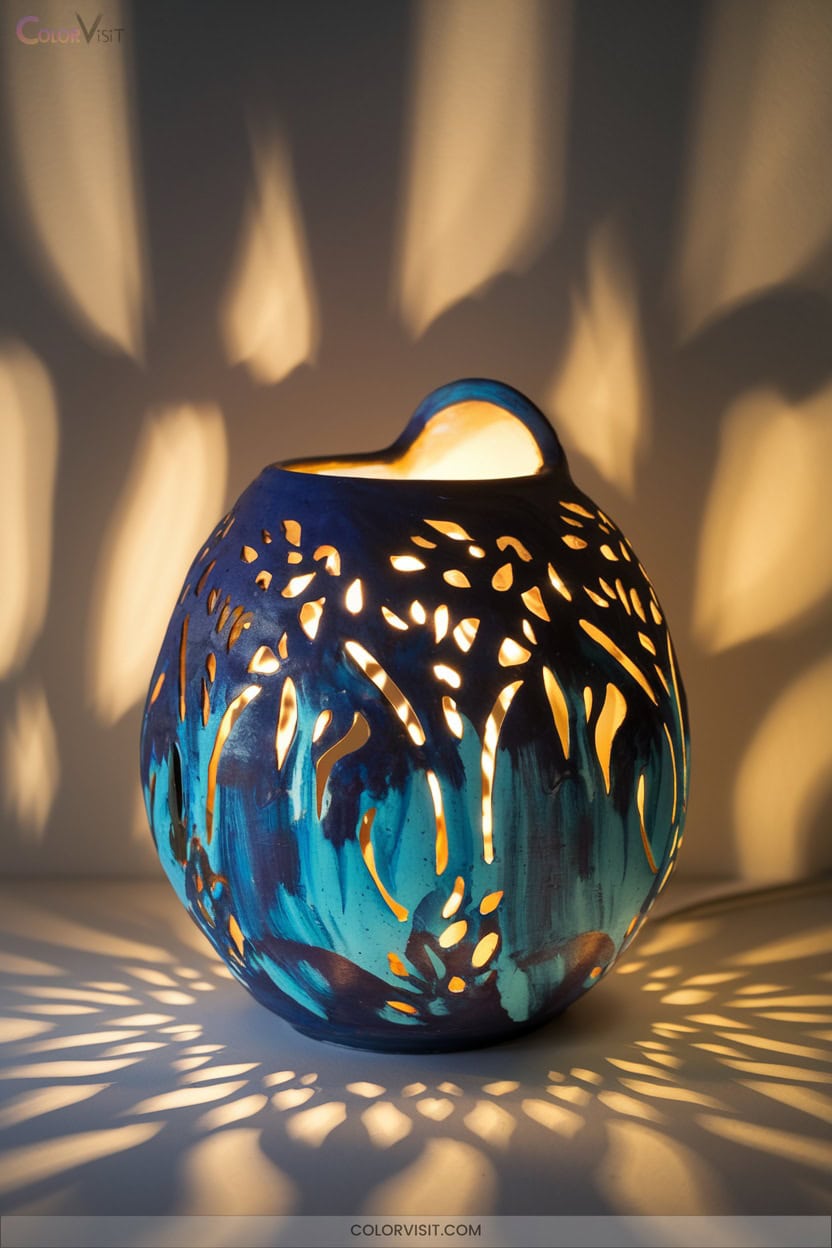
How do you transform a simple ceramic vessel into both a light source and a sculptural statement?
You’ll start with an innovative approach—combining functional lighting with sophisticated ceramic artistry.
Integrate LEDs for efficient illumination, leverage porcelain’s translucency for glowing effects, and experiment with geometric or nature-inspired forms.
Prioritize safe electrical integration and effective heat management.
- Select translucent porcelain or thin clay to maximize light diffusion.
- Carve or perforate patterns to create dramatic shadow interplay.
- Embed LED fixtures and insulate electrical components.
- Incorporate mixed materials—like metal or wood—for enhanced structure and aesthetics.
13. Retro Butter Dish With Abstract Patterns
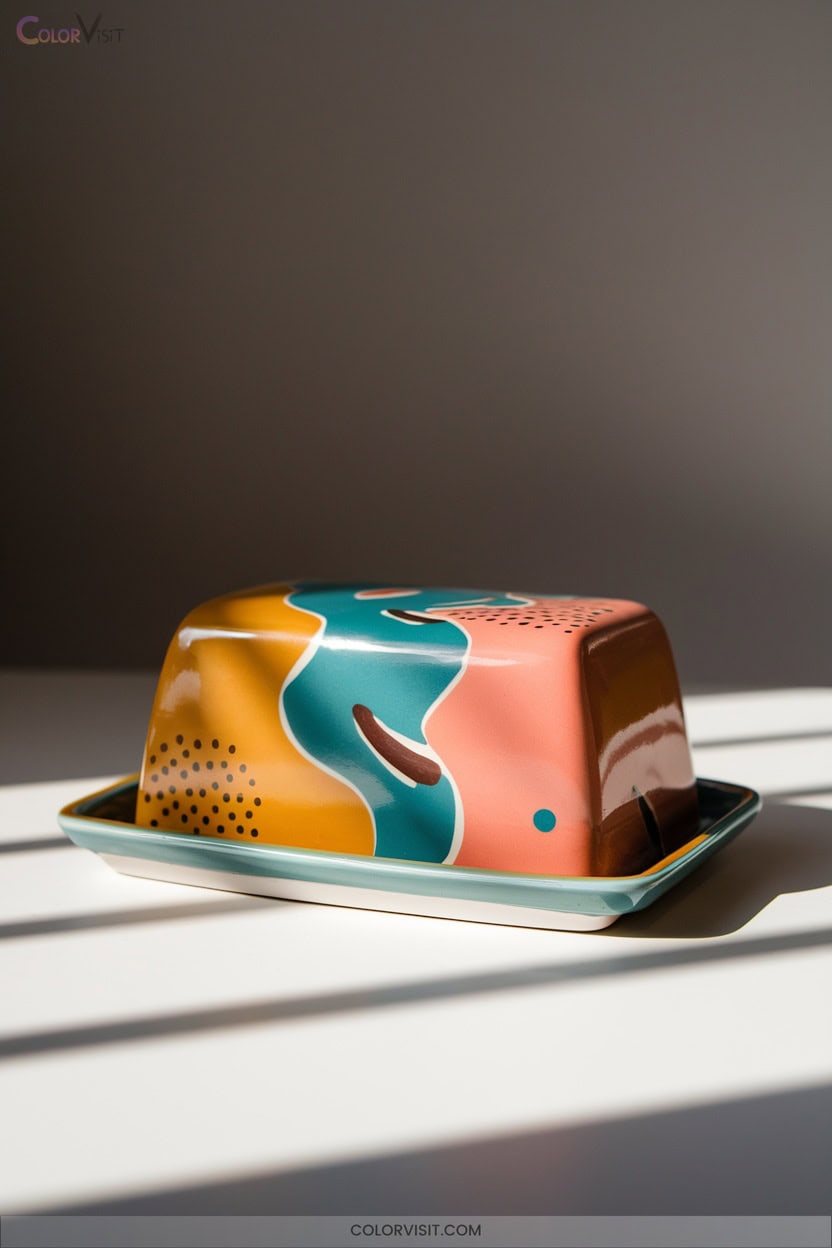
A retro butter dish with abstract patterns blends mid-century design principles with modern ceramic techniques, resulting in a functional yet visually striking piece.
A retro butter dish fuses mid-century style with modern ceramics, creating a striking balance of function and abstract artistry.
Start by forming a rounded or oval base using high-quality ceramic clay on a pottery wheel.
Apply freehand geometric motifs—think chevrons or hexagons—in bold, contrasting glazes or underglazes, drawing from Cubism or Futurism for inspiration.
Integrate texture by embossing or distressing the surface for a vintage look.
Accent the piece with metallic handles or antique-inspired edges.
Fire the dish using techniques that enhance pastel retro palettes and crackle finishes, ensuring both durability and a compelling, nostalgic aesthetic.
14. Nature-Inspired Measuring Cups With Garden Motifs
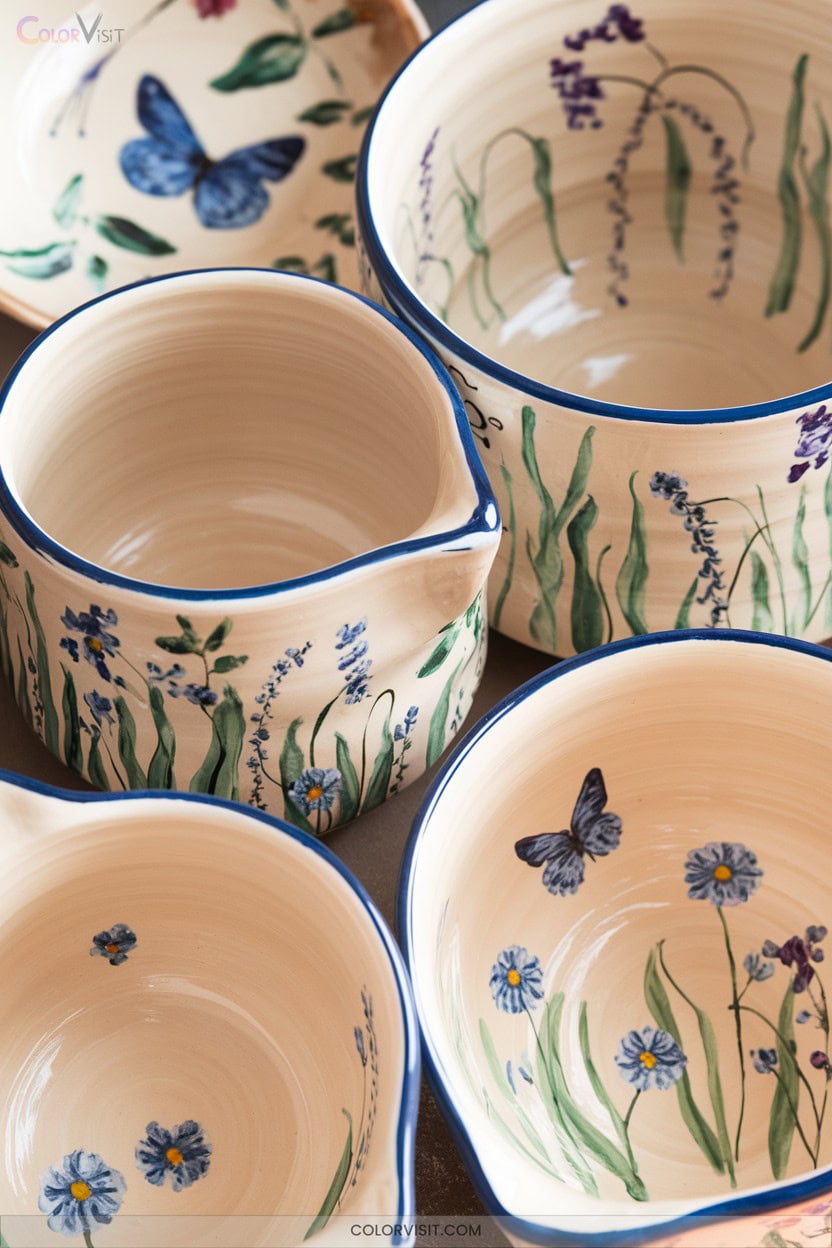
Porcelain measuring cups, adorned with garden-inspired motifs, fuse functional design with botanical artistry.
You’ll appreciate the precision of fine porcelain, complemented by chip-resistant glaze for longevity and ease of maintenance.
Botanical illustrations, reminiscent of 19th-century floral studies, are hand-applied or transferred for detailed visual intrigue.
Their multi-unit measurement markings enhance practicality, while diverse color schemes add aesthetic versatility.
- Select earth-toned or vibrant floral palettes to match your kitchen’s mood.
- Opt for assorted motifs for mix-and-match appeal.
- Verify dishwasher and microwave compatibility.
- Source handmade or custom pieces for uniqueness via platforms like Etsy.
15. Personalized Ornaments for Gifting and Decor
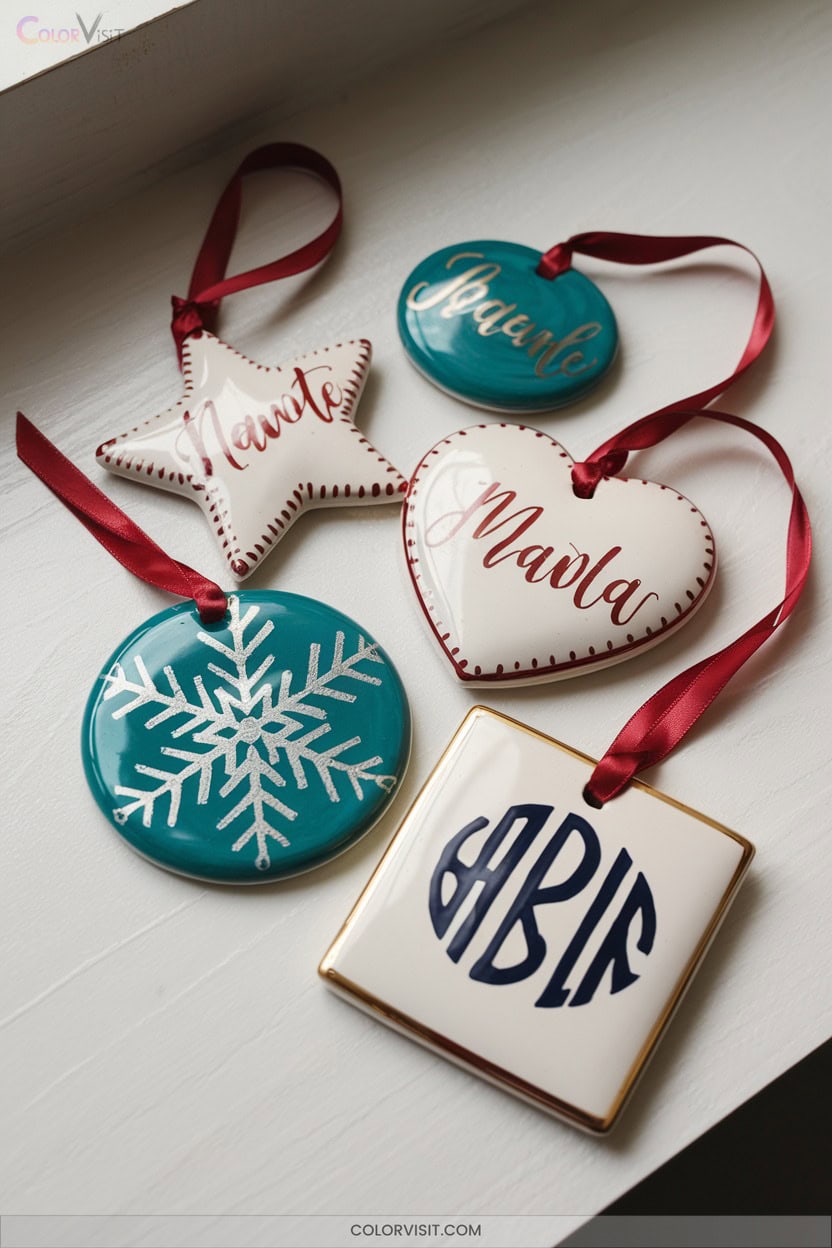
Ever wondered what transforms a simple ceramic disc into a cherished keepsake?
Start by selecting high-fired, lightweight blanks—these resist chips, withstand weather, and won’t weigh down tree branches.
Employ hand-painting for intricate holiday motifs or pet portraits, and use engraving tools for permanent names or dates.
Integrate raised clay accents for tactile dimension; photo transfer techniques let you imprint actual images.
Apply non-toxic, lead-free glazes for eco-conscious, child-safe results.
Don’t overlook double-sided designs or UV-resistant finishes for maximum visibility and fade resistance.
Incorporate metallic foils or glitter for modern flair, and explore coordinated series for repeat gifting.
16. Earth Tone and Pastel Accent Plates
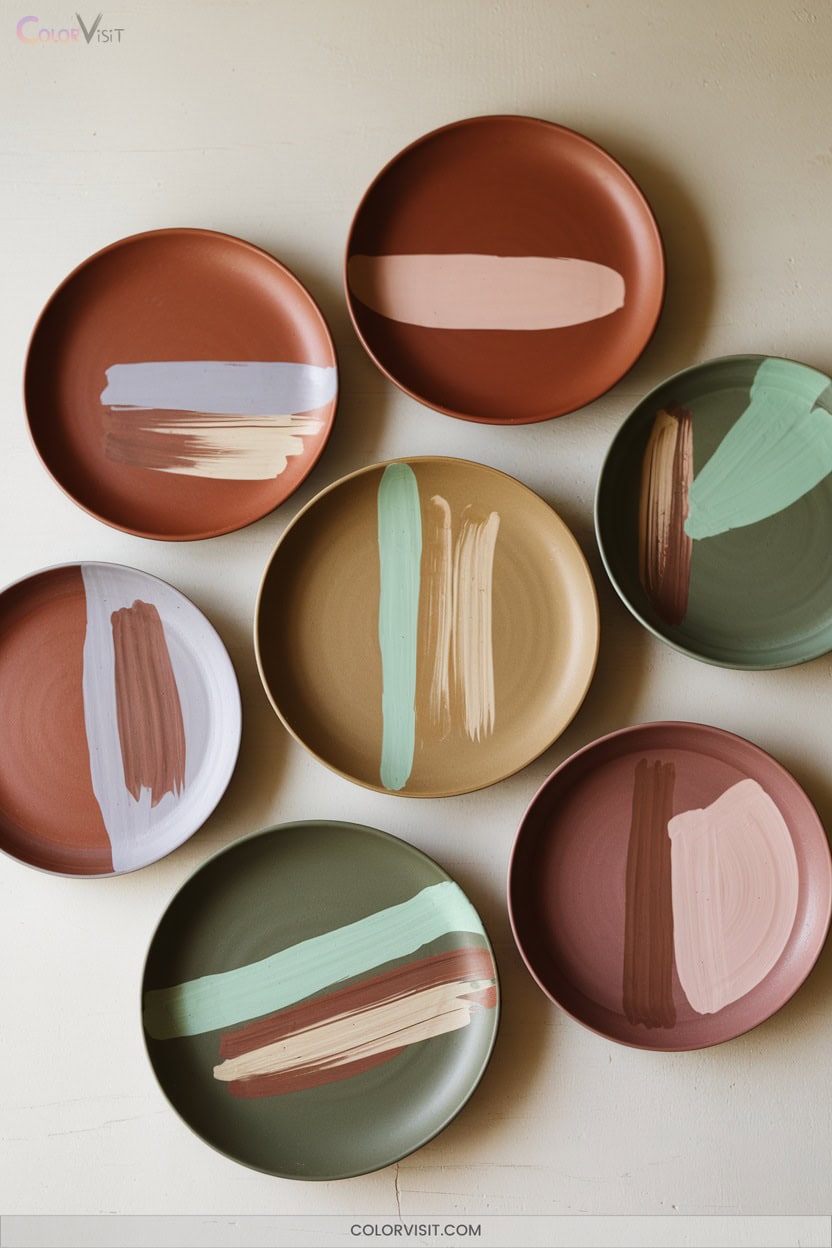
Shifting from personalized ornaments to functional art, earth tone and pastel accent plates offer a nuanced palette rooted in material choice and technique.
Select terracotta or stoneware clays for an organic foundation.
Integrate earth pigments—iron oxide, silicon dioxide, and carbonates—to establish base hues.
Pastel accenting emerges through slip trailing with mineral pigments or subtle glaze layering.
Precision and technical awareness drive every step:
- Hand build or wheel throw plates using earthy clays.
- Refine surfaces with scraping tools for ideal adhesion.
- Apply controlled gradients and pastel highlights via slip or glaze.
- Fire meticulously to preserve vibrancy and tonal depth.
17. Mixed Media Pottery With Attached Charms
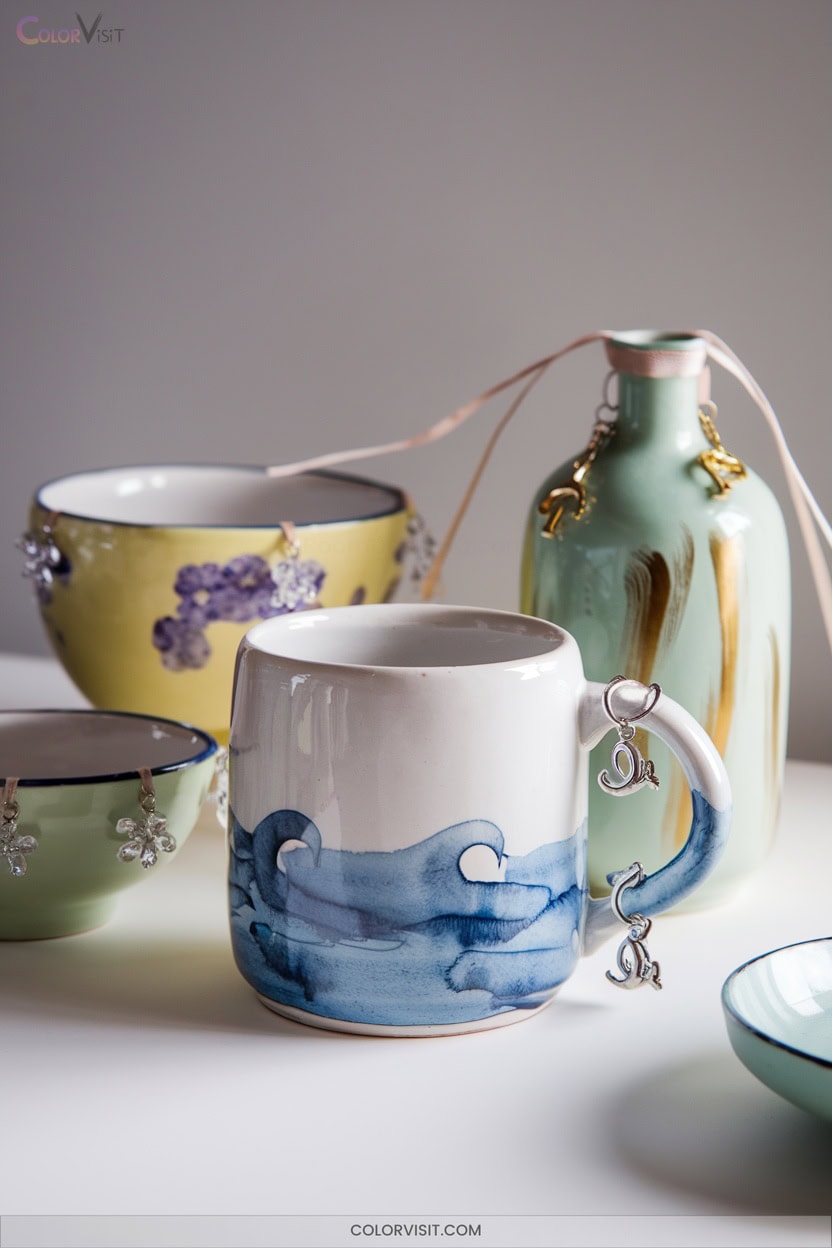
Mixed media pottery with attached charms unites ceramic craftsmanship and jewelry techniques, expanding the possibilities for surface embellishment and functional design.
Embed bezels or charms into polymer clay bases prior to baking for secure integration, or use UV resin to bond and gloss mixed media elements.
Attach ceramic or wire-based charms post-firing using jump rings, glue, or varnish to enhance durability.
Employ round nose pliers, flush cutters, and bead racks for precise assembly.
For innovation, pair earth-toned glazes with vibrant polymer clay motifs—ginkgo leaves, stars—layered under resin for tactile and visual contrast.
Test attachment methods on sample tiles.
18. Contemporary Egg Crates in Gradient Glazes
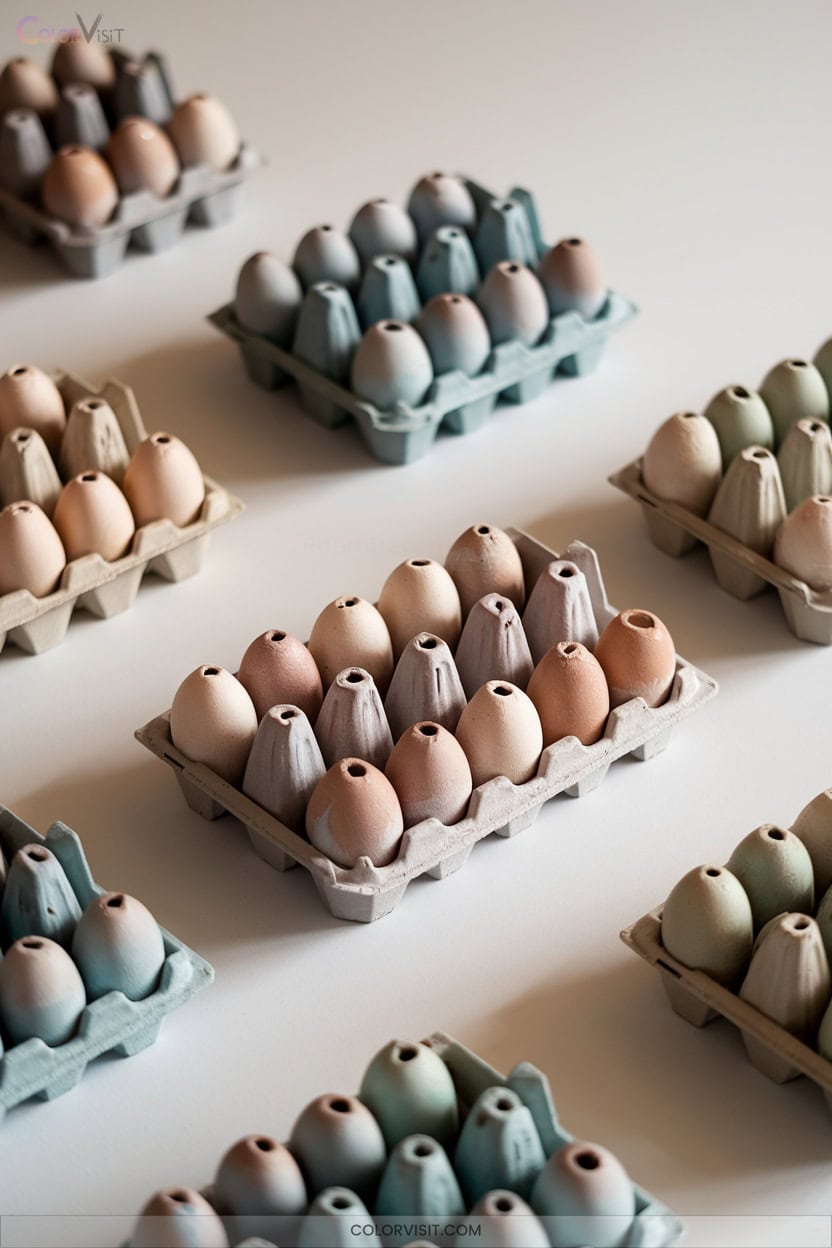
How can a utilitarian kitchen staple become a canvas for surface innovation?
You’ll discover that contemporary ceramic egg crates, with their grid-like recesses, transform under gradient glaze techniques.
By layering glazes through dipping or spraying, you’ll highlight contours and emphasize ergonomic features.
The process demands attention to glaze chemistry and firing precision for seamless color gradations.
Try these approaches:
- Apply vertical gradients for dimensional emphasis on each compartment.
- Experiment with matte versus glossy finishes to modulate light reflection.
- Incorporate earth-toned or pastel colorways for modern appeal.
- Control kiln atmosphere to prevent color bleed and preserve gradient integrity.
Frequently Asked Questions
Can I Bring My Own Design Ideas or Reference Images to Color Me Mine?
You can bring your own design ideas or reference images to Color Me Mine. Staff will guide you in translating your concept onto ceramics, leveraging underglaze pencils, layering techniques, and studio-safe materials to achieve vibrant, durable, innovative results.
What Is the Typical Turnaround Time for Picking up Finished Pottery?
You’ll typically wait 7-10 days for your piece, as the studio must dry, glaze, and fire pottery at 1,828°F. Some locations offer rush processing, reducing turnaround to about 3 days for innovative, time-sensitive projects.
Are There Age Restrictions or Recommended Ages for Certain Pottery Projects?
You’ll encounter age restrictions based on project complexity and material hazards. Advanced processes—like glass fusion or wheel throwing—require older participants, typically 12+. Supervise children under 12, ensuring safe tool use, kiln procedures, and adherence to studio safety protocols.
Do I Need to Make a Reservation, or Can I Walk in Anytime?
Think of reservations as your kiln preheat—essential for peak times, ensuring your creative process fires smoothly. While walk-ins are possible, studios prioritize booked tables, especially weekends. Secure your workspace and materials by reserving online or by phone.
What Happens if I Make a Mistake While Painting My Pottery Piece?
If you make a mistake while painting, you can correct it by wiping off wet glaze, layering thin coats, or using washable markers for design adjustments. Test tiles and material knowledge let you innovate and refine your technique.
Conclusion
As you select your bisque piece and mix your glazes, remember—each brushstroke and unexpected texture unleashes new creative potential. Will you layer metallics, experiment with resist techniques, or embed found objects?
The kiln’s heat transforms not just clay, but your vision itself. As you wait for the final reveal, anticipation builds: what unique surface effects, color fusions, and tactile finishes will emerge? Your next Color Me Mine project might just redefine what’s possible—are you ready to discover how?