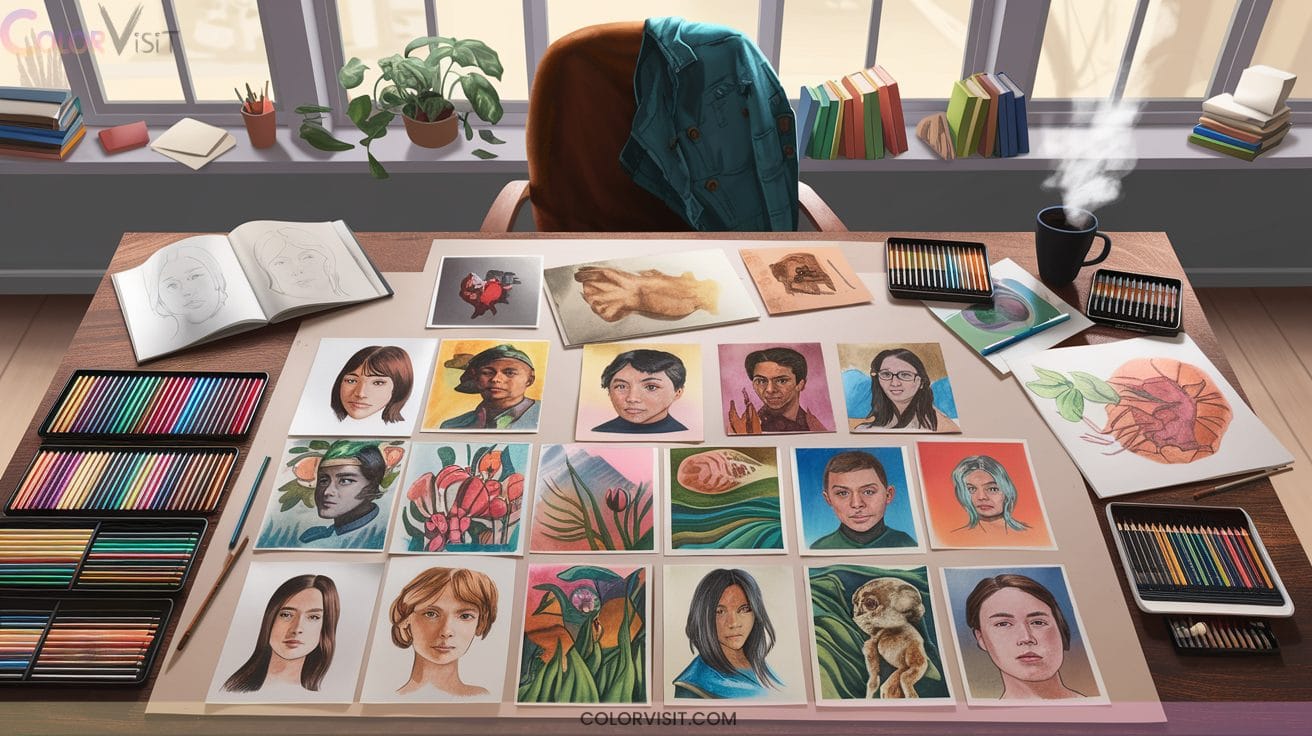
20 Inspiring Color Pencil Drawing Ideas for Artists of All Levels
Unleash your creativity with 20 inspiring colored pencil drawing ideas, perfect for any skill level. Try lush forests, vibrant flower bouquets, and expressive animal portraits to master layering, pressure, and color blending. Immerse yourself in urban scenes, surreal compositions, or still life studies using cross-hatching and careful shading for depth.
Experiment with pop culture icons, mixed media, and atmospheric landscapes to fuel both technical skill and storytelling. You’ll discover techniques and imaginative themes to elevate every artistic session.

| KALOUR 72 Count Colored Pencils Set |  | Best Blendability | Number of Colors / Pieces: 72 colored pencils | Pencil Core Type: Soft core colored pencils | Target User Level: Beginners, kids, adults | VIEW LATEST PRICE | Read Our Analysis |
| PRINA 120-Color Professional Colored Pencils Set |  | Largest Color Selection | Number of Colors / Pieces: 120 colored pencils | Pencil Core Type: Soft core oil-based colored pencils | Target User Level: Adults, beginners | VIEW LATEST PRICE | Read Our Analysis |
| 36-Color Watercolor Pencils Set for Drawing |  | Best Watercolor Option | Number of Colors / Pieces: 36 watercolor pencils | Pencil Core Type: Watercolor (water-soluble) pencils | Target User Level: Adults, teens | VIEW LATEST PRICE | Read Our Analysis |
| Caliart 176PCS Art Supplies Sketching Kit Set | 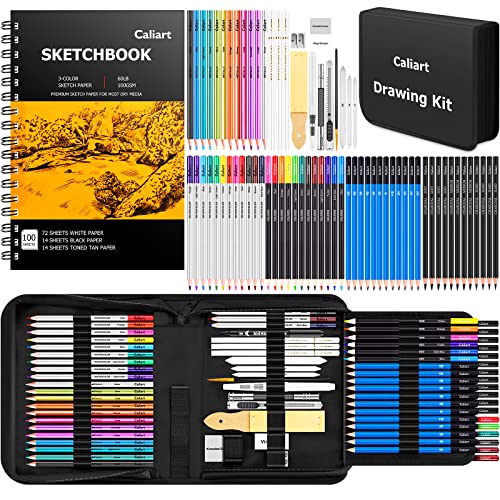 | All-in-One Art Kit | Number of Colors / Pieces: 176 pieces total (includes 12 colored pencils, 12 watercolor pencils, etc.) | Pencil Core Type: Mixed (graphite, colored, watercolor, charcoal, metallic) | Target User Level: Adults, teens, kids | VIEW LATEST PRICE | Read Our Analysis |
| Heshengping 39pcs Sketching Pencil and Charcoal Set |  | Versatile Sketching Set | Number of Colors / Pieces: 39 pieces total (includes 12 watercolor pencils, 14 graphite pencils, etc.) | Pencil Core Type: Mixed (graphite, watercolor, charcoal) | Target User Level: Beginners, professionals | VIEW LATEST PRICE | Read Our Analysis |
| Yagol 72-Color Soft Core Colored Pencils Set |  | Gift-Ready Premium Set | Number of Colors / Pieces: 72 colored pencils | Pencil Core Type: Soft core colored pencils | Target User Level: Beginners to advanced artists, adults, teens | VIEW LATEST PRICE | Read Our Analysis |
| 72-Color Oil-Based Colored Pencils for Adults |  | Vibrant Oil-Based Pencils | Number of Colors / Pieces: 72 colored pencils | Pencil Core Type: Oil-based colored pencils | Target User Level: Beginners, teens, adults | VIEW LATEST PRICE | Read Our Analysis |
| COOL BANK 72-Pack Colored Pencils Set |  | Ergonomic Comfort Grip | Number of Colors / Pieces: 72 colored pencils | Pencil Core Type: Soft oil-based colored pencils | Target User Level: Kids, teens, adults, beginners, artists | VIEW LATEST PRICE | Read Our Analysis |
| Crayola Twistables Colored Pencil Set (50ct) |  | No-Sharpen Convenience | Number of Colors / Pieces: 50 colored pencils (twistable) | Pencil Core Type: Twistable colored pencils (plastic barrel, no sharpening) | Target User Level: Kids 4+ and teens | VIEW LATEST PRICE | Read Our Analysis |
| Prina 76 Pack Pro Drawing and Sketching Kit | 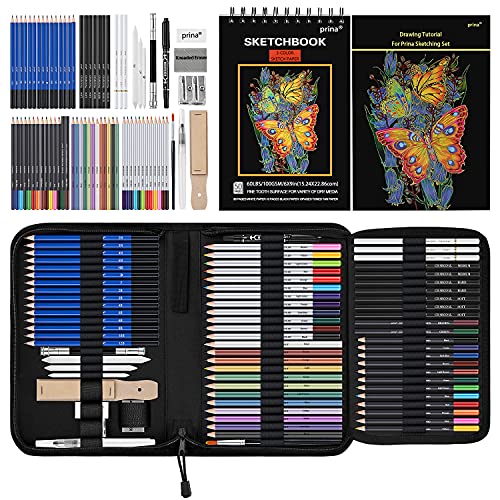 | Comprehensive Pro Kit | Number of Colors / Pieces: 76 pieces total (includes 12 colored pencils, 12 watercolor pencils, etc.) | Pencil Core Type: Mixed (graphite, colored, watercolor, charcoal, metallic) | Target User Level: Adults, teens, beginners | VIEW LATEST PRICE | Read Our Analysis |
| PABLUE 12-Color Premium Soft Core Colored Pencils | 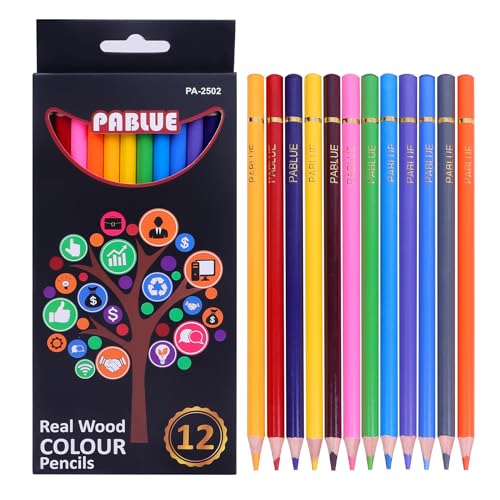 | Premium Soft Core | Number of Colors / Pieces: 12 colored pencils | Pencil Core Type: Soft core colored pencils | Target User Level: Beginners, artists, adults | VIEW LATEST PRICE | Read Our Analysis |
| Castle Art Supplies 72-Color Premium Colored Pencils Set |  | Artist Trusted Classic | Number of Colors / Pieces: 72 colored pencils | Pencil Core Type: Soft core colored pencils | Target User Level: Adult artists | VIEW LATEST PRICE | Read Our Analysis |
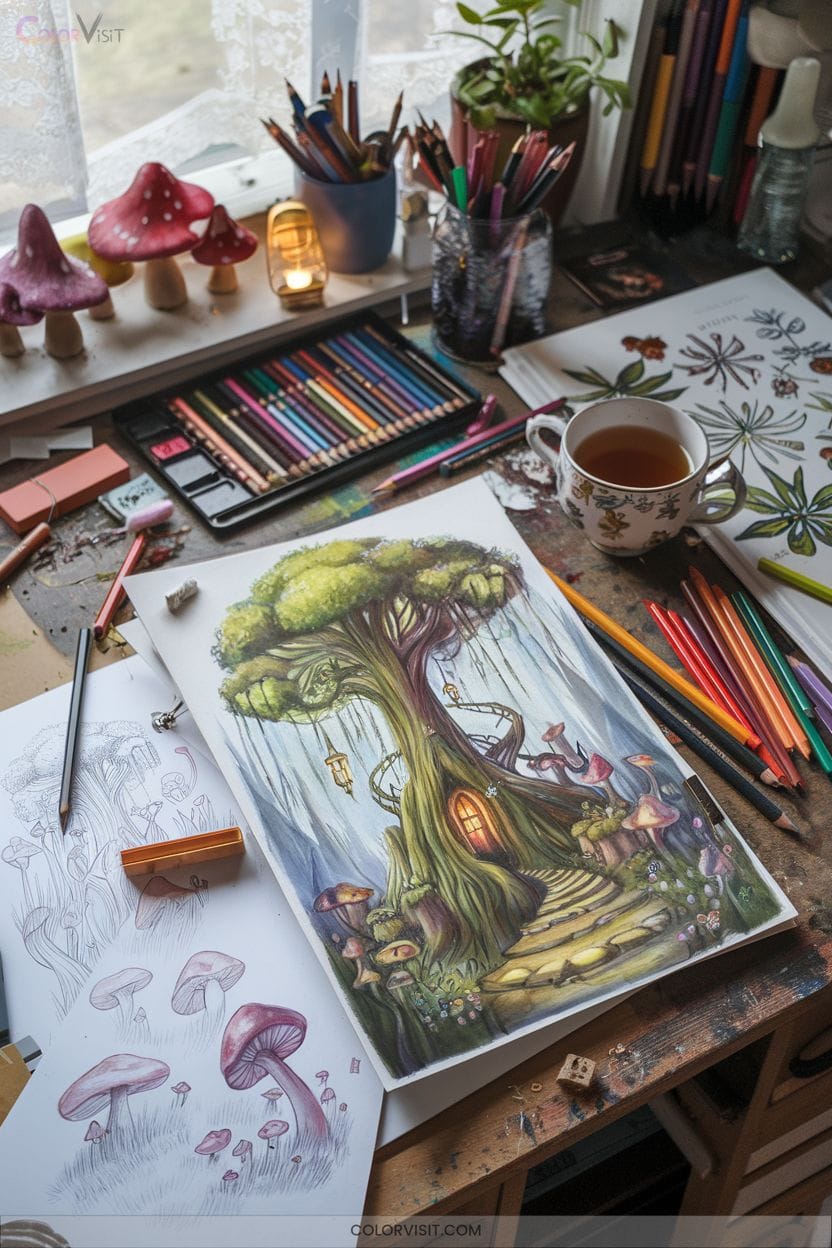
1. Nature Scenes: Trees and Forests

Trees serve as the backbone of compelling nature scenes, offering endless possibilities for color pencil drawings.
Trees form the heart of nature art, providing limitless inspiration for color pencil drawings and inviting creative exploration.
Begin by blocking in basic shapes—broad ovals for deciduous canopies or triangles for conifers—so you’ll maintain overall structure and balance.
Pay attention to branch structure: mix solid lines and broken strokes to create convincing depth.
For bark, use cross-hatching and varied pressure to add rugged texture.
Layer colors—greens, blues, yellows—for vibrant foliage, always considering your light source.
Place lighter, detailed trees in the foreground and darker silhouettes behind to build spatial depth.
Innovate with eraser highlights to simulate sunlight streaming through branches.
2. Drawing Vibrant Flower Bouquets
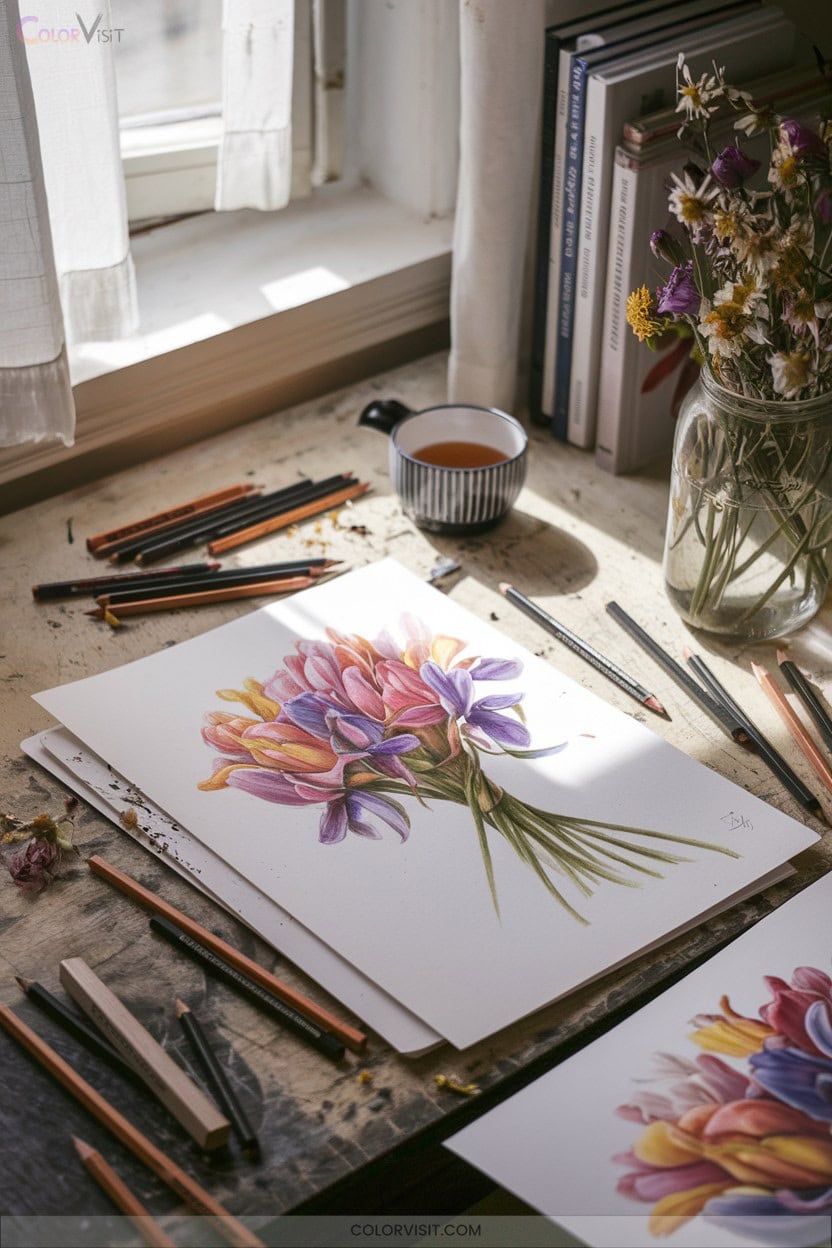
Why do some flower bouquets leap off the page while others fall flat?
The secret lies in strategic layering and innovative color blending.
Begin with light pink or purple underlayers, building depth with magentas and cool undertones for realistic whites.
Elevate vibrancy—layer complementary greens into red flower shadows.
Burnish petals using a light pencil for gloss, then overlap blooms at varied stages for dynamic composition.
Guide the viewer’s eye with angled stems and negative space.
For leaf realism, alternate directional strokes and lift veins with a precision eraser.
Work petal-by-petal, referencing high-res photos for tonal accuracy, and optimize your surface choice.
3. Exploring Simple Still Life With Fruit
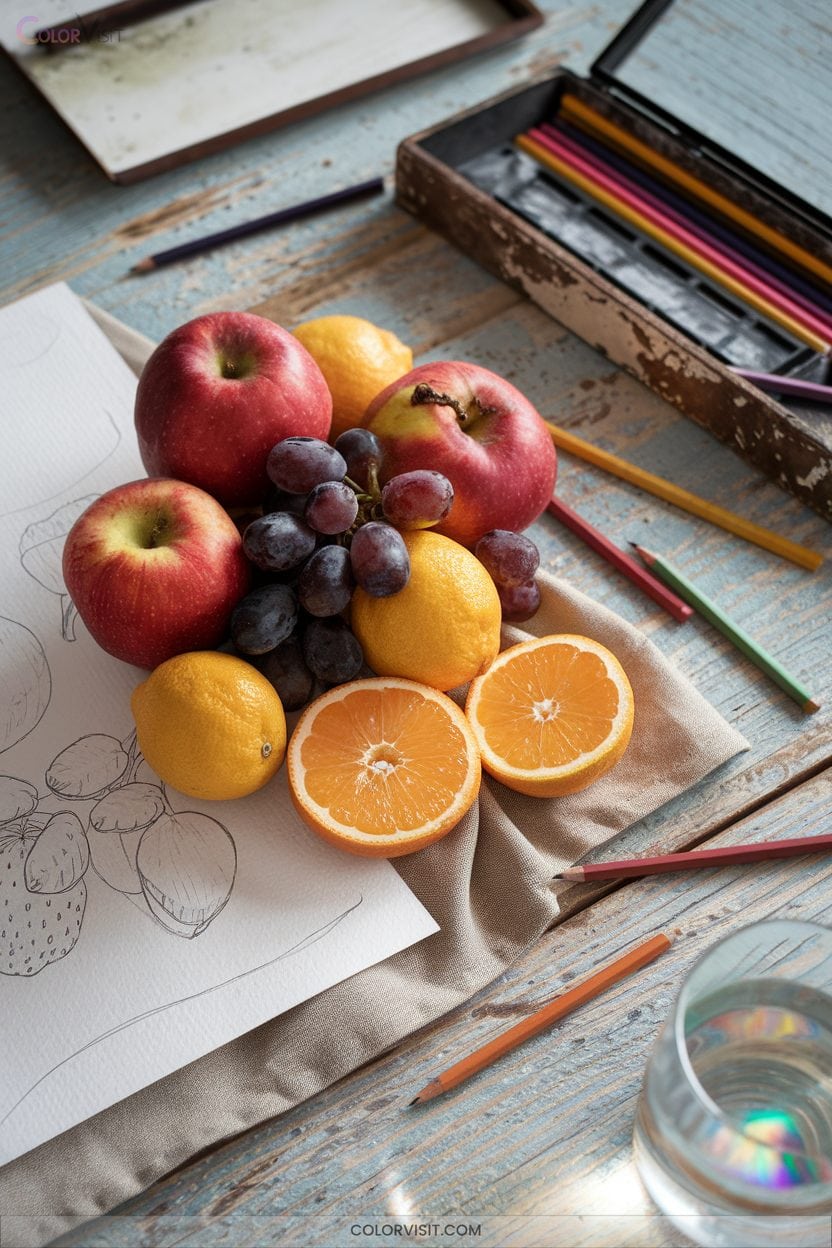
A classic still life with fruit challenges you to balance technical precision with expressive composition.
Begin by sketching transparent wireframes with a 2B pencil to establish accurate proportions and spatial relationships.
Layer colored pencils, leveraging hatching, cross-hatching, and stippling to articulate each fruit’s distinct surface—think citrus rind or peach fuzz.
Burnish for polished highlights and blend gradient shadows to define volume and form.
Strategically subtract or leave blank areas in deep shadows to intensify light effects and direct focus.
Compose contrasting shapes and textures, overlap forms for depth, and edit out distractions to emphasize the most luminous and compelling features.
4. Capturing Everyday Objects in Detail
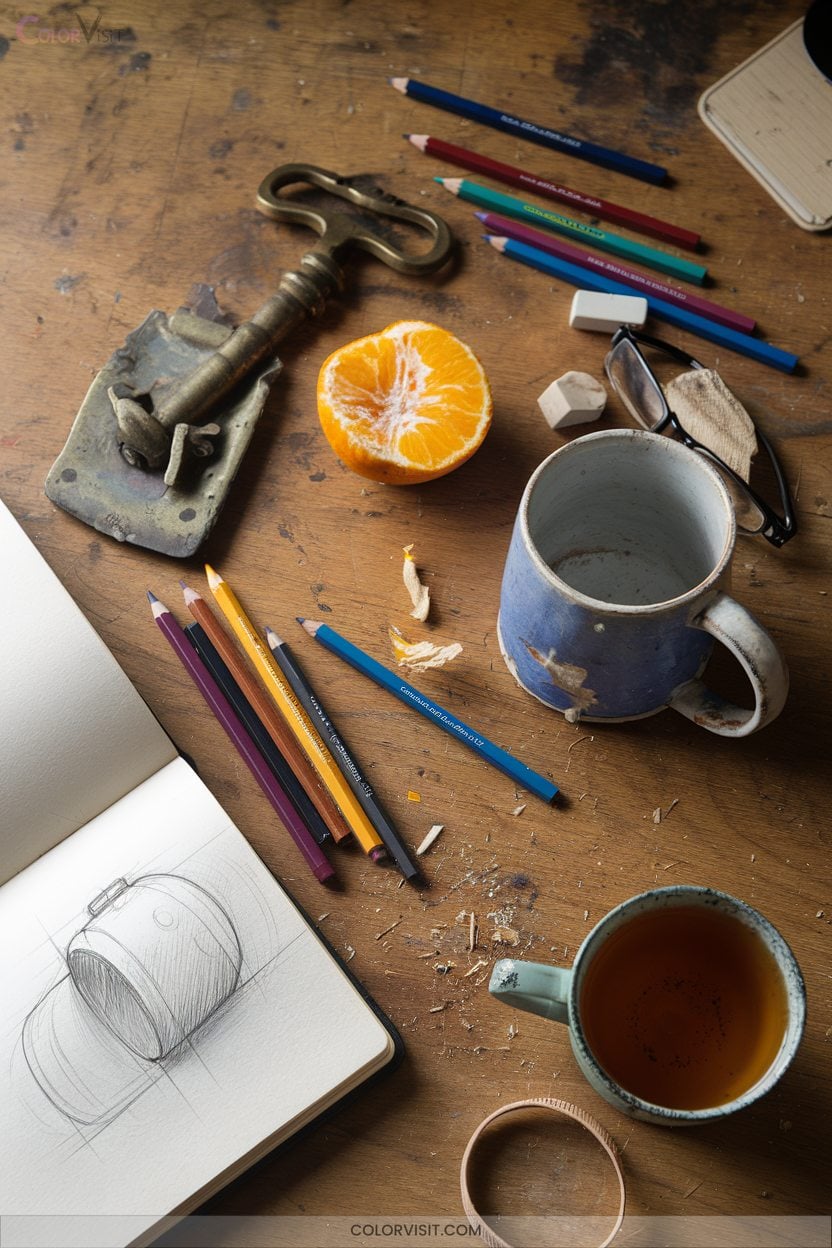
While fruit still lifes offer a chance to refine your handling of form and color, everyday objects present a new set of challenges that push your observational skills further.
To capture their complexity, start with a precise line outline, then layer colors using cross-hatching, scumbling, and back-and-forth strokes.
Observe how light and shadow interact across surfaces—use varied pressure and pencil grades to recreate gradients and subtle textures.
Select items with intriguing material contrasts, like mugs or watches, and experiment with toned papers or hybrid media for added depth.
Focus on accurate proportions, and let each section reveal its unique detail through layering.
5. Animal Portraits With Realistic Fur
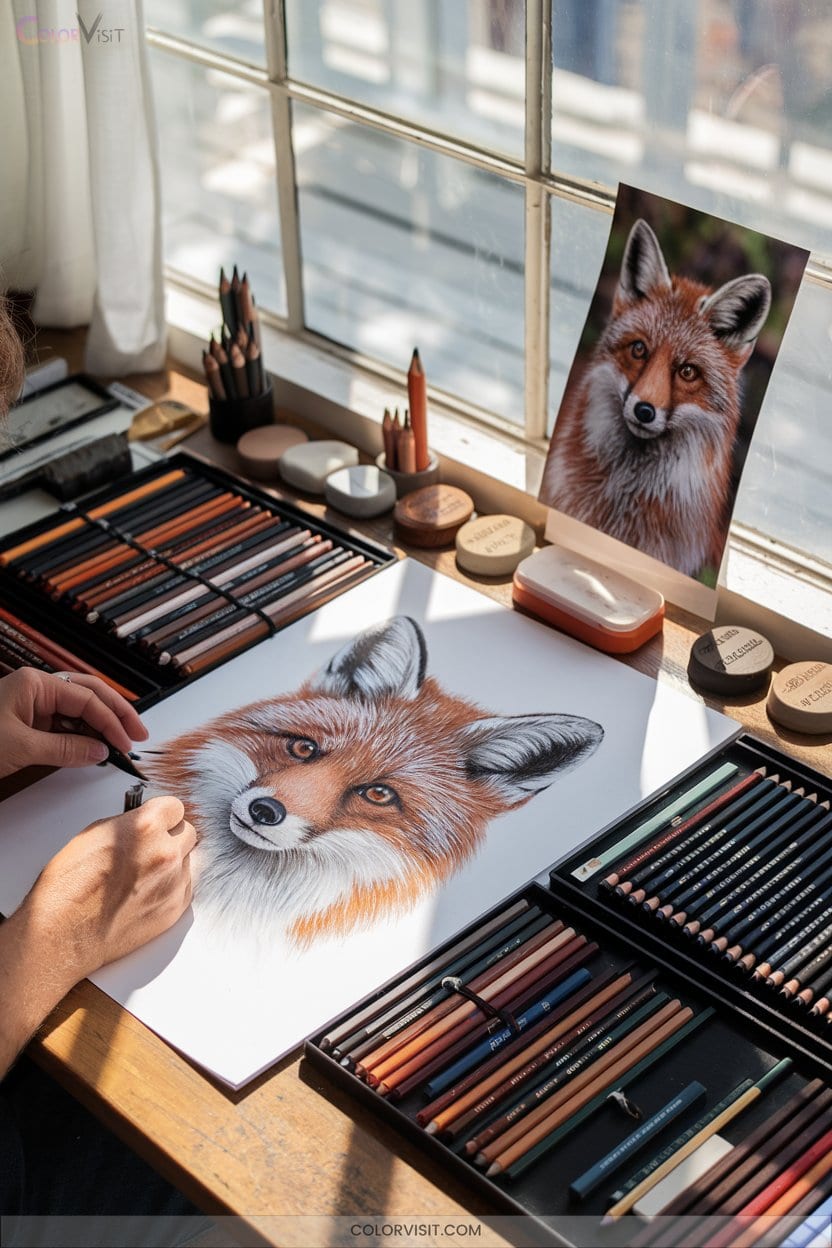
Rendering lifelike animal portraits with colored pencils demands a deliberate approach to both texture and structure, especially when tackling the intricate challenge of fur.
Start with a limited palette and lay down undertones to avoid flatness.
Layer light, directional strokes that mirror fur growth, alternating warm and cool hues for optical depth.
Zone your drawing—divide chest, back, and legs—so each section’s fur direction feels natural.
Use sharpened pencils and vary line weights; guard hairs need crisp emphasis.
Employ blending stumps and burnishing for smoothness, then lift highlights and scratch in whiskers.
Constantly assess from a distance to perfect balance and realism.
6. Creating Lifelike Human Eyes
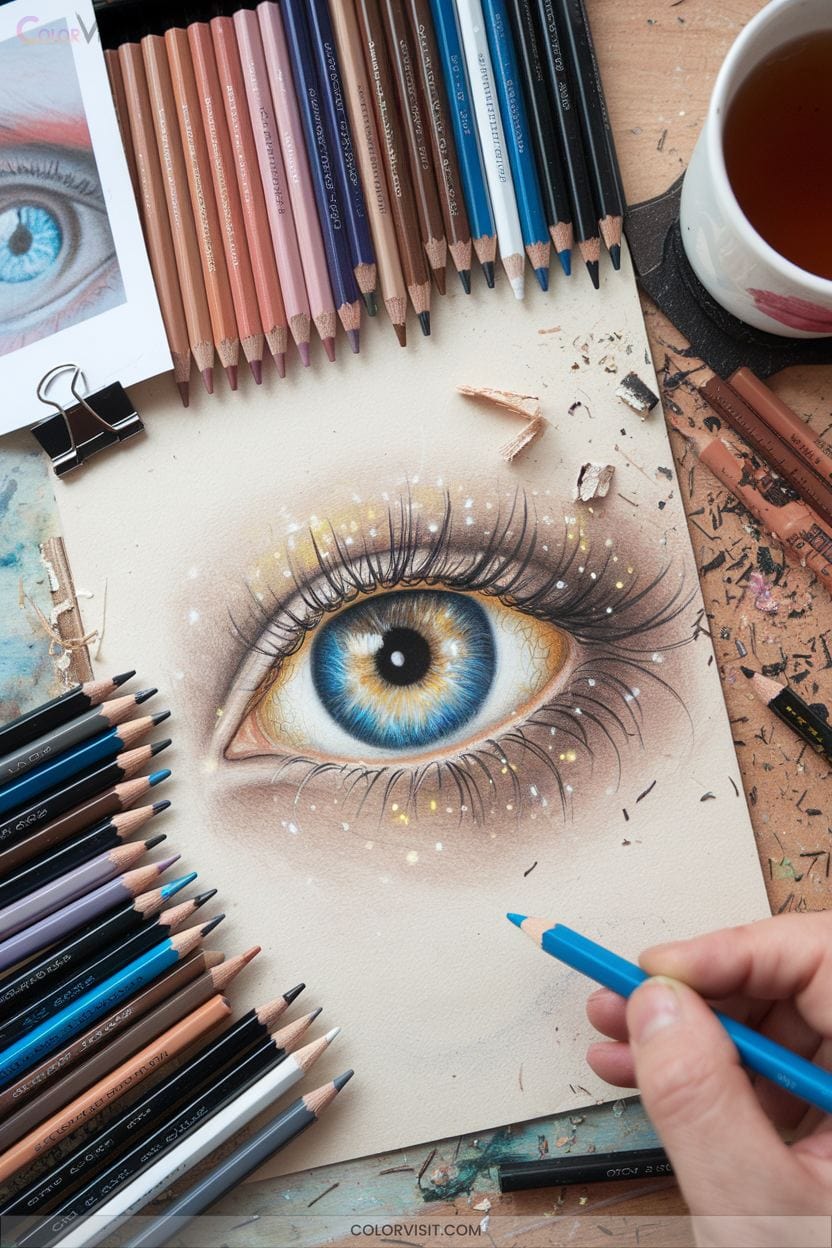
How do you capture the subtle luminosity and complexity of a human eye with colored pencils?
Start by layering a spectrum of hues—don’t limit yourself to basic blues or browns.
Observe the iris: add delicate striations, veins, and intricate patterns using sharp pencils for precision.
Employ burnishing and blending stumps to merge tones seamlessly, while preserving detail.
Reference real eyes to replicate the pupil’s depth and the sclera’s subtle texture.
Illuminate your drawing with strategic corneal highlights and nuanced shadows.
Integrate eyelids and lashes with careful proportion.
Innovation emerges from layering, attentive observation, and mastering color blends for lifelike results.
7. Sketching Wildlife in Their Habitat
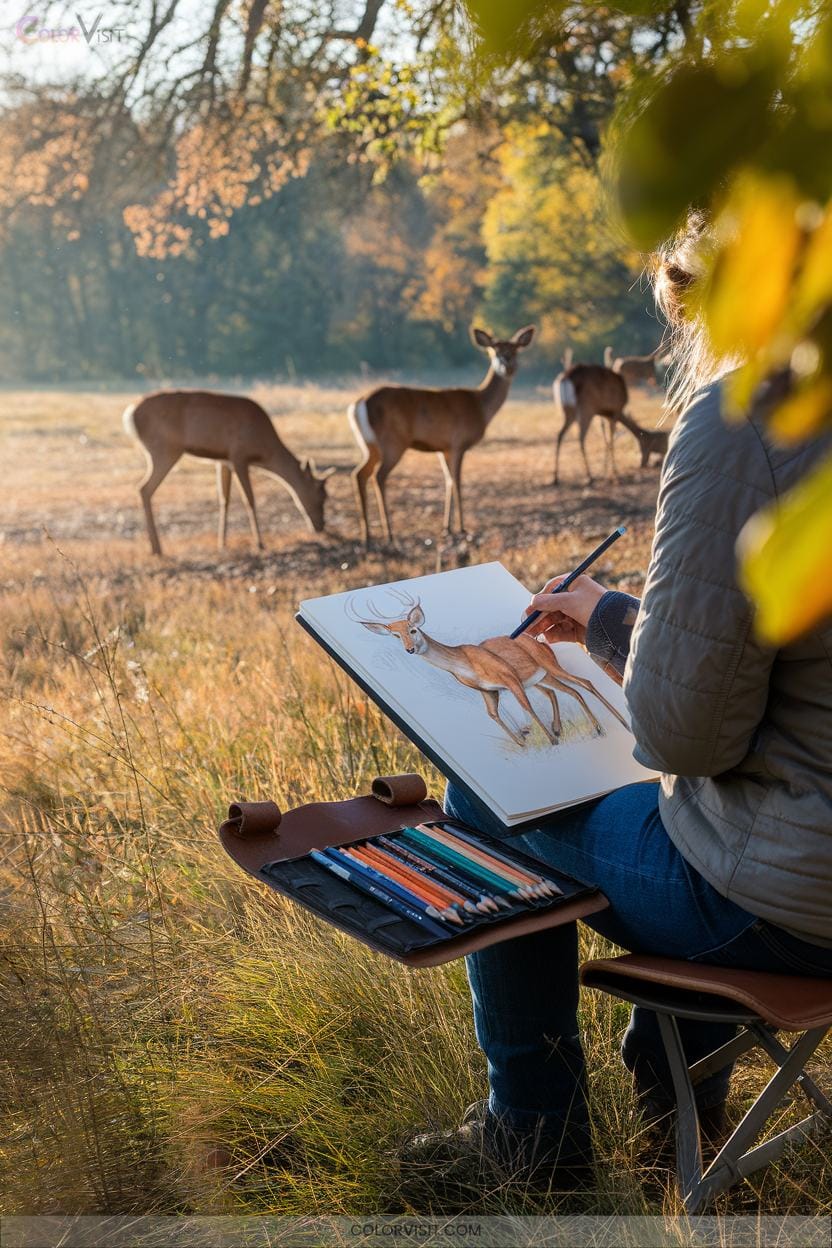
Immersion defines successful wildlife sketching—your colored pencils must capture not only the animal’s anatomy but also its relationship to the surrounding habitat.
Choose heavyweight, toothy paper like Pastelmat for layered textures, and keep pencils razor-sharp with a Swordfish sharpener for fur detail.
Use Derwent Pro Colors, blending ochres and blacks for luminous shadows, and apply oil-painting-inspired dark-to-light layering.
Integrate PanPastels for atmospheric bases and create bokeh backgrounds with blending stumps.
Foreground flora demands crosshatched strokes in Olive Green and Yellow Ochre.
Research local plant life and maintain a precise scale ratio to ground your wildlife subjects authentically.
8. Geometric Pattern Designs
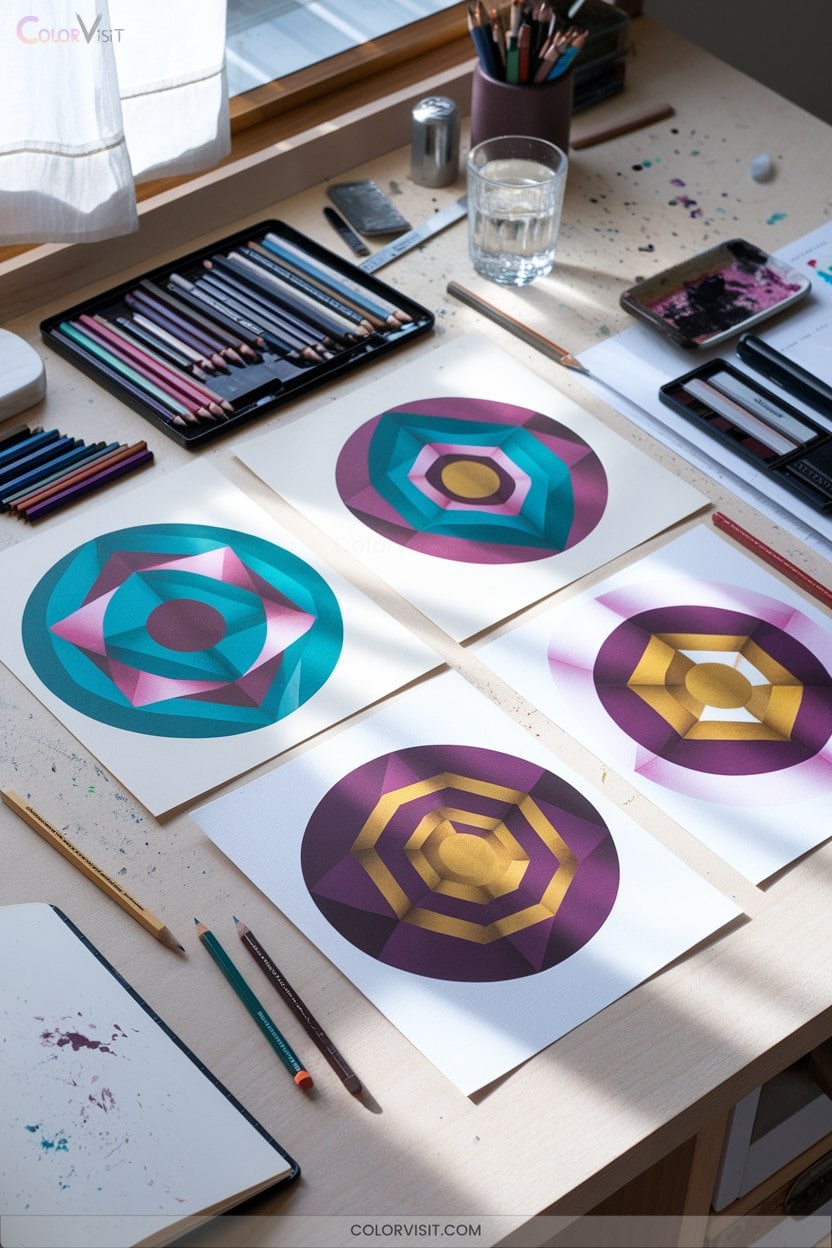
A foundation in geometric pattern design opens a world of creative precision with colored pencils.
Start by sketching grids for symmetry, then experiment with spheres, prisms, and hexagons to build dynamic patterns.
Master layering, blending, and burnishing to achieve optical illusions and vibrant effects—contrasting colors like orange and purple add striking depth.
Draw inspiration from architecture or abstract art to innovate your own motifs.
Tutorials across digital platforms provide step-by-step guidance, and sharing results in online communities fuels creative growth.
9. Illustrating Whimsical Fantasy Worlds
Building on the structured elegance of geometric patterns, illustrating whimsical fantasy worlds invites you to construct entire worlds fueled by imagination.
Begin with thumbnail sketches to anchor your vision, then shape mythical creatures and magical terrains with bold, experimental forms.
Elevate realism by layering intricate textures, luminous colors, and dynamic lighting.
Control mood and narrative through thoughtful composition and strategic use of color theory.
Let these core techniques ignite your creative ambition:
- Envision creatures and landscapes that defy reality
- Layer textures for tactile dimension and depth
- Manipulate color and light to evoke emotion
- Compose immersive scenes rich with narrative potential
10. Rendering Historical Buildings and Architecture
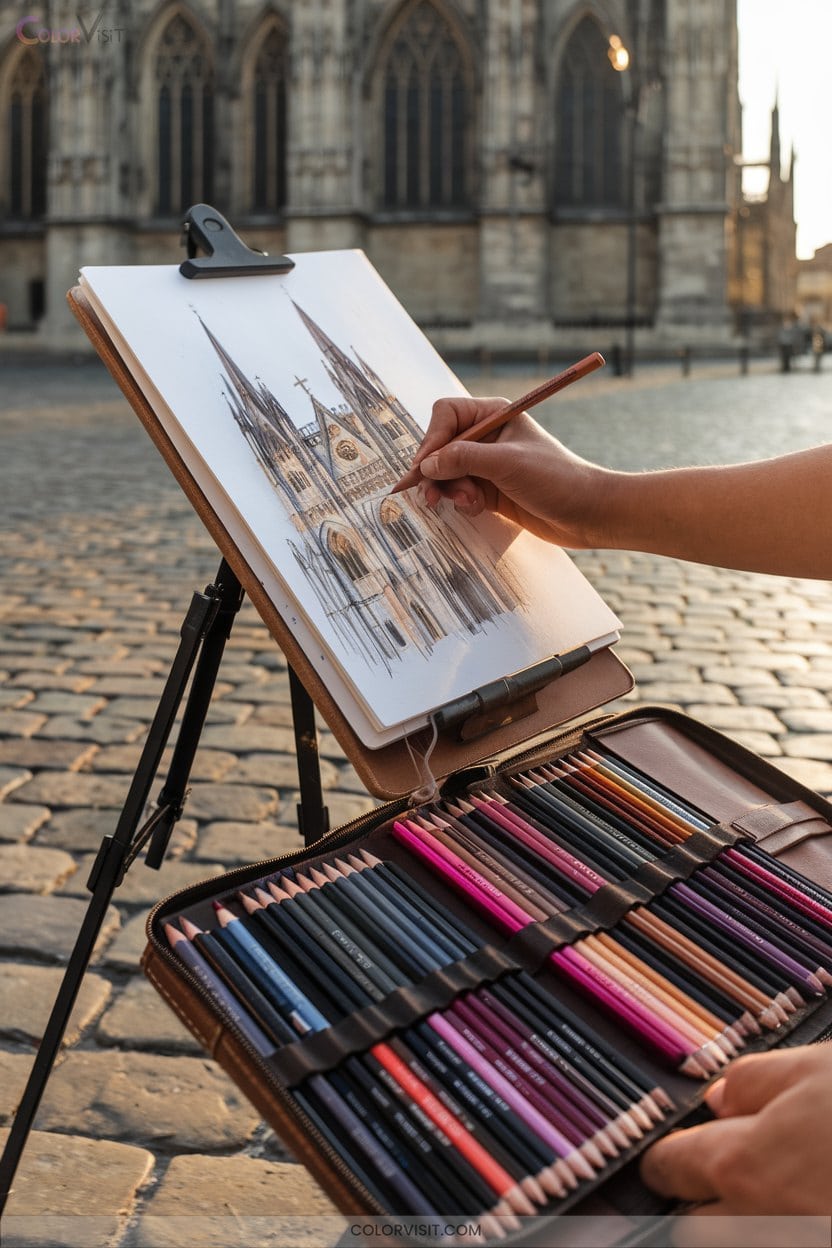
Mastery of architectural rendering demands a keen eye for proportion, perspective, and the nuanced details that define historical buildings.
Begin with sharp observation—capture intricate carvings, ornate facades, and unique structural elements in your initial sketch.
Select colors reflecting the building’s era and material: earth tones for aged stone, subtle hues for period-appropriate accents.
Apply shading that responds to natural light, emphasizing texture and depth.
Render classical columns, arches, and elaborate rooflines with precision.
Meticulously detail windows, doors, and masonry, preserving historical authenticity.
Finally, enrich your composition by integrating contextual elements—trees, figures, or vehicles—to ground the structure in its environment.
11. Colorful Urban Cityscapes
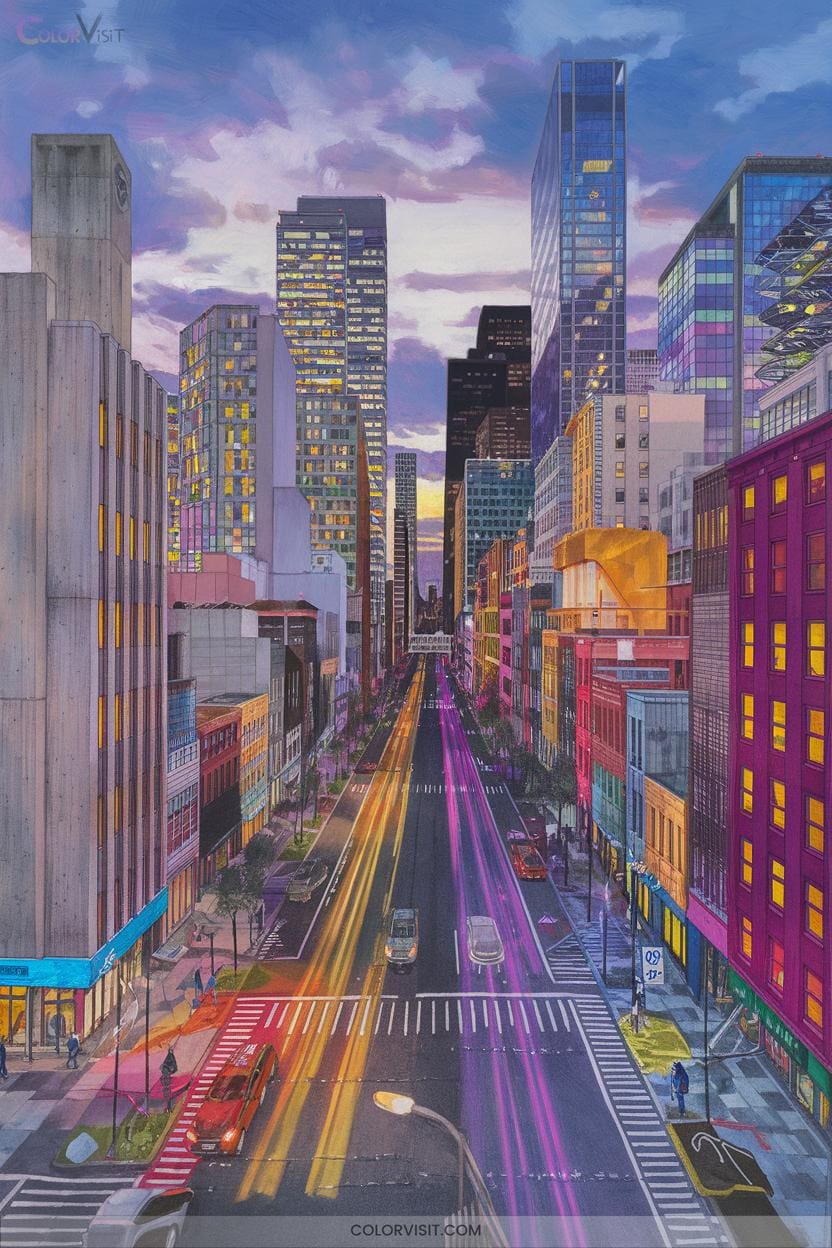
After refining your skills with historical architecture, channel that attention to detail and sense of proportion into vibrant urban cityscapes.
Use Caran D’Ache Luminance pencils or versatile pencil sets to achieve bold color palettes and intricate textures.
Layer and blend pigments with precision, leveraging pressure control for dynamic shading and luminous highlights.
Capture the energy of bustling streets, iconic landmarks, or glowing night scenes by observing real-life moments or referencing photos.
Let your innovation shine as you balance light, shadow, and composition.
- Experience the pulse of city life
- Illuminate architectural details
- Capture fleeting light and color
- Express urban vibrancy boldly
12. Textured Feathers and Bird Studies
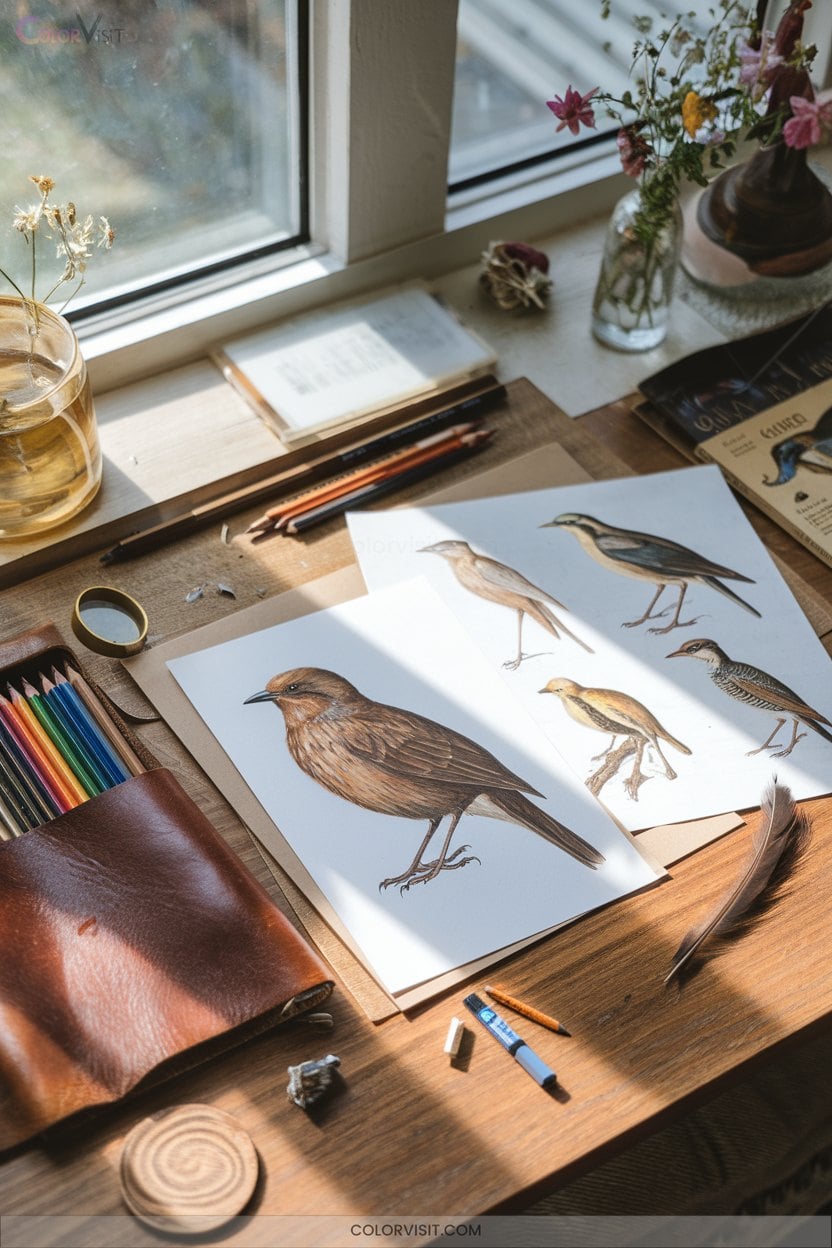
Intricacy defines feather and bird studies, where each stroke must capture both the softness and structure unique to avian subjects.
You’ll combine circular and flicking motions with colored pencils to sculpt smooth gradients and textured barbs. Layer color deliberately, deepening shadows and blending gradients for lifelike volume.
Use short, directional strokes to suggest feather flow, reserving sharp pencil tips for edges and highlights.
Observe reference images closely—each species and feather type presents distinct patterns and challenges. Achieve fuzzy or sleek effects by adjusting pressure and stroke.
Prioritize anatomical accuracy, and let selective detail guide focus, shaping dynamic, innovative avian portraits.
13. Surreal Compositions With Dreamlike Elements
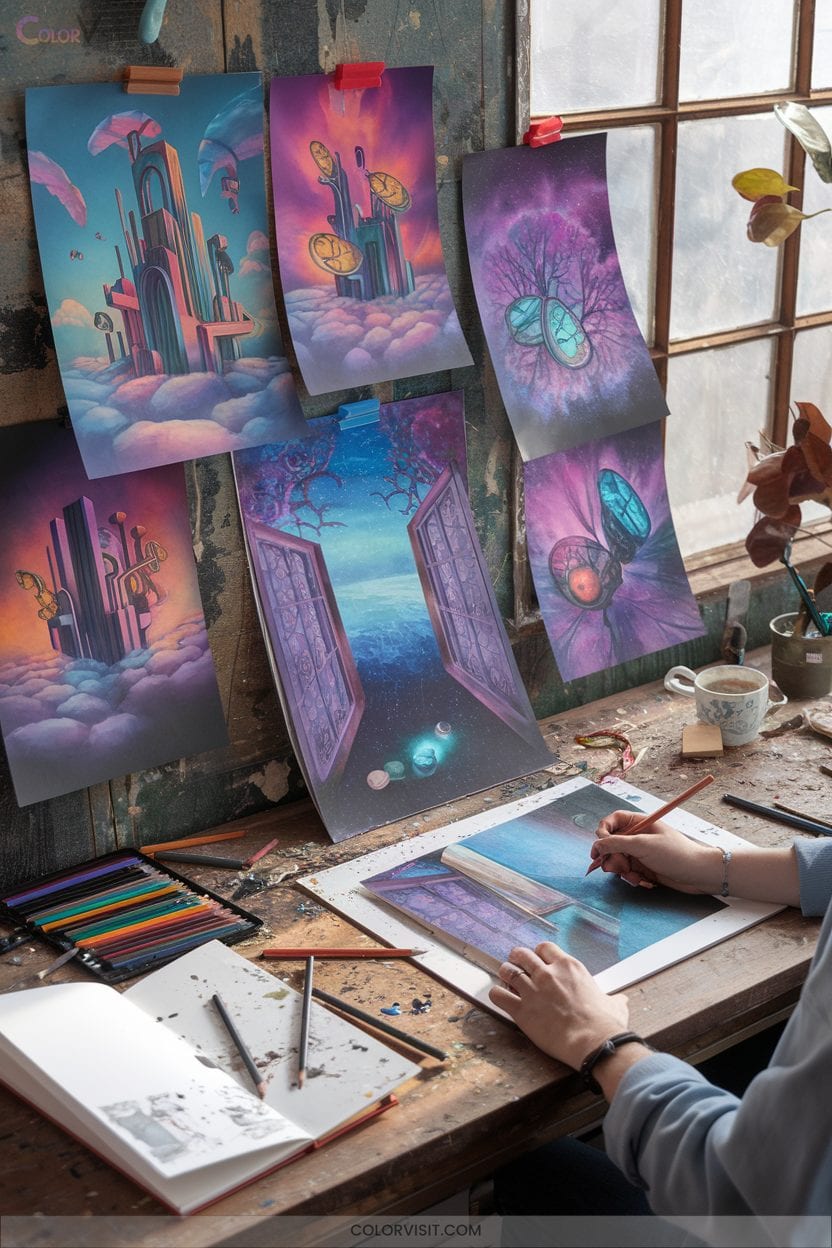
How do you translate the logic-defying nature of dreams onto paper?
Start by fusing realism with fantasy—let vibrant color schemes and gradation blur the boundary between believable and bizarre.
Push boundaries by breaking perspective rules, manipulating scale, and weaving hidden symbolism throughout your scene.
Think of your composition as a visual riddle, inviting viewers to decipher meaning.
To evoke genuine wonder, experiment boldly:
- Juxtapose unrelated objects for surprise
- Infuse mirrors or reflections for infinite depth
- Layer textures using burnishing and hatching
- Embrace negative space to amplify surreal tension
Your colored pencils become instruments of innovation, forging unprecedented dreamscapes.
14. Portraits With Expressive Facial Features
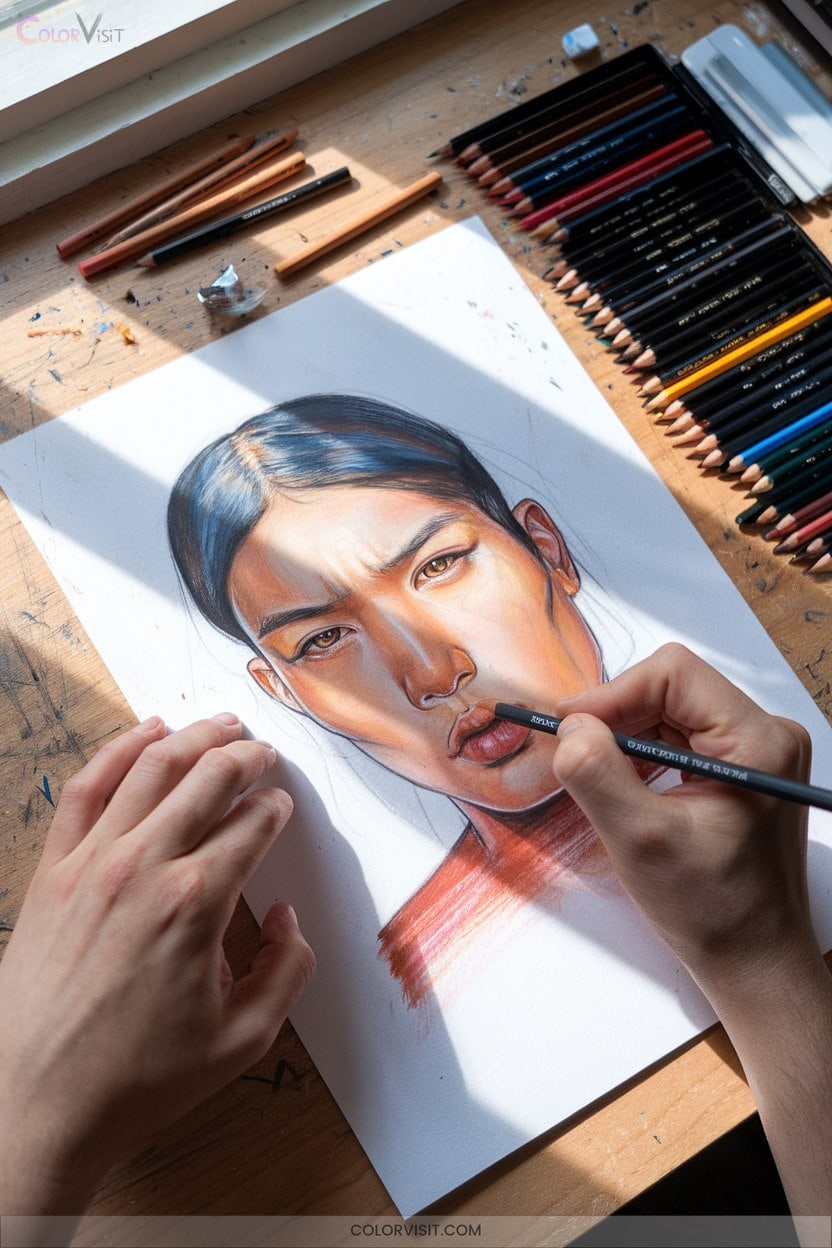
Emotion forms the core of compelling portraiture, and colored pencils offer remarkable control for capturing expressive facial features.
Emotion drives powerful portraits, and colored pencils provide unmatched precision for rendering the subtle nuances of facial expression.
Start by mapping values in grayscale to master light and shadow interplay.
Use a light graphite underdrawing to secure proportion, then layer color in at least three passes—reserving highlights on white paper for vibrancy.
Select cool gray paper and oil-based pencils for ideal blending and luminous skin.
Apply directional strokes for natural hair, crosshatch shadows for depth, and manipulate color temperature to evoke mood.
Limit your palette and strategically accentuate eyes or lips for psychological impact.
Always balance precision with expressive mark-making.
15. Abstract Art Using Bold Color Blends
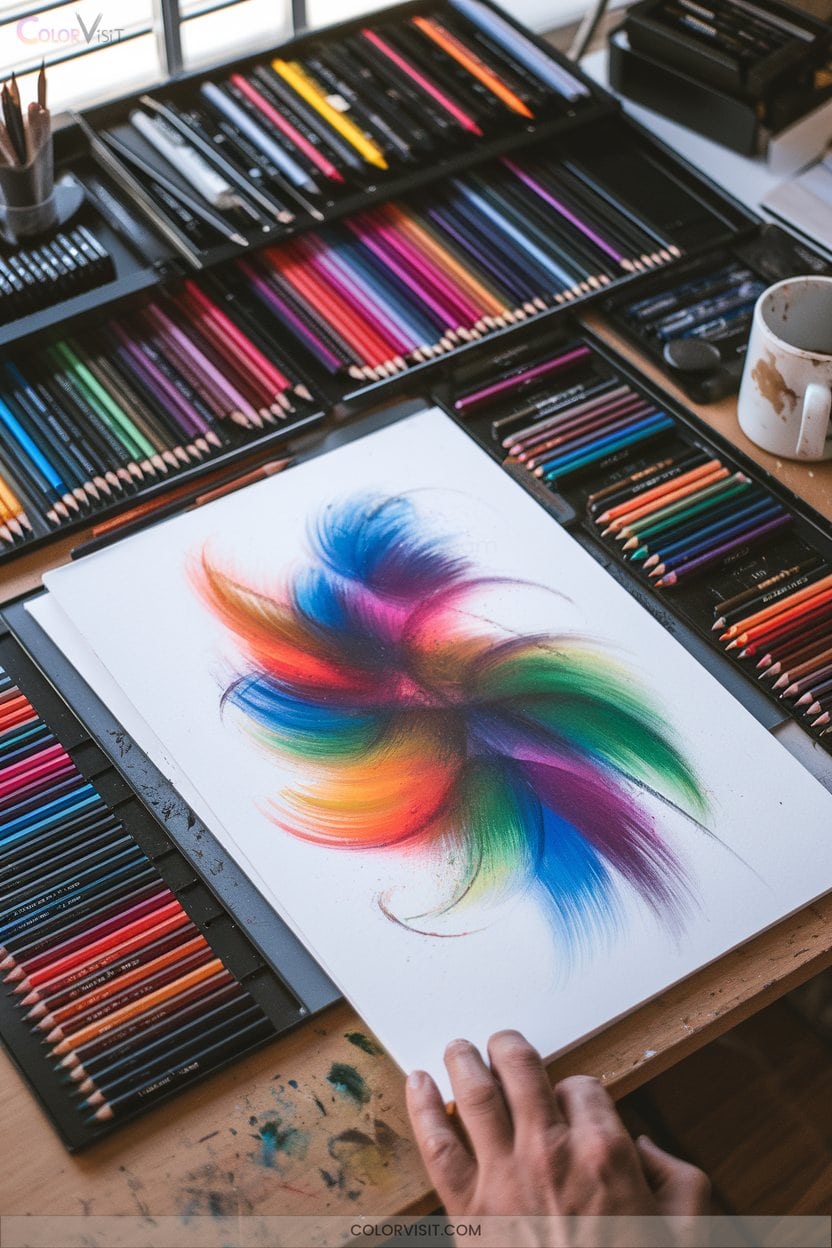
While realistic portraits demand precision and subtlety, abstract art with bold color blends invites you to break free from representation and focus on raw visual impact.
Embrace geometric versus organic contrasts, layering translucent hues to create deep optical intrigue.
Push vibrancy by blending complementary colors—think electric blue and orange—or build subtle drama with muted dissonance and value extremes.
Use dynamic mark-making and texture, from dry crosshatching to solvent blending, to energize each composition.
Let negative space breathe amidst the intensity.
Abstract drawing isn’t just visual—it’s emotional.
Let these techniques provoke:
- Tension and release
- Surprise and curiosity
- Energy and flow
- Harmony and disruption
16. Dynamic Action Poses and Movement

Capture the energy of movement by focusing on dynamic action poses—where every line and angle suggests motion and life.
Let every line and angle in your drawing pulse with motion, capturing the vibrant energy of dynamic action poses.
Start with gesture drawing using felt pens and copier paper to quickly establish the action line, emphasizing the flow and rhythm.
Reference dynamic pose collections or film stills for inspiration.
Master foreshortening to inject depth, and layer expressive line work with vibrant color pencil techniques for emotional impact.
Don’t hesitate to experiment with textures, blending, and media—digital or traditional.
Practice with a stopwatch to improve speed and fluidity.
Refine anatomical accuracy, and always prioritize movement over static precision for innovative results.
17. Tranquil Water Scenes and Reflections
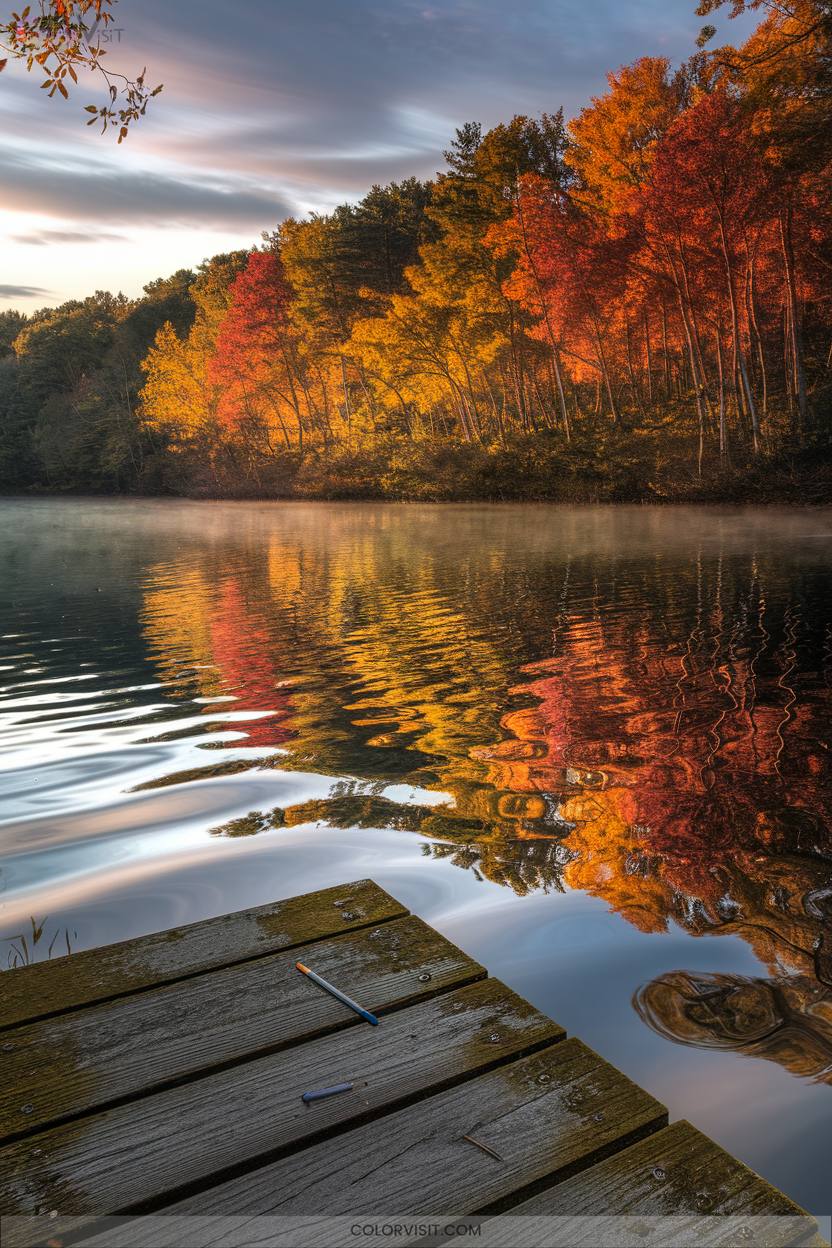
A tranquil water scene offers a unique opportunity to explore the nuanced interplay of light, color, and reflection with colored pencils.
Analyze natural light’s effect on water to distinguish subtle surface ripples and mirrored landscapes.
Layer transparent blues, greens, and grays with precision, using smooth strokes and blending tools to evoke depth and serenity.
Carefully balance highlights and shadowed depths to achieve luminous, glasslike reflections.
Let these moments inspire your creativity:
- Experience the meditative calm of mirrored skies
- Capture fleeting ripples with confident, expressive marks
- Convey silence through soft gradations and negative space
- Evoke wonder as light dances across tranquil surfaces
18. Pop Culture Characters in Color

Shifting from serene natural landscapes to the vibrant world of pop culture, colored pencil artists encounter new challenges and opportunities for technical mastery.
When you render iconic characters from franchises like Toy Story or Marvel, accuracy is paramount—reference images guide your hand in capturing subtle facial features and dynamic costumes.
Experiment by combining rivals, such as Batman and Joker, to explore narrative contrast.
Layer vibrant colors for depth, and use precise composition to balance multiple figures.
Sharing your work on Instagram or Pinterest connects you with engaged fans, while participating in online challenges sharpens your technique and expands your creative repertoire.
19. Mixed Media Experiments With Colored Pencil
How do you elevate your colored pencil work beyond traditional boundaries?
Mixed media unveils a world of innovative expression.
By blending colored pencil with alcohol markers, watercolors, or PanPastels, you achieve depth, vibrancy, and textures impossible with pencils alone.
Use thick, hot-press watercolor paper or clay-coated boards for robust layering, and embrace fixative sprays to control media bleed.
Experiment fearlessly:
- Layer gouache for striking opacity beneath translucent pencil glazes
- Outline in ink, then shade for sharp, dynamic contrast
- Blend white pencil atop watercolor for ethereal highlights
- Collage tissue or text under pencil for tactile depth
Push your artistic vision further.
20. Seasonal Landscapes Through the Year
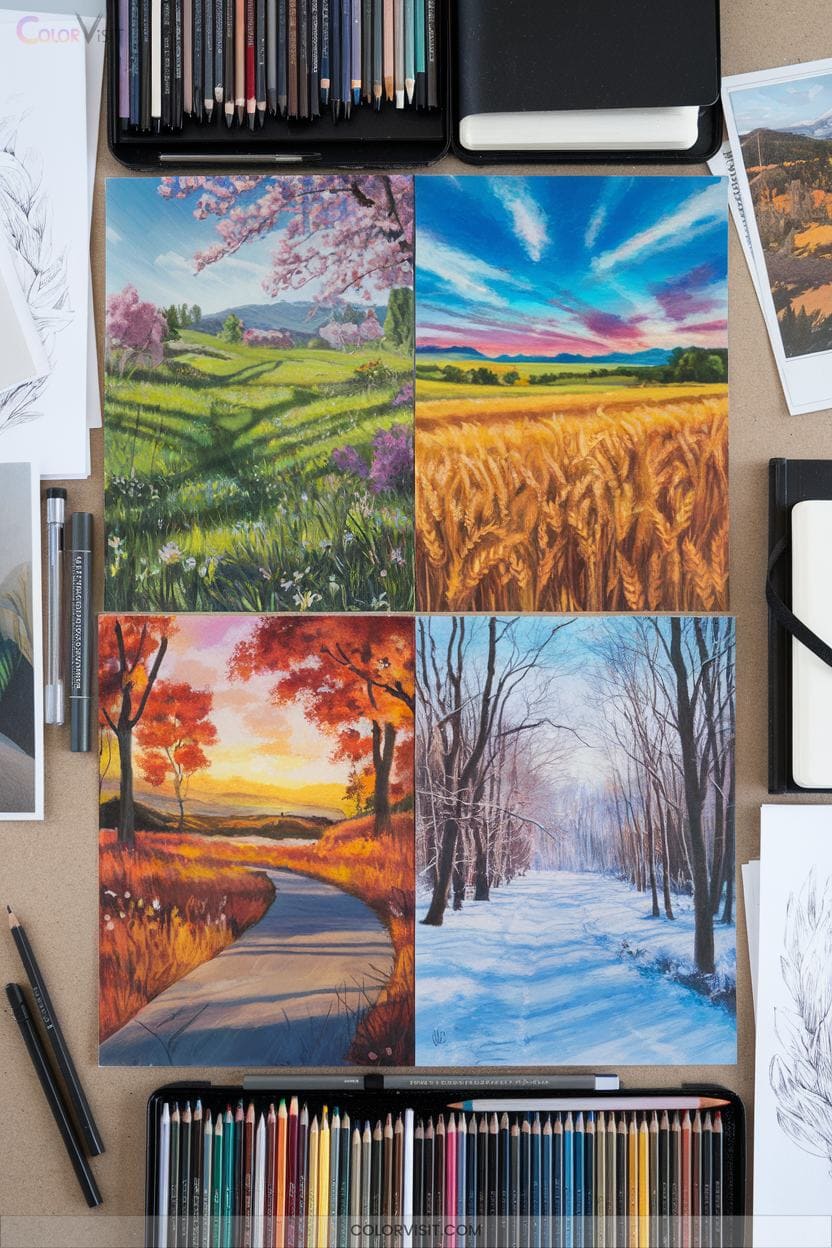
Each season offers a distinct palette and atmospheric character, challenging you to adapt your colored pencil techniques for heightened realism and mood.
Spring calls for pastel layering—light greens and pinks—plus crisp detailing in fresh grasses and reflections.
Summer demands saturated ochres, bold shadows, and heat-induced textures for parched earth.
Autumn pushes you to master earthy overlays, randomized leaf litter, and golden skies blending into haze.
Winter tests your control with cool palettes, preserved highlights, and dramatic cloudwork.
Innovate by blending palettes at seasonal edges, varying focus, and adding contextual cues—like migratory birds or holiday decor—to evoke time’s passage and climate’s subtle shifts.
More Details on Our Top Picks
KALOUR 72 Count Colored Pencils Set
Looking for a versatile colored pencil set that suits adults, kids, and beginners alike? The KALOUR 72 Count Colored Pencils offer 72 vibrant, soft-core pencils perfect for drawing, blending, and shading. Each pencil features a numbered body and color name for easy identification. Made from basswood, they sharpen easily and have break-resistant, silky smooth leads that deliver rich pigmentation.
Whether you’re tackling adult coloring books, classroom projects, or sketching, these pencils provide excellent layering and blending options. Non-toxic and ASTM D-4236 & EN71-3 certified, KALOUR ensures safe use plus reliable customer support and a 30-day return policy.
- Number of Colors / Pieces:72 colored pencils
- Pencil Core Type:Soft core colored pencils
- Target User Level:Beginners, kids, adults
- Included Extras / Accessories:None specified
- Safety and Standards Compliance:ASTM D-4236 & EN71-3 certified, non-toxic
- Customer Ratings (Approximate Average):4.7 / 5 (9,940 reviews)
- Additional Feature:Basswood easy sharpening
- Additional Feature:Numbered, named pencils
- Additional Feature:Silky smooth velvety leads
PRINA 120-Color Professional Colored Pencils Set
If you’re an artist seeking vibrant, smooth blending and layering, the PRINA 120-Color Professional Colored Pencils Set offers a thorough range of soft core oil-based pencils perfect for both beginners and experienced creators.
With 120 pre-sharpened, oil-based colored pencils, you get rich, bold pigments that blend and layer effortlessly. The set includes a handy sketchbook with step-by-step tutorials; this helps you sharpen your skills. All pencils come in a portable zipper case, keeping your tools organized and protected.
Non-toxic and eco-friendly, this set balances quality and safety. It makes it ideal for every artist’s creative journey.
- Number of Colors / Pieces:120 colored pencils
- Pencil Core Type:Soft core oil-based colored pencils
- Target User Level:Adults, beginners
- Included Extras / Accessories:Sketchbook (3-color), zipper case, drawing tutorial
- Safety and Standards Compliance:ASTM D-4236 & EN71 certified, non-toxic, eco-friendly
- Customer Ratings (Approximate Average):4.7 / 5 (4,166 reviews)
- Additional Feature:Includes 3-color sketchbook
- Additional Feature:Portable zipper case
- Additional Feature:Drawing tutorial included
36-Color Watercolor Pencils Set for Drawing
Who can resist the vibrant versatility of a 36-color watercolor pencil set designed for both adults and teens? You’ll love the smooth, highly pigmented colors that blend and layer beautifully, giving your drawings a professional finish.
The unique angular grip keeps pencils steady and prevents rolling off your desk. Plus, the sturdy decorative pen holder makes storage and portability a breeze. These light-resistant pigments won’t fade over time, ensuring your artwork stays vivid.
Whether you’re painting, sketching, or coloring adult picture books, this set offers rich, stable hues and includes a detail brush for added precision.
- Number of Colors / Pieces:36 watercolor pencils
- Pencil Core Type:Watercolor (water-soluble) pencils
- Target User Level:Adults, teens
- Included Extras / Accessories:Detail brush, pen holder
- Safety and Standards Compliance:Non-toxic, no explicit standard listed
- Customer Ratings (Approximate Average):4.6 / 5 (2,313 reviews)
- Additional Feature:Water-soluble pigments
- Additional Feature:Angular grip design
- Additional Feature:Includes detail brush
Caliart 176PCS Art Supplies Sketching Kit Set
The Caliart 176PCS Art Supplies Sketching Kit Set offers an impressive variety of tools perfect for artists of all ages. Whether you’re just starting out or refining your skills, you get 12 graphite, colored, watercolor, charcoal, white charcoal, and metallic pencils. Plus, blending stumps and a refillable water brush pen are included.
The kit’s 100-sheet sketchbook features white, toned tan, and black paper, letting you experiment with different backgrounds. All tools come pre-sharpened in a lightweight travel case; this makes it easy to draw anywhere. With a 4.8-star rating and premium packaging, it’s an excellent gift for creative minds.
- Number of Colors / Pieces:176 pieces total (includes 12 colored pencils, 12 watercolor pencils, etc.)
- Pencil Core Type:Mixed (graphite, colored, watercolor, charcoal, metallic)
- Target User Level:Adults, teens, kids
- Included Extras / Accessories:Sketchbook (100 sheets), blending stumps, water brush, art knife, sharpener, erasers, pencil extender, travel case
- Safety and Standards Compliance:Non-toxic, no explicit standard listed
- Customer Ratings (Approximate Average):4.8 / 5 (3,143 reviews)
- Additional Feature:Extensive 176-piece set
- Additional Feature:100-sheet multi-color sketchbook
- Additional Feature:Travel case organizer
Heshengping 39pcs Sketching Pencil and Charcoal Set
Artists seeking a versatile and thorough drawing set will appreciate the Heshengping 39pcs Sketching Pencil and Charcoal Set. You get 14 graphite pencils, 12 watercolor pencils, and 3 charcoal pencils, covering soft to hard ranges for all your sketching needs.
This set also includes blending stumps, erasers, an art knife, sharpener, pencil extender, brush, and a travel-friendly case. Whether you’re a beginner or pro, it lets you create anywhere with ease. Plus, it’s an ideal gift and encourages exploration.
With a 4.7-star rating and a 30-day return policy, you can trust its quality and support.
- Number of Colors / Pieces:39 pieces total (includes 12 watercolor pencils, 14 graphite pencils, etc.)
- Pencil Core Type:Mixed (graphite, watercolor, charcoal)
- Target User Level:Beginners, professionals
- Included Extras / Accessories:Pencil case, blending stumps, erasers, art knife, sharpener, pencil extender, brush
- Safety and Standards Compliance:Non-toxic, no explicit standard listed
- Customer Ratings (Approximate Average):4.7 / 5 (2,289 reviews)
- Additional Feature:Includes art knife
- Additional Feature:Color paper blending stumps
- Additional Feature:Travel-friendly pencil case
Yagol 72-Color Soft Core Colored Pencils Set
Looking for a versatile colored pencil set that suits both beginners and seasoned creators? The Yagol 72-Color Soft Core Colored Pencils Set offers vibrant, velvety-soft cores perfect for drawing, shading, and blending on various surfaces like paper, canvas, and wood.
Each pre-sharpened pencil features a unique name and number, making color selection easy. You’ll appreciate the break-resistant leads and rich pigmentation that deliver smooth coverage and layering.
Packaged in a premium tube with a fold-out tutorial, this set is ideal for creative exploration and makes a fantastic gift. Plus, it’s non-toxic and safe for teens and adults alike.
- Number of Colors / Pieces:72 colored pencils
- Pencil Core Type:Soft core colored pencils
- Target User Level:Beginners to advanced artists, adults, teens
- Included Extras / Accessories:Fold-out tutorial on sleeve cover
- Safety and Standards Compliance:Non-toxic, odorless, ASTM D-4236 implied
- Customer Ratings (Approximate Average):4.7 / 5 (Rating count not specified)
- Additional Feature:Fold-out unicorn tutorial
- Additional Feature:Premium tube storage
- Additional Feature:Works on multiple surfaces
72-Color Oil-Based Colored Pencils for Adults
Wondering which colored pencils deliver vibrant, smooth shading perfect for detailed work? The 72-Color Oil-Based Colored Pencils for Adults by Aenir are an excellent choice. With oil-based cores, these pencils offer rich, blendable colors ideal for layering and dramatic effects.
Their fine 0.5mm points let you create intricate lines and shading on adult coloring books or professional sketches. The set comes in a sturdy, portable case, making it easy to carry and store. Whether you’re a beginner or experienced artist, this colorful, high-quality set supports your creativity with ease and elegance.
- Number of Colors / Pieces:72 colored pencils
- Pencil Core Type:Oil-based colored pencils
- Target User Level:Beginners, teens, adults
- Included Extras / Accessories:Cylindrical case
- Safety and Standards Compliance:ASTM D-4236 certified, non-toxic
- Customer Ratings (Approximate Average):4.6 / 5 (1,208 reviews)
- Additional Feature:Fine line 0.5mm tip
- Additional Feature:Sturdy cylindrical case
- Additional Feature:Aenir brand community
COOL BANK 72-Pack Colored Pencils Set
If you want a versatile color pencil set that suits beginners and seasoned creatives alike, the COOL BANK 72-Pack Colored Pencils deliver vibrant, fade-resistant hues with smooth application. These soft oil-based cores blend and layer effortlessly; they are perfect for sketching or detailed work. You’ll appreciate their break-resistant, easy-to-sharpen design and ergonomic, non-slip grip that reduces hand fatigue.
The color-matching barrels keep your workspace tidy and organized. Packaged in an elegant, eco-friendly box, this set is ASTM certified and ideal for artists, students, or as a thoughtful gift. With glowing reviews and lasting color richness, it’s a smart choice for 2026.
- Number of Colors / Pieces:72 colored pencils
- Pencil Core Type:Soft oil-based colored pencils
- Target User Level:Kids, teens, adults, beginners, artists
- Included Extras / Accessories:Ergonomic grip pencils, elegant box packaging
- Safety and Standards Compliance:ASTM D-4236 certified, eco-friendly, odorless
- Customer Ratings (Approximate Average):4.6 / 5 (4,870 reviews)
- Additional Feature:Ribbed ergonomic grip
- Additional Feature:Fade-resistant colors
- Additional Feature:Color-matching barrels
Crayola Twistables Colored Pencil Set (50ct)
Who’s ready to enjoy vibrant, mess-free coloring without the hassle of sharpening? The Crayola Twistables Colored Pencil Set (50ct) lets you twist up your color and get straight to drawing. Its plastic barrel protects the color core, so you can twist down to safeguard tips when not in use.
With 20 new shades included, you’ll experience consistent, vivid colors every time. Perfect for kids aged 4 and up, these non-toxic pencils come in a compact, durable case—ideal for travel, outdoor fun, or stocking stuffers.
Say goodbye to peeling and sharpening with this convenient, creative set.
- Number of Colors / Pieces:50 colored pencils (twistable)
- Pencil Core Type:Twistable colored pencils (plastic barrel, no sharpening)
- Target User Level:Kids 4+ and teens
- Included Extras / Accessories:Durable compact case
- Safety and Standards Compliance:Non-toxic, safe for ages 4+
- Customer Ratings (Approximate Average):4.7 / 5 (28,483 reviews)
- Additional Feature:Twist-up design
- Additional Feature:Plastic barrel protection
- Additional Feature:No sharpening needed
Prina 76 Pack Pro Drawing and Sketching Kit
Looking for a comprehensive art kit that suits beginners and experienced artists alike? The Prina 76 Pack Pro Drawing and Sketching Kit offers 76 versatile items, including colored, graphite, charcoal, watercolor, and metallic pencils.
You’ll appreciate the premium 3-color sketchbook with 50 pages of white, tan, and black paper; it is perfect for diverse styles. This eco-friendly, non-toxic set includes essential tools like blending stumps, erasers, and a refillable water brush. All items are organized in a travel case.
Whether you’re shading, layering, or sketching detailed illustrations, this kit provides quality and portability for artists of all levels.
- Number of Colors / Pieces:76 pieces total (includes 12 colored pencils, 12 watercolor pencils, etc.)
- Pencil Core Type:Mixed (graphite, colored, watercolor, charcoal, metallic)
- Target User Level:Adults, teens, beginners
- Included Extras / Accessories:Sketchbook (3-color, 50 pages), tutorial, blending stumps, erasers, water brush, paint brush, sandpaper, travel case
- Safety and Standards Compliance:ASTM D-4236 & EN71 certified, non-toxic, eco-friendly
- Customer Ratings (Approximate Average):4.8 / 5 (Rating count not specified)
- Additional Feature:Includes 3-color sketchbook
- Additional Feature:Variety of pencil types
- Additional Feature:Travel case included
PABLUE 12-Color Premium Soft Core Colored Pencils
Artists at any skill level will appreciate the PABLUE 12-Color Premium Soft Core Colored Pencils for their strong, soft leads that resist breaking while allowing variable line thickness. You’ll enjoy the contoured grip that ensures stable handling, making coloring, sketching, or shading effortless.
These pencils are easy to sharpen and perfect for a variety of creative projects; whether you’re working on adult coloring books, scrapbooking, or doodling. The set includes 12 vibrant colors with thick 2mm leads, offering durability and smooth application.
Plus, PABLUE backs their product with a solid satisfaction guarantee, so you can create confidently.
- Number of Colors / Pieces:12 colored pencils
- Pencil Core Type:Soft core colored pencils
- Target User Level:Beginners, artists, adults
- Included Extras / Accessories:Watercolor brush
- Safety and Standards Compliance:Non-toxic
- Customer Ratings (Approximate Average):4.7 / 5 (107 reviews)
- Additional Feature:Thick leads 2mm+
- Additional Feature:Contoured pencil grip
- Additional Feature:Includes watercolor brush
Castle Art Supplies 72-Color Premium Colored Pencils Set
If you crave a vast spectrum of vibrant, creamy colors for your drawings, the Castle Art Supplies 72-Color Premium Colored Pencils Set delivers exactly that. With 72 soft yet durable cores arranged by color families, you’ll easily select and blend shades for smooth, rich coverage.
These pencils resist crumbling and hold their point well. This allows you to layer and burnish to achieve stunning textures on various surfaces like paper or wood. Plus, a unique fold-out tutorial sharpens your skills while practicing a unicorn illustration.
Trusted by millions and backed by a money-back guarantee, this set is a must-have for serious artists.
- Number of Colors / Pieces:72 colored pencils
- Pencil Core Type:Soft core colored pencils
- Target User Level:Adult artists
- Included Extras / Accessories:Presentation tin case, fold-out tutorial
- Safety and Standards Compliance:Tested by studio experts, likely safe; no explicit standard listed
- Customer Ratings (Approximate Average):4.8 / 5 (24,090 reviews)
- Additional Feature:Presentation tin case
- Additional Feature:Fold-out skill tutorial
- Additional Feature:Trusted by 2.5 million
Factors to Consider When Choosing Color Pencil Drawing Ideas
When choosing color pencil drawing ideas, you’ll want to contemplate the quality of your pencils and whether the subject matches your skill level.
Think about the blending techniques the drawing requires and if your paper type supports those methods. These factors will help you create your best work with ease.
Color Pencil Quality
How do you choose the best color pencils for your drawing projects? Start by considering the pencil core type: soft cores offer silky smooth application and easy blending, but pigment load varies by brand. Oil-based cores are firmer, letting you create sharper lines and durable layers.
Remember, softer cores break more easily under pressure, so balance softness with break-resistance based on your technique. Check for clear color labeling on pencil bodies; it speeds up shade selection during your work. Finally, prioritize lightfastness and pigment quality to ensure your artwork resists fading over time, regardless of the paper you use.
Selecting pencils with these qualities helps your drawings stay vibrant and sharp long after completion.
Skill Level Matching
Choosing the right color pencils goes beyond quality; it also depends on your skill level and drawing goals. If you’re a beginner, softer cores are forgiving, allowing you to experiment without harsh lines. More experienced artists benefit from harder or oil-based cores, which offer controlled shading and finer details.
Pay attention to lead hardness and break resistance. Durable cores reduce interruptions and keep your lines consistent. Consider pencils with smooth, pigment-rich cores if you want to master layering and blending techniques. A comprehensive set with a wide tonal range supports diverse practice and expands your creative options.
Lastly, pick pencils with comfortable, non-slip grips to minimize fatigue and improve control during longer sessions. This helps you execute precise ideas effortlessly. Matching pencils to your skills makes drawing more enjoyable and effective.
Subject Matter Selection
Why does the subject matter you pick matter so much? It shapes your entire approach, from color choices to pencil types. If you aim for realism, complex subjects like portraits or landscapes demand a broader color range and smooth tonal shifts.
Simpler or stylized subjects, such as patterns or cartoons, suit a limited palette focusing on key hues and contrast. Your pencil choice matters too; water-soluble pencils work great for gradients and washes, while oil-based ones keep edges crisp for detail.
Don’t forget your paper’s texture and weight; they influence whether bold, saturated colors or delicate layered shading will bring your subject to life best. Aligning your subject with these factors ensures your drawing process flows smoothly, and your final piece shines.
Blending Techniques Needed
Blending techniques play a pivotal role in bringing your colored pencil drawings to life, and selecting the right pencils makes all the difference. Soft core pencils with highly pigmented leads let you create smooth blends and seamless color transitions when layering.
If you prefer slow, controllable blending with rich depth, oil-based cores are perfect for gradients and burnishing. Break-resistant cores help you layer and shade repeatedly without worrying about frequent breakage. Look for pencils labeled with color names or numbers; they simplify color matching, making gradual blends easier and more precise.
Don’t forget to consider pencil hardness: softer cores blend effortlessly, while harder ones preserve edges for textured layers. By choosing pencils aligned with your blending style, you’ll enhance your drawings’ vibrancy and realism in no time.
Paper Type Compatibility
How does the paper you pick affect your colored pencil work? It influences texture, layering, and overall finish. Smoother papers like hot-pressed or smooth Bristol let you create fine lines. Textured papers with more tooth improve pigment grip and layering vibrancy.
Choose paper weight wisely; 120 to 300 GSM supports multiple layers without buckling, unlike lighter sheets that warp under heavy work. The tooth level, ideally medium to high, helps with pigment adhesion and smooth burnishing. Also, consider the surface coating: watercolor or mixed-media papers handle water-soluble pencils and washes better than plain drawing paper.
Finally, opt for archival-quality, pH-neutral papers to prevent fading or staining; this ensures your artwork stays vibrant for years. Selecting compatible paper ensures your colored pencil ideas truly shine.
Available Color Range
A wide color range in your pencil set can dramatically expand your creative possibilities. When you choose sets with 72 to over 120 colors, you gain the ability to create subtle gradients and detailed shading; this is essential for realistic skin tones, landscapes, and vibrant artwork.
Look for sets that organize colors by families or provide swatches with clear labels: this helps you select hues quickly and stay focused on your drawing. Consider the pencil core quality too; soft or oil-based cores affect color payoff and blending, influencing how your artwork appears across the spectrum.
Also, pay attention to packaging like tin or travel cases to keep your colors organized and accessible, especially when working with extensive color ranges. This ensures you make the most of every shade available.
Durability And Safety
Having a broad color range is only part of the equation when selecting colored pencils for your artwork. You also need to prioritize durability and safety to ensure a smooth creative process. Choose pencils with break-resistant cores so they won’t snap easily during shading or layering.
Make sure the leads are non-toxic and meet safety standards like ASTM D-4236 and EN71, especially if you’re working around kids. Consider core type: soft cores let you blend smoothly, while harder cores reduce smudging on delicate papers. Whether oil-based or wax-based, the core affects how well pencils hold up to repeated sharpening and use.
Lastly, opt for pencils packaged in sturdy cases to protect cores from drying or cracking. This will keep your tools reliable over time.
Storage And Portability
Many artists value portability when choosing colored pencil sets because it lets you create art anywhere without hassle. Look for travel-friendly kits that come with protective cases or tins to prevent pigment breakage and simplify transport. Compact sets with organized color slots or labeled pencils help you quickly pick shades and avoid digging through your supplies while on the go.
Some kits even include boxed or fold-out tutorials, offering step-by-step guidance for practicing new techniques outside your studio. Prioritize pencils with durable, break-resistant cores since they withstand jostling during transit. Also, consider the size and weight of the set; smaller, lighter kits are easier to carry for field sketches or travel sessions. Thoughtful storage and portability features make your creative process smoother wherever you are.
Frequently Asked Questions
What Type of Colored Pencils Are Best for Beginners and Professionals?
You’ll want soft-core pencils like Arteza or Prismacolor for easy blending as a beginner. As a professional, opt for Faber-Castell Polychromos or Caran d’Ache Pablo for unrivaled lightfastness, color range, and performance. Innovate confidently.
How Do I Prevent Colored Pencil Drawings From Smudging or Fading Over Time?
Want to guarantee your colored pencil art stays vibrant and pristine? Apply non-yellowing fixatives between layers, use archival sprays for UV protection, draw methodically to reduce smudging, and always test protective coatings for compatibility—innovation elevates preservation.
Is It Necessary to Use a Fixative for Colored Pencil Artwork?
You don’t always need fixative for colored pencil work, since pencils resist smudging. However, if you’re using sanded papers, layering heavily, or want added protection and surface tooth, a fixative can enhance both durability and creative possibilities.
How Can I Effectively Erase Mistakes Made With Colored Pencils?
You’ll erase colored pencil mistakes best by layering marks lightly, using kneaded or Tombow Mono Zero erasers with a dabbing motion, and testing first. Combine techniques, warm erasers in your hands, and always protect your paper’s integrity.
Which Paper Textures Work Best With Colored Pencils for Smooth Blending?
As the saying goes, “Smooth seas never made a skilled sailor”—but smooth paper makes masterful blending. You’ll achieve seamless gradients and photorealism with hot-press or plate-finish surfaces, where minimal tooth eliminates distracting grain and enables innovative layering.
Conclusion
Think of your colored pencils as a fleet of ships, each hue charting new waters across the vast sea of your imagination. With every drawing, you navigate uncharted islands—nature, portraits, pop culture—gathering treasures of skill and creative vision.
Don’t anchor in familiar harbors; let curiosity captain your journey. With these ideas as your map, set sail boldly, knowing each sketch brings you closer to mastering the artful ocean of colored pencil drawing.