
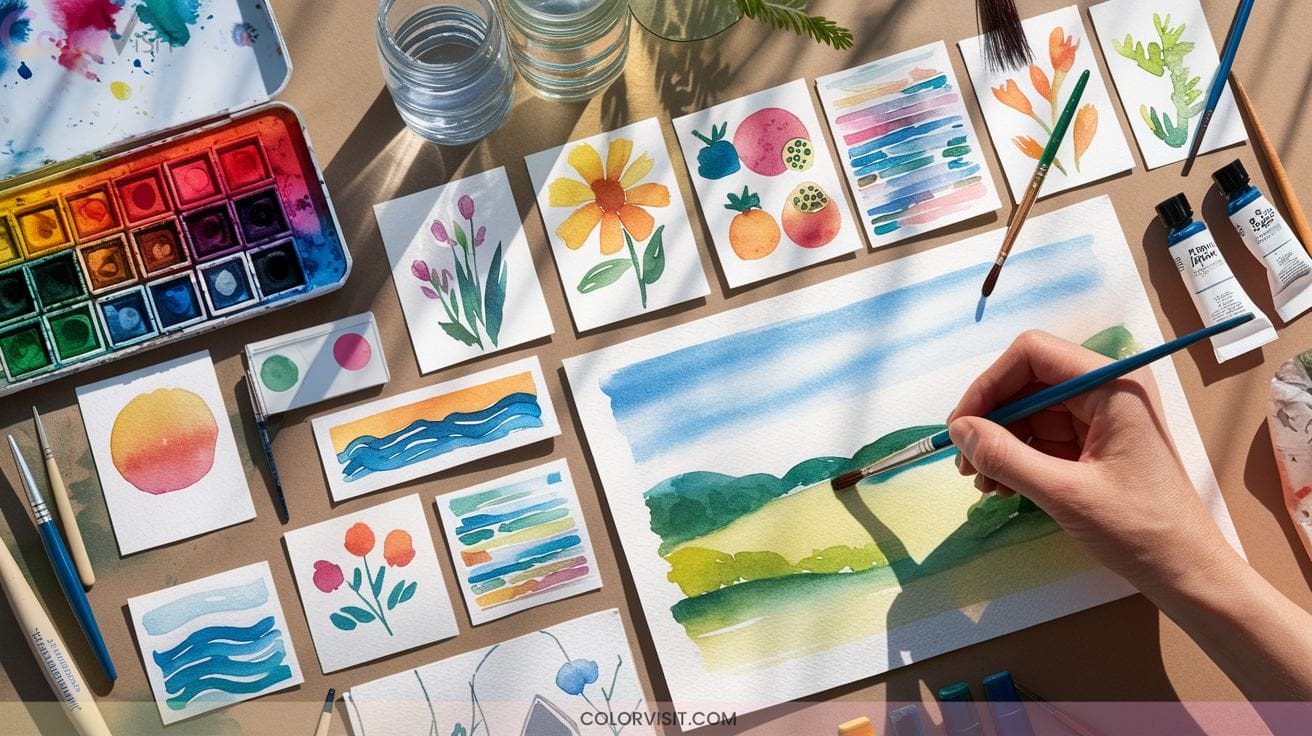
20 Easy Water Color Painting Ideas for Beginners Step by Step
Start with simple flower petals using a wet-in-wet technique, then paint a blue sky gradient wash for practice. Try abstract colorful circles, gentle sunset landscapes, or layered leaves. Experiment with a rainbow wash, butterflies, soft roses, or balloons with crisp edges.
Use light pencil sketches, drop in vibrant colors, blend with wet brushes, and add highlights with dry tools. Every step you try introduces you to playful new effects, so keep going for even more creative inspiration.

1. Simple Flower Petals With Wet-In-Wet Technique

Immerse yourself in the world of watercolor painting by exploring the wet-in-wet technique—a perfect starting point for painting simple flower petals.
Discover the beauty of watercolor by trying the wet-in-wet technique, an inviting approach for painting delicate flower petals.
Begin with a soft, round brush loaded with water to map out a glossy petal shape on sturdy paper.
Drop vibrant pigment along the edges or center, letting color flow organically across the wet surface.
Gently introduce secondary hues for subtle gradients, working swiftly to keep the paper moist and edges soft.
As the wash sets, use a drier brush for refined details without overworking.
Experiment boldly, embrace abstraction, and let each petal reveal its own expressive, innovative beauty.
2. Basic Blue Sky Gradient Wash
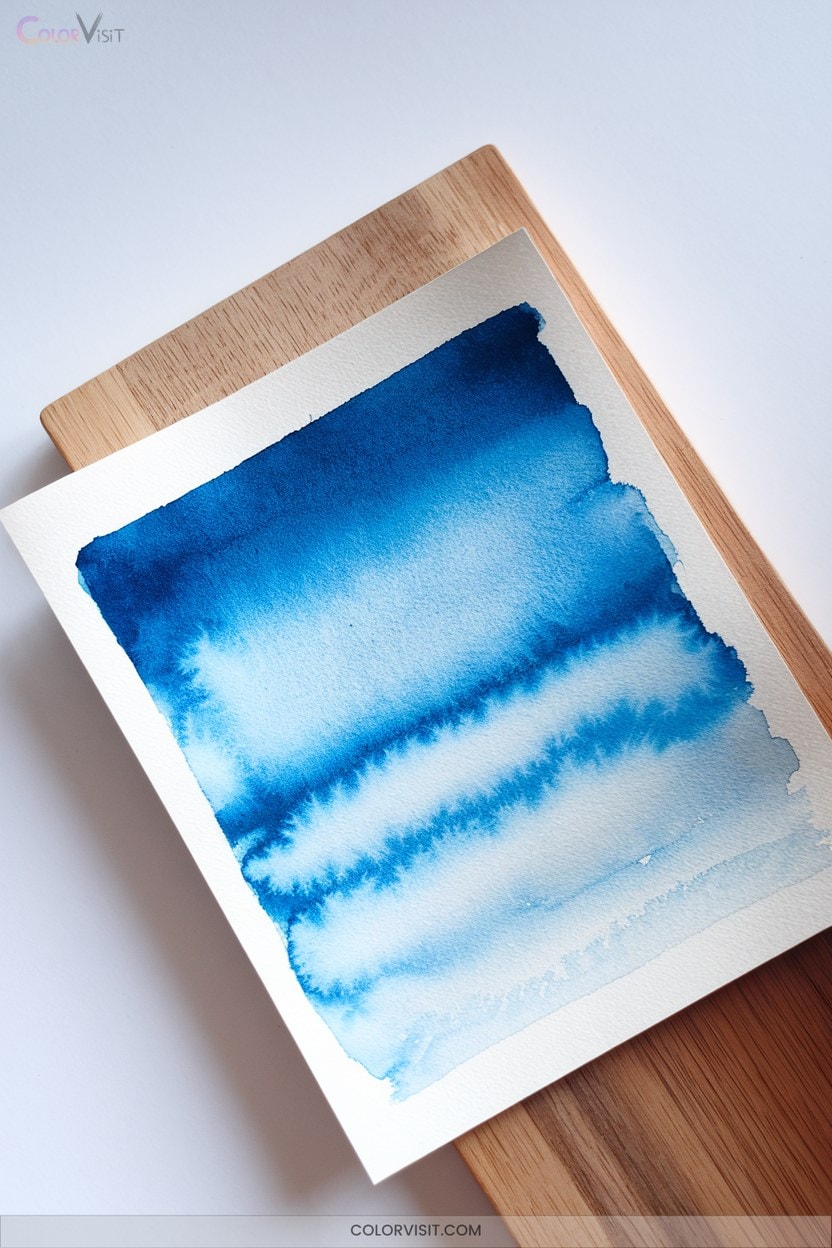
After exploring the softness of flower petals, you can set the stage for your watercolor scene by mastering a luminous blue sky gradient wash.
Begin by evenly dampening 140lb cold-pressed paper, using a large flat brush until you see a subtle sheen.
Tilt your board to about 30°, then load your brush with concentrated cobalt or cerulean blue and sweep color across the top.
Let gravity guide the flow downward; rinse your brush, then pull pigment toward the horizon with clean water for a seamless fade.
Keep edges wet, blot excess pigment, and swiftly correct blooms or hard lines for a flawless, innovative sky.
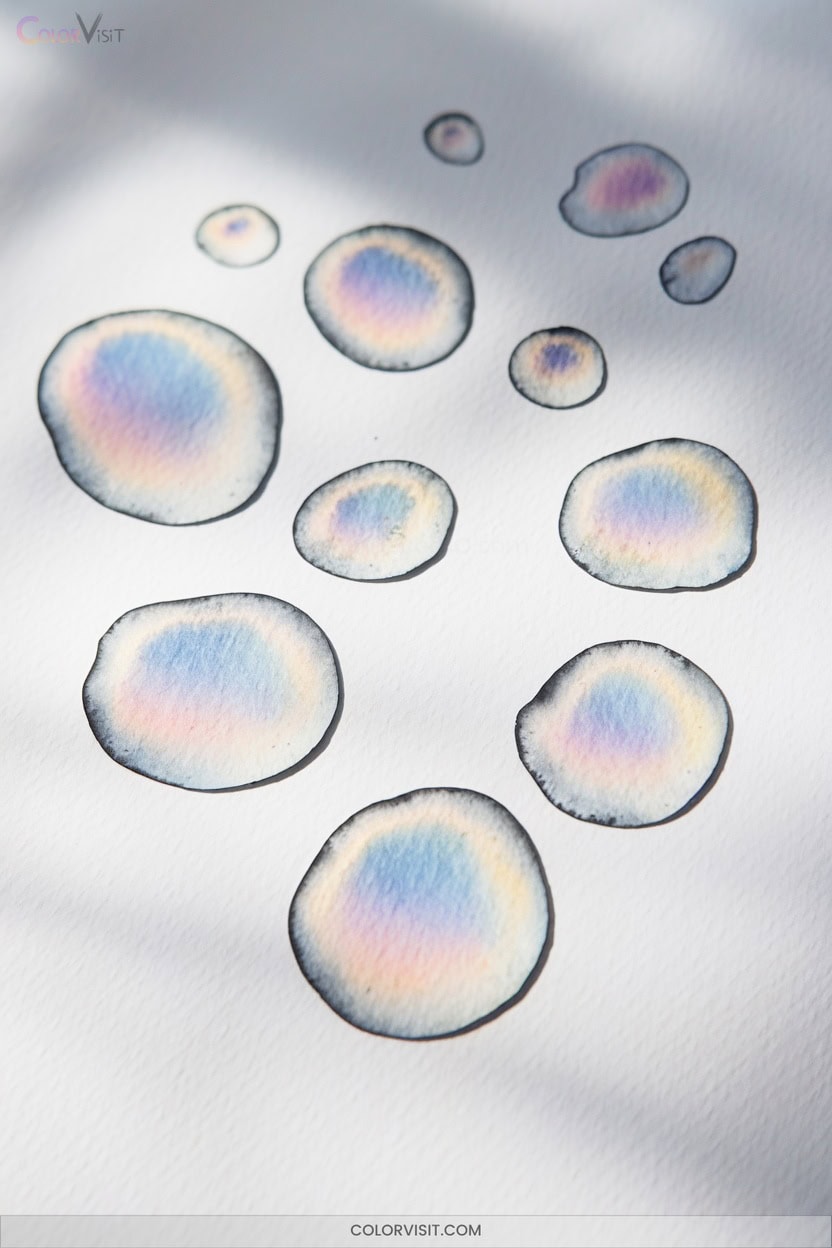
3. Abstract Colorful Circles
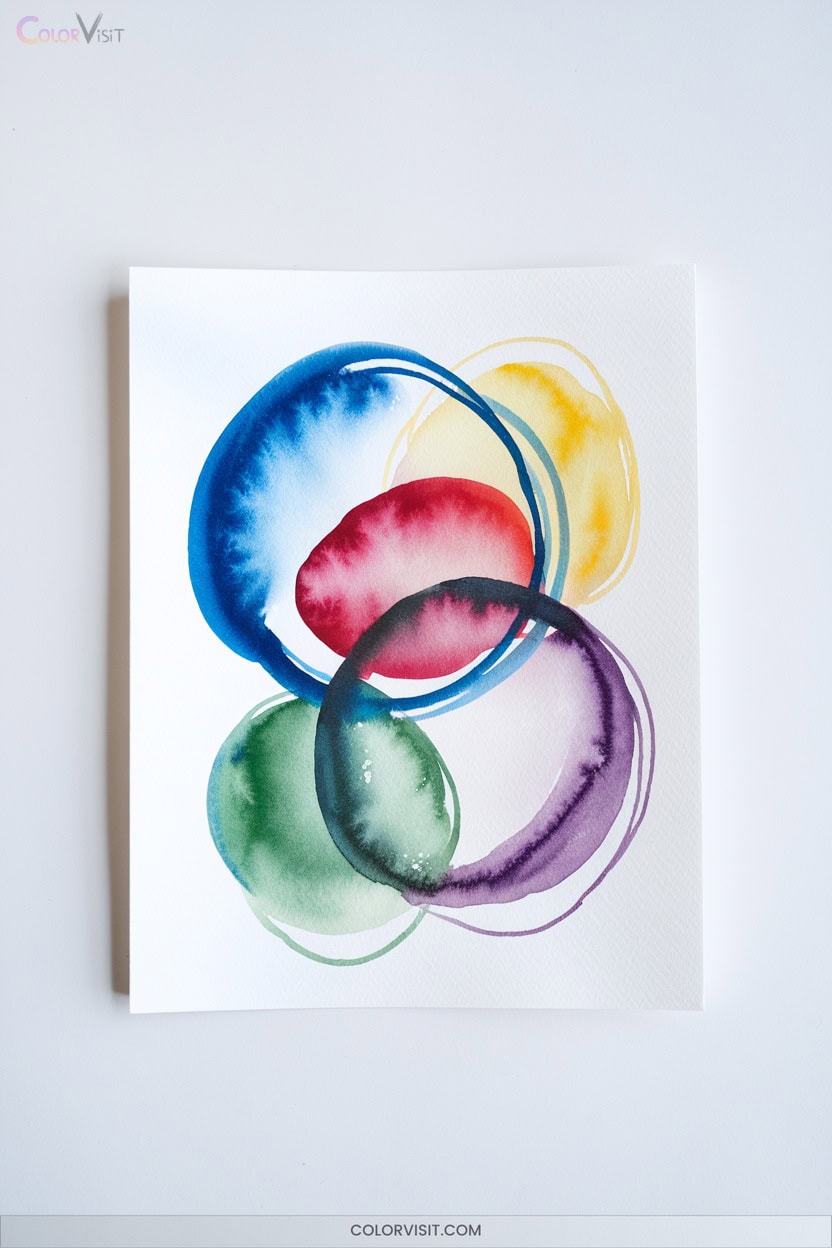
Curious how to inject playful movement into your watercolor practice? Try abstract colorful circles.
Begin by sketching circles diagonally across your mixed-media paper, varying sizes for visual rhythm.
Load your round brush with cerulean blue and lay the lightest wash.
While it dries, add darker concentric rings, using wet-on-wet for organic blends or wet-on-dry for crisp edges.
Sprinkle salt or press plastic wrap onto wet paint for unexpected textures.
Once dry, embellish with ink dots, dashed lines, or dry-brush accents.
Embrace negative space, balance warm and cool hues, and extend some circles off the edge for an innovative, dynamic feel.
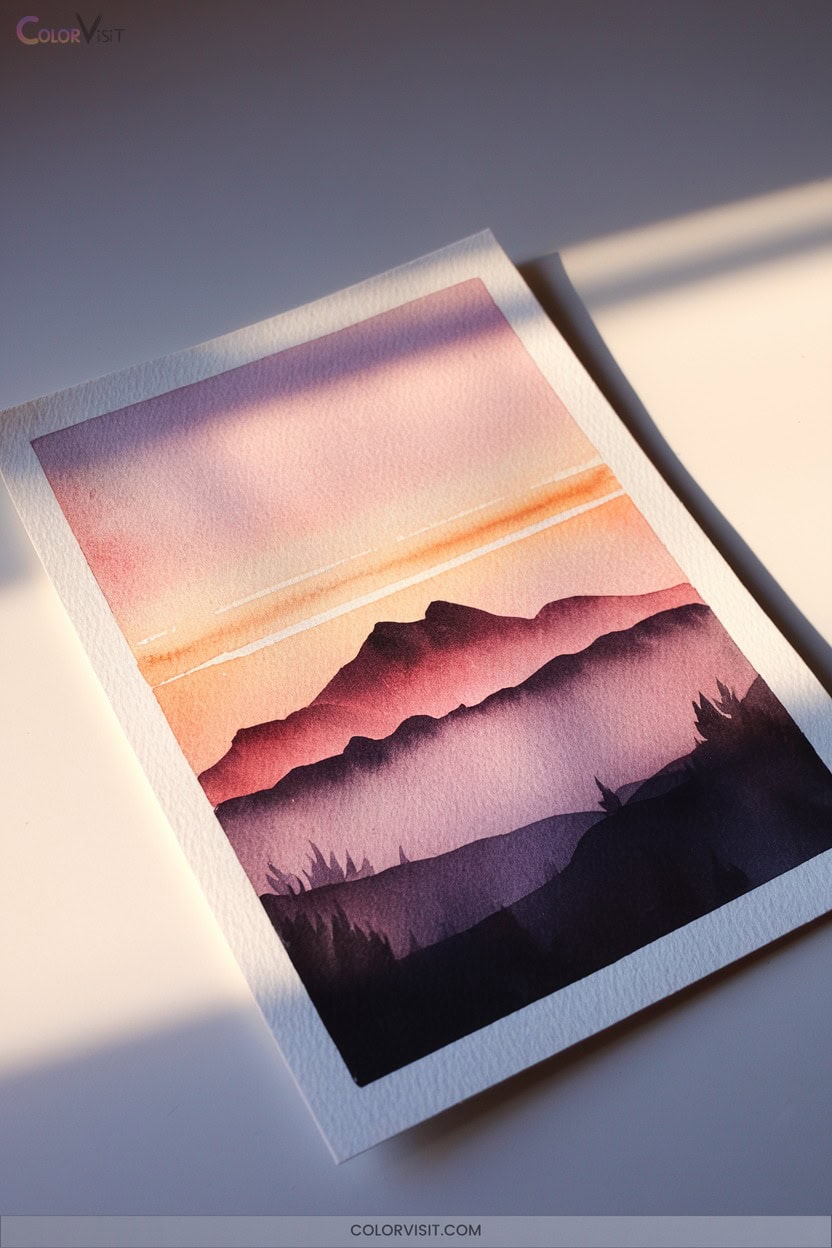
4. Gentle Sunset Landscape
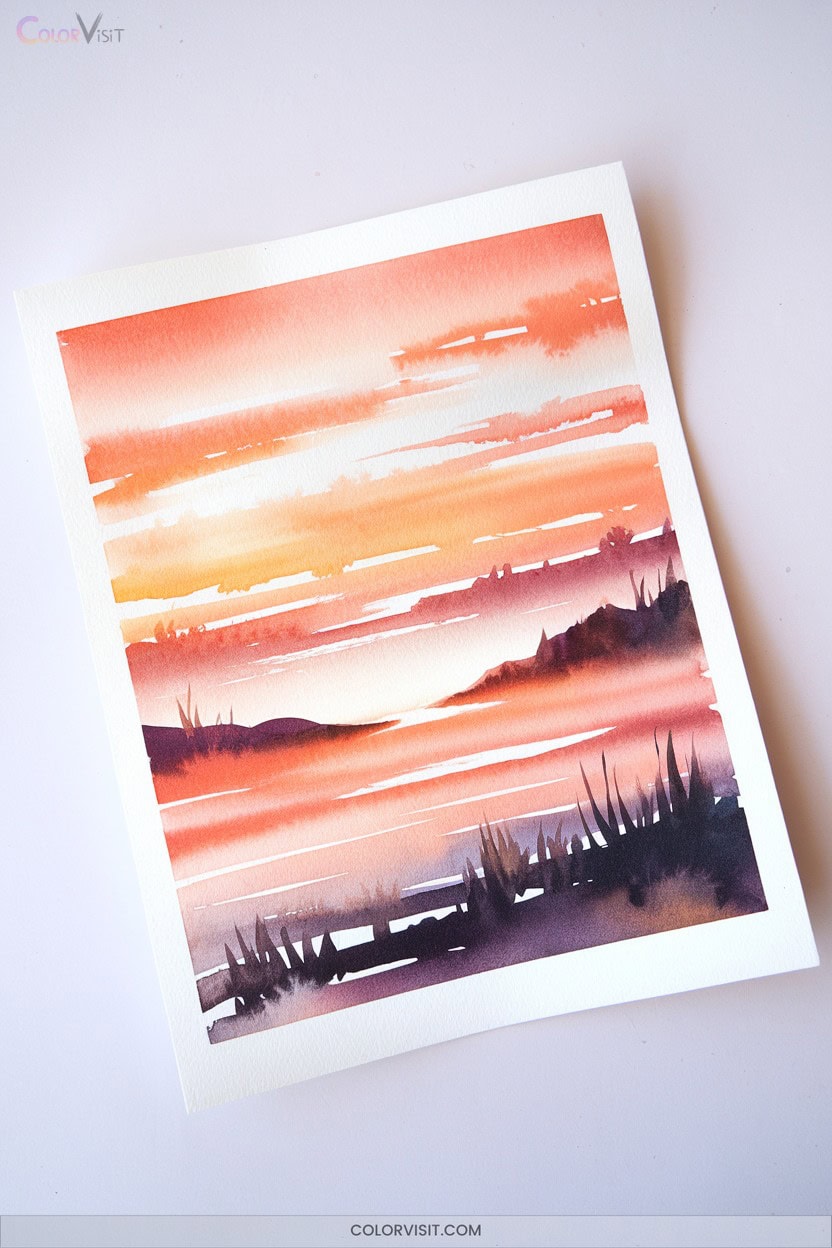
As daylight fades and colors melt across the horizon, painting a gentle sunset landscape offers you a chance to explore watercolor’s luminous blending and atmospheric depth.
Begin by taping your 100% cotton paper, then wet the sky area.
Glide Indian Yellow near the horizon, blending upwards into Opera Red, violets, and blues.
Leave a soft, dry circle for the sun’s glow.
Layer clouds with streaks of orange and violet, using diluted pigment for shadows.
Anchor your scene with minimal hills in dark blues or purple.
For best results:
- Blend wet-on-wet for smooth gradients
- Reserve bright sun
- Layer cloud colors
- Use masking tape for crisp horizons
5. Leaf Shapes With Layered Washes
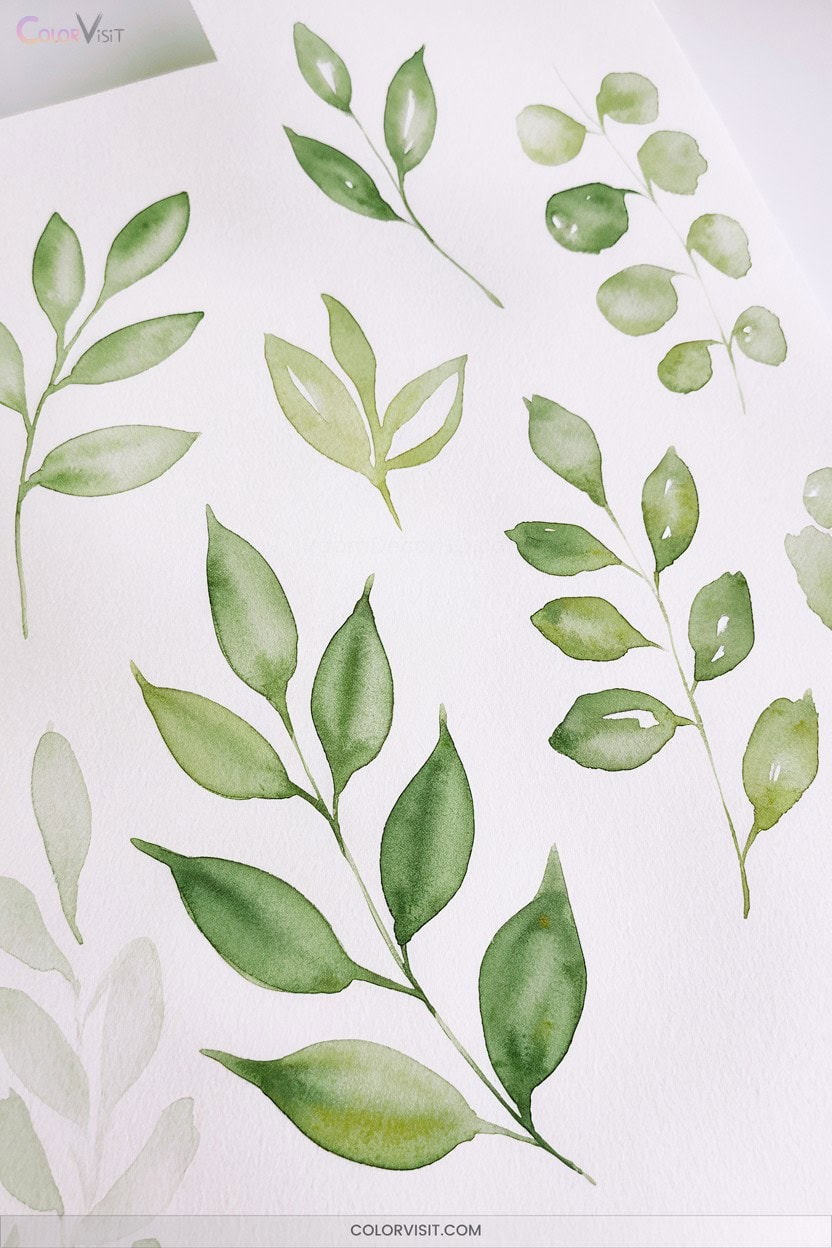
Building on your experience with gentle sunset skies, you can now explore the beauty of individual leaves by painting their shapes with layered watercolor washes.
Begin by sketching simple, symmetrical leaf outlines with a light pencil on quality watercolor paper.
Lay down a wet yellow wash, reserving highlights and veins.
Let each layer dry, then introduce secondary colors—greens, reds, oranges—for depth and realism.
Use a fine brush to define veins with Burnt Sienna, blending and lifting as needed for natural gradations.
Add sharp details or texture for innovation and visual interest.
Adjust color harmony and contrast as your leaf evolves.
6. Mountain Silhouette With Gradient Background
A mountain silhouette against a softly blended sky offers a striking yet simple subject for beginner watercolor artists.
Start by taping down your watercolor paper and lightly sketching jagged peaks.
Create a gradient sky using wet-on-wet technique, blending blues and purples for a dreamy backdrop.
While the sky dries, mix a deep, contrasting hue for the silhouette.
Layer multiple mountain shapes, darkening each layer for depth.
To innovate and enhance your process, remember:
- Experiment with color blends for unique gradients.
- Use reference images to inspire composition.
- Apply negative painting for crisp mountain edges.
- Add mist for atmospheric flair.
7. Easy Watercolor Rain Drops
Bring your rainy day scenes to life by mastering easy watercolor raindrops—a rewarding technique that instantly adds mood and realism to your art.
Start with a gentle wash using cool blues or grays, then sketch simple droplet shapes. To create luminous raindrops, lift paint for highlights and add soft shading opposite the light source.
Use a round brush for control, and blend edges for a natural look. Reference photos help you see how light and shadow interact.
Don’t overmix colors—let the pigments glow. Practice restraint with details; the illusion of water shines brightest when you keep your forms simple and expressive.
8. Soft Blended Clouds
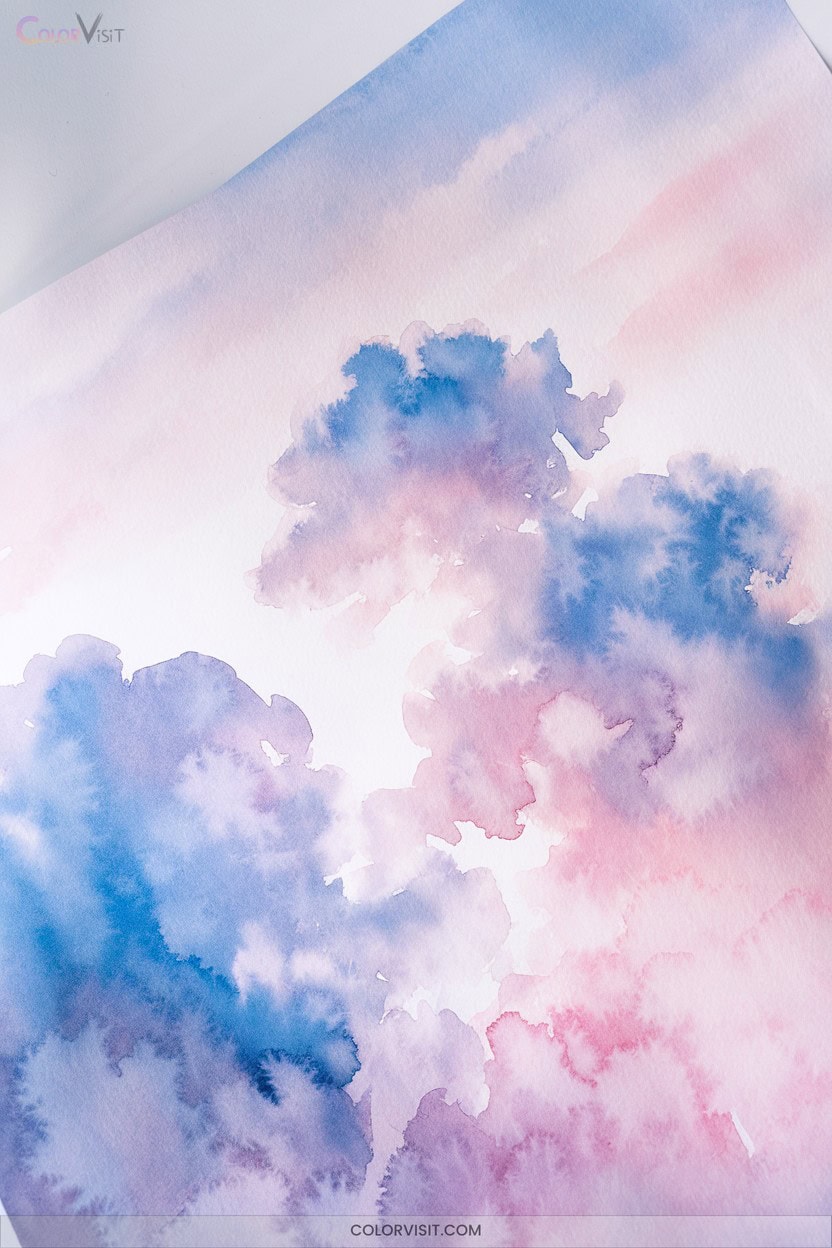
Transform your skies with soft blended clouds by embracing the wet-on-wet watercolor technique—a method that lets pigment flow and merge effortlessly across damp paper.
Start by wetting your sky area, then drop in light blue or gray washes.
Allow colors to blend organically as you reference real cloud shapes.
To innovate your results, remember:
- Lift pigment with a damp brush or tissue for fluffy edges
- Gradually blend colors for seamless blends
- Layer darker shades to build depth and volume
- Adjust water levels to control softness and flow
Stay patient, let each layer dry, and focus on capturing the movement and subtlety of natural clouds.
9. Vibrant Watercolor Stripes
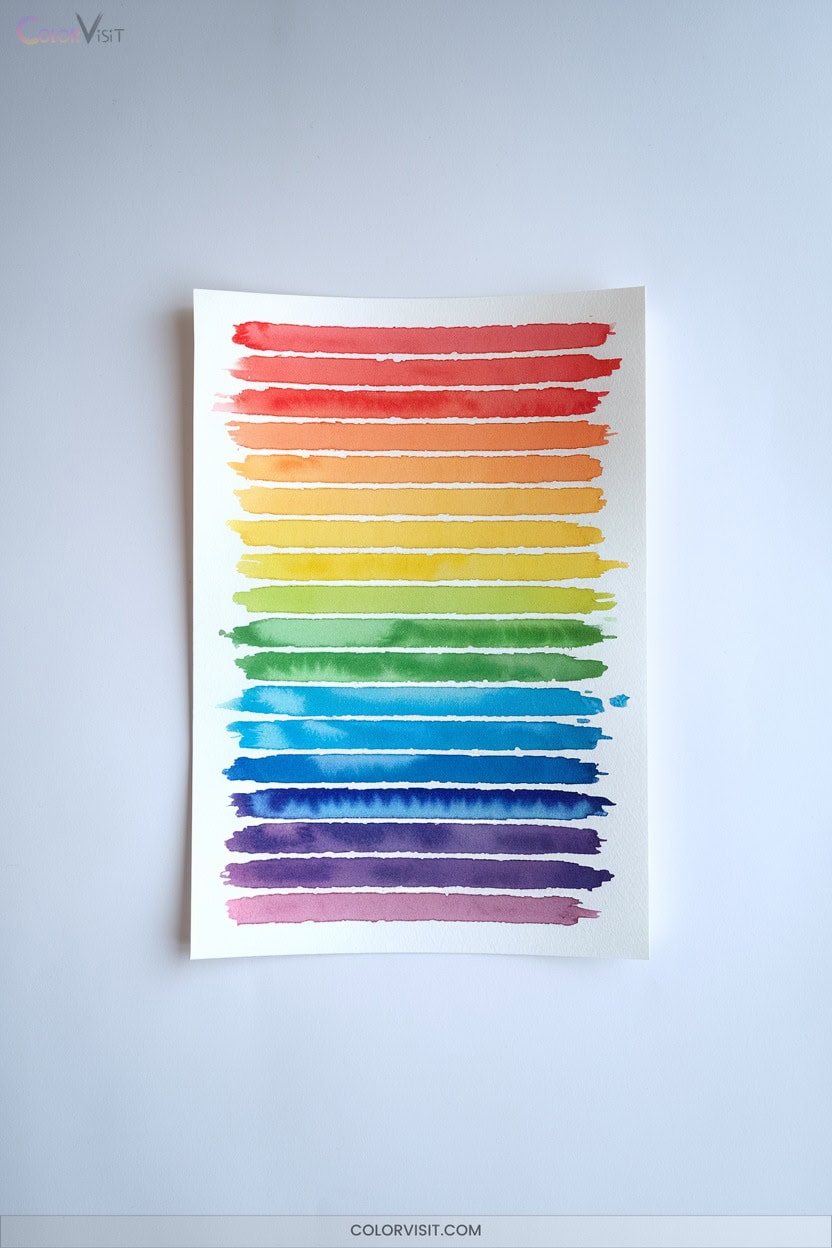
Once you’ve explored the softness of blended clouds, it’s time to energize your painting with vibrant watercolor stripes.
Gather your high-quality watercolor paper, brushes, and bold pigments—think ultramarine, cerulean, or indigo.
Plan your stripe pattern, varying widths and arranging contrasting colors for maximum impact.
Experiment with wet-on-wet blending or the push technique: drop clear water between stripes, watch textures bloom, and layer colors to intensify vibrancy.
Use quick, confident strokes and sprinkle in tiny droplets of contrasting hues for dynamic depth.
Embrace spontaneity and asymmetry, letting pigments mingle naturally.
With practice, your stripes will pulse with innovative, electric color.
10. Minimalist Tree Branches
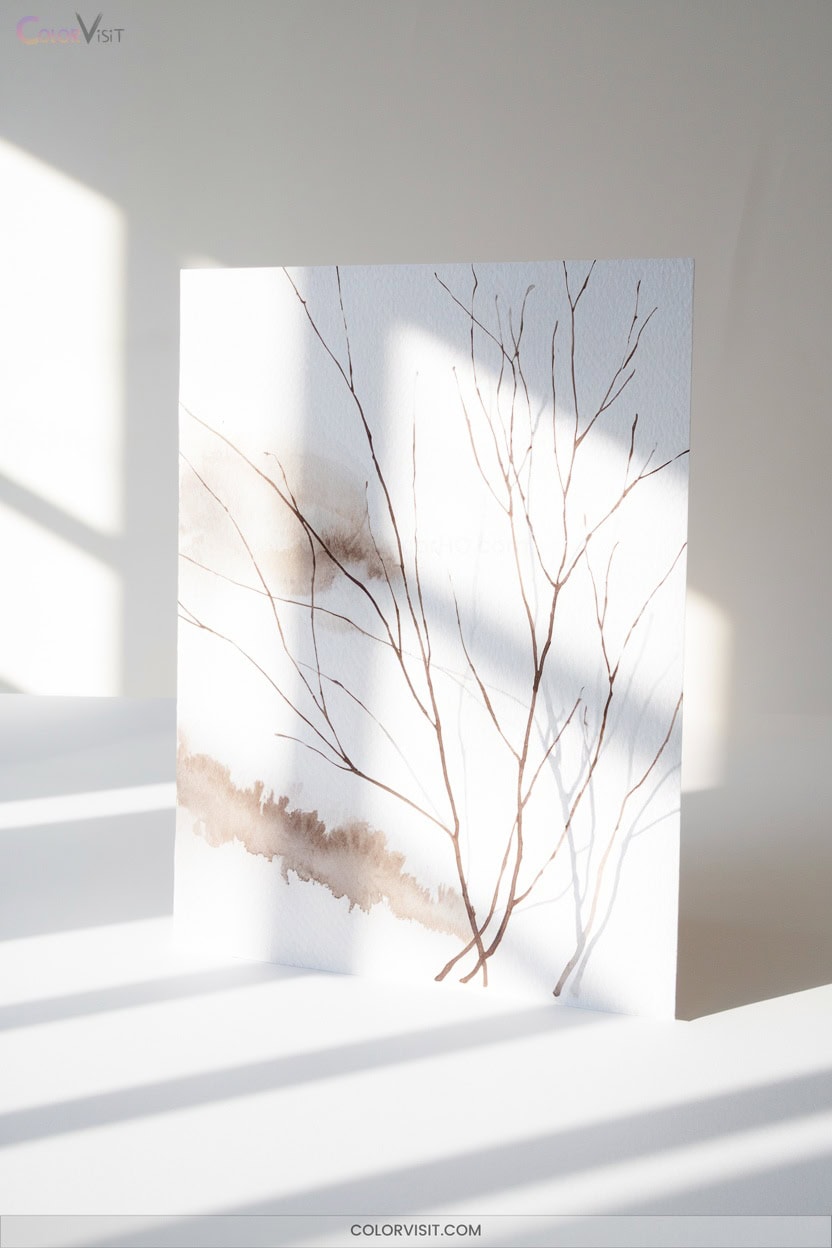
A minimalist tree branch painting captures nature’s elegance with just a few expressive brushstrokes, making it an ideal project for beginners keen to explore watercolor’s subtle beauty.
Start with a round brush, flowing freely to form organic, twisting branches—thicker at the base, slender at the tips.
Layer earthy browns and greens, letting water blend and soften edges.
Use the “Y” and “V” technique to split branches naturally.
For leaves, switch to a smaller brush and scatter shapes with playful vibrancy.
- Embrace imperfections for authenticity
- Reference nature photos for inspiration
- Experiment with layering and glazing
- Vary branch angles and thickness
11. Cute Watercolor Hearts

Hearts painted in watercolor radiate charm and warmth, making them perfect for playful cards, journals, or simple wall art.
Begin by pre-wetting cold-press paper for a soft, blended look—this wet-on-wet method lets colors flow organically.
Start by dampening your cold-press paper to let watercolors flow and blend naturally for a dreamy, soft-focus effect.
Tilt the paper and watch pigment swirl into dreamy ombre or blooming organic-edge hearts.
For crisp shapes, try negative painting: outline hearts with wax, then wash color around them.
Use grid layouts for repeatable geometric patterns, or layer transparent washes for depth.
Refine edges using blotting or a clean brush.
Add fine-liner accents or experiment with miniature hearts to boost your brush control.
12. Textured Ocean Waves
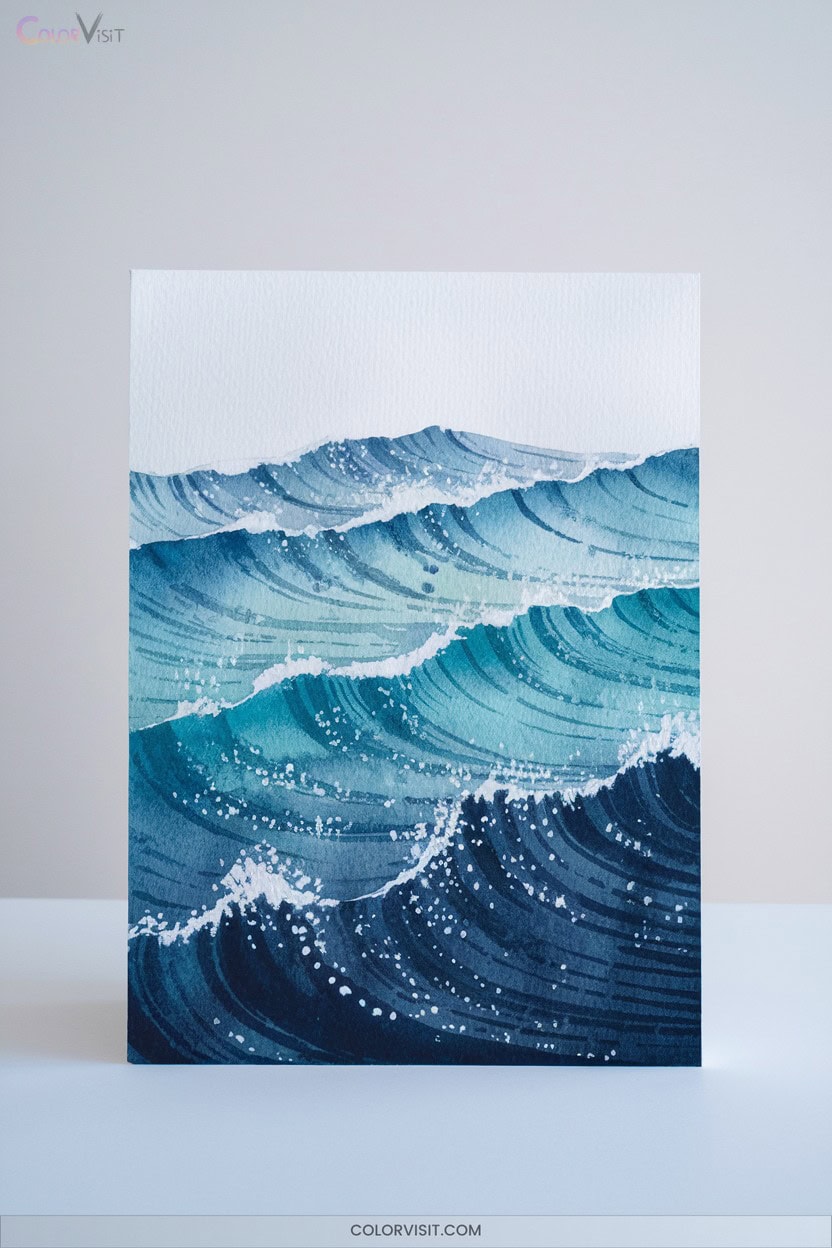
Waves offer an ideal subject for exploring watercolor’s unique textures and fluidity.
Begin with a light sketch—think mountain-like lines marking wave crests and curves.
Lay down a blue gradient, blending turquoise and green, then build dimension using wet-on-wet techniques.
Now, innovate with texture:
- Use a dry brush to suggest sparkling highlights atop the waves.
- Sprinkle salt onto wet paint for organic, grainy effects.
- Let the watercolor paper’s texture enhance depth naturally.
- Add crisp white peaks with gouache for a bold contrast.
Layer colors and vary your brushwork to evoke movement, capturing the ocean’s dynamic energy.
13. Simple Geometric Patterns
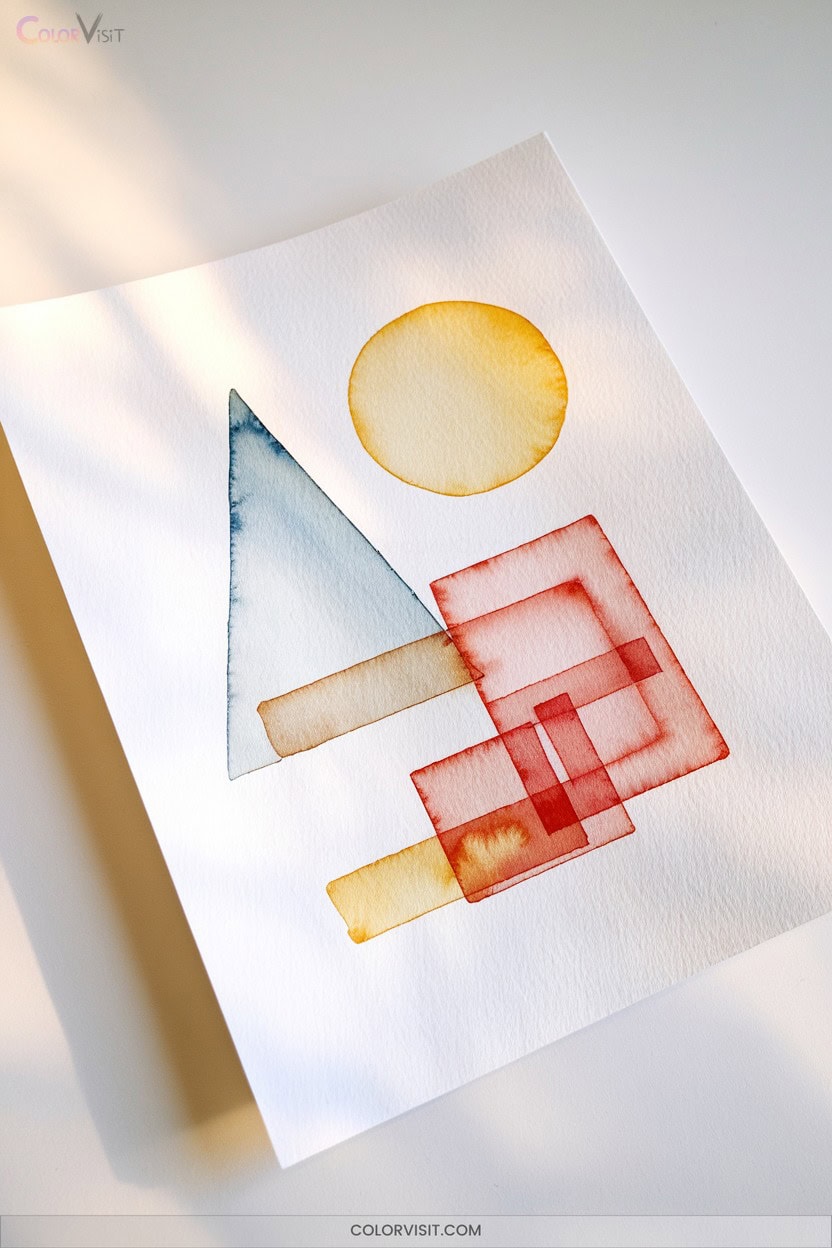
One of the most inviting ways to explore watercolor is by creating simple geometric patterns that transform basic shapes into vibrant, eye-catching designs.
Start with a compass and watercolor paper, sketching circles, triangles, or squares.
Overlap circles to discover mesmerizing intersections, then experiment with wet-on-wet or wet-on-dry techniques to blend bold, innovative colors.
Draw inspiration from natural patterns—mimic petals using triangles or hexagons, and layer washes for depth.
Add gold accents or doodle fine details with pens for a personal touch.
Embrace each stroke mindfully, letting the process spark creativity while you develop your own distinctive geometric style.
14. Watercolor Cacti
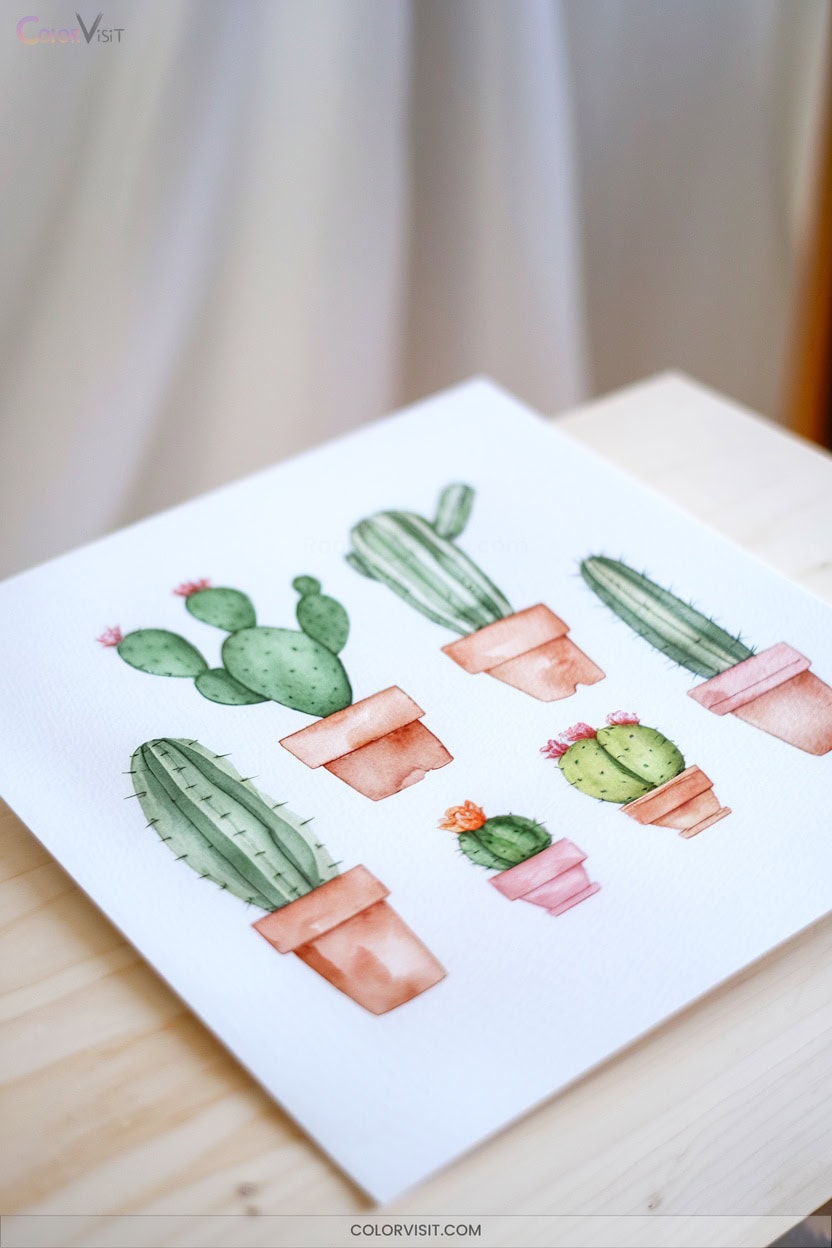
A watercolor cactus offers the perfect blend of structure and spontaneity, inviting you to explore organic shapes, vibrant greens, and textured details.
Discover structure and spontaneity as you paint watercolor cacti, exploring vibrant greens, organic shapes, and textured details.
Start with a loose pencil sketch, then choose a range of greens—mix in earthy ochres or muted pastels for depth.
Layer your washes, allowing each to dry, and use a fine brush for spines and delicate flowers.
For an expressive composition, consider these elements:
- Overlap multiple cacti for dynamic depth
- Leave negative space to let your subject breathe
- Add contrasting flower hues for pop
- Integrate desert elements like rocks for an authentic setting
Let your brush innovate!
15. Blotting Technique for Unique Textures

Discover how the blotting technique transforms ordinary watercolor washes into textured, luminous passages with just a few simple tools.
You’ll need paper towels, tissues, sponges, or a clean dry brush—each leaves its own signature mark.
Press gently on wet paint to lift pigment, creating highlights and soft edges, or press firmly for bolder, more dramatic textures.
Crinkle your blotting material for organic, unpredictable patterns.
Timing is everything; work while the paint glistens.
Don’t over-blot—limit each area to a couple presses and use fresh sections to avoid muddying colors.
Experiment on scraps first to gauge intensity and protect your paper’s surface.
16. Easy Watercolor Fruits
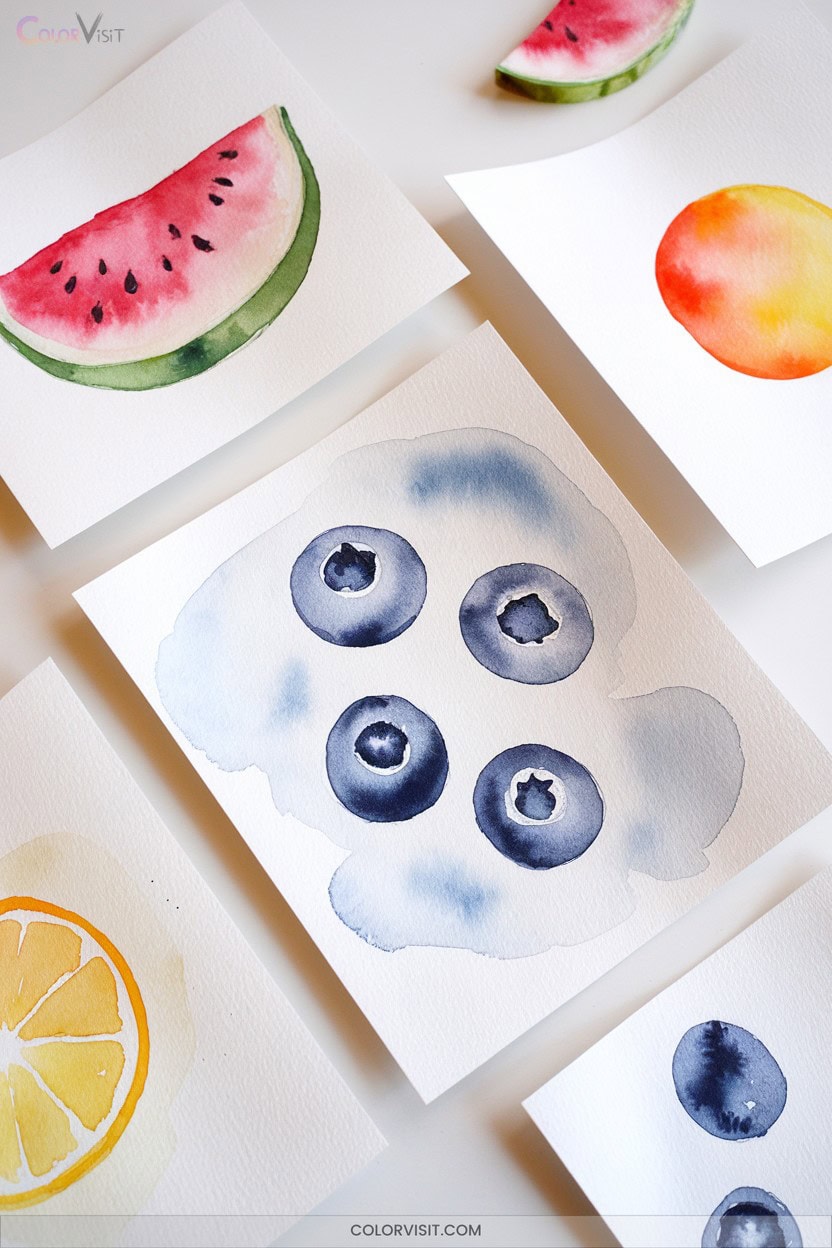
Juicy fruit forms bring instant color and freshness to your watercolor practice, making them perfect subjects for beginners.
Start with a light pencil outline on sturdy watercolor paper.
Lay down vibrant washes using a wet-on-wet technique, letting the pigments blend naturally.
Drop in richer tones for shadows and leave white spaces for highlights.
Focus on a limited, innovative palette—three main colors mixed to achieve authentic fruit hues.
- Combine primary colors to create dynamic fruit shades
- Layer gradually for realistic texture and vibrancy
- Use fine brushes to add seeds or surface details
- Balance warm and cool tones for natural dimension
Experiment boldly!
17. Rainbow Gradient Wash
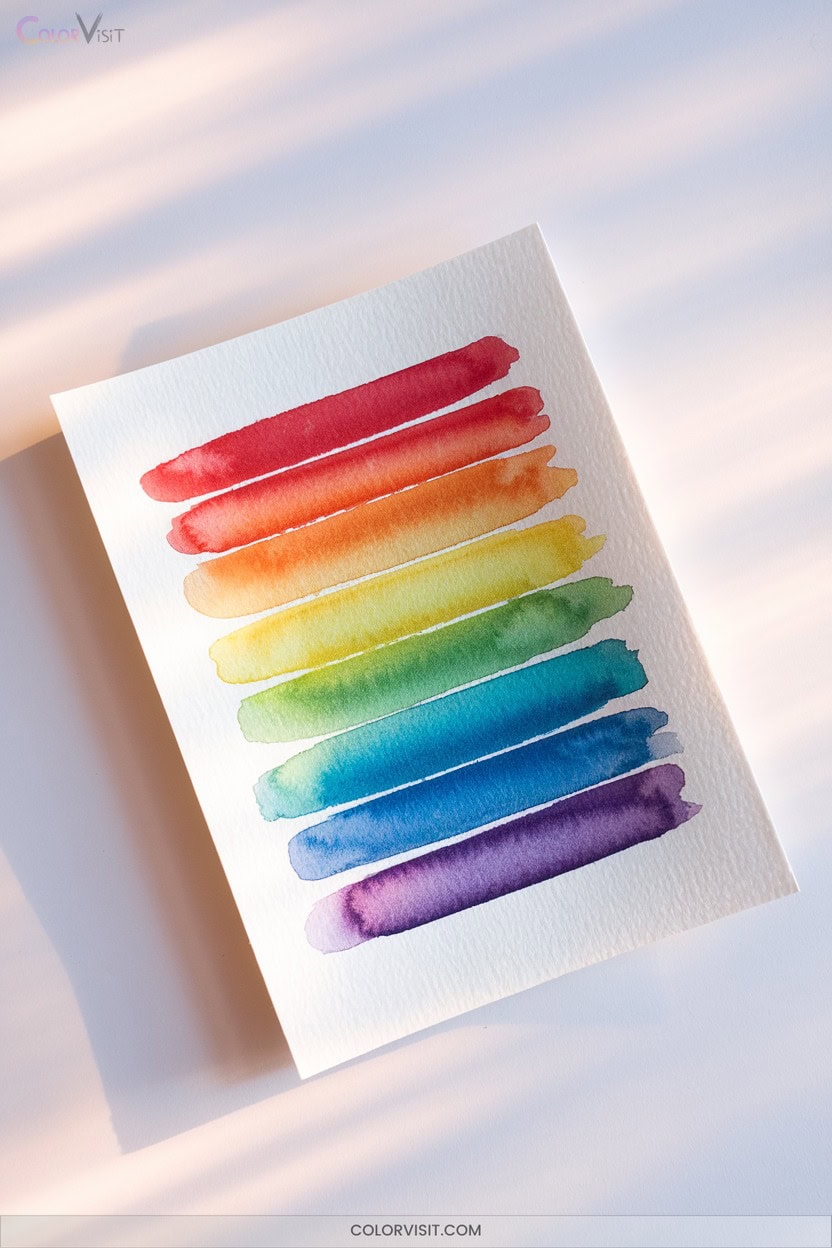
Transform your watercolor page with a rainbow gradient wash, letting vibrant hues flow seamlessly from one to the next.
Start by wetting your watercolor paper evenly—this primes the surface for smooth color blends.
Select primary colors and mix secondary shades for a vibrant spectrum.
With your brush, lay down the first color, then blend gently into the next, tilting your paper to let gravity assist the merging.
Maintain consistent water-to-paint ratios to avoid harsh lines or muddy hues.
Keep your tools handy to blot excess water.
Embrace experimentation—try symmetrical or asymmetrical gradients and discover dynamic, innovative effects with every wash.
18. Simple Watercolor Butterflies
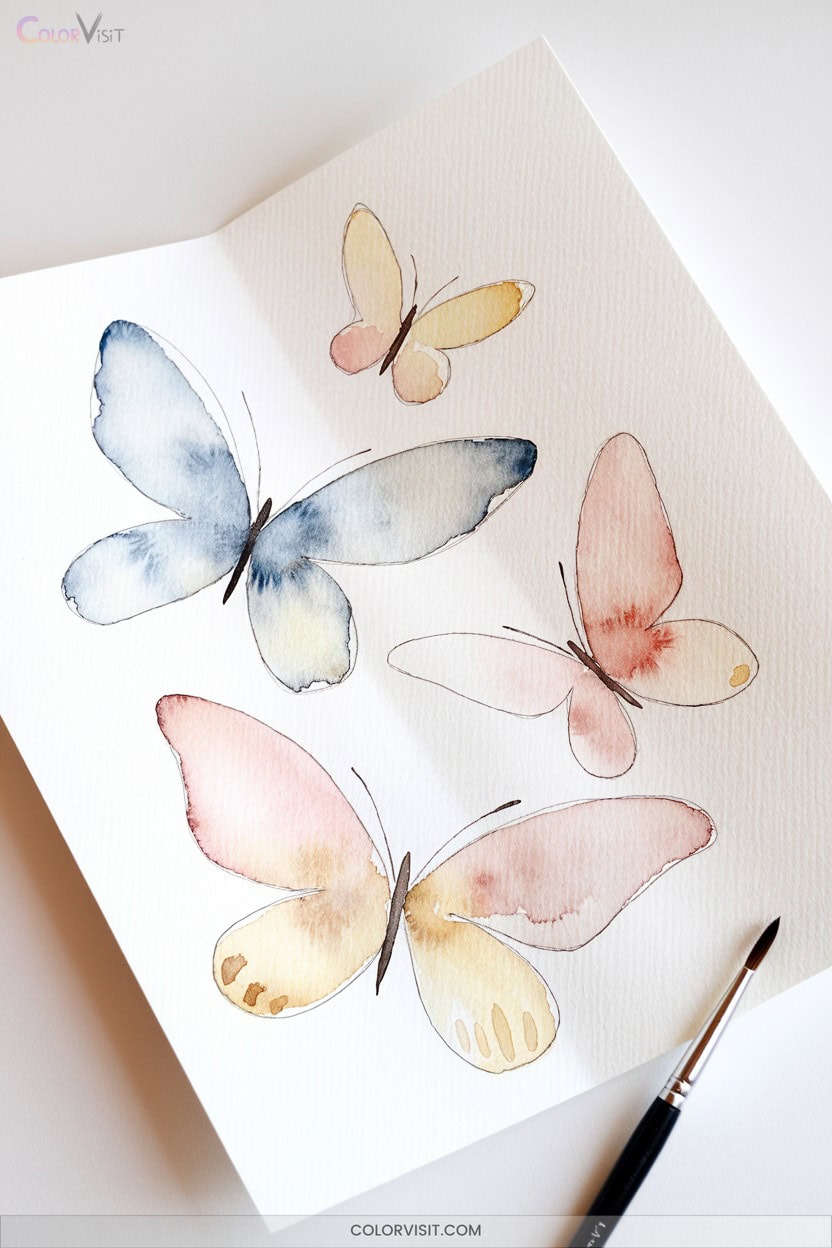
Bring delicate beauty to your watercolor practice by painting simple butterflies that flutter across the page with vibrant color and soft gradients.
Begin by brushing clean water into wing shapes, then drop in bright pigments to let them flow and blend naturally.
Use a round brush for soft, organic edges and experiment with wet-on-wet layering for depth.
Once dry, add a dark, slender body and fine antennae with a smaller brush.
To enhance realism, paint subtle veins and edges.
Remember to:
- Choose translucent, vibrant pigments
- Layer colors while wings are wet
- Let each stage dry for clarity
- Use fine brushes for details
19. Soft Petal Rose Using Dragging Technique
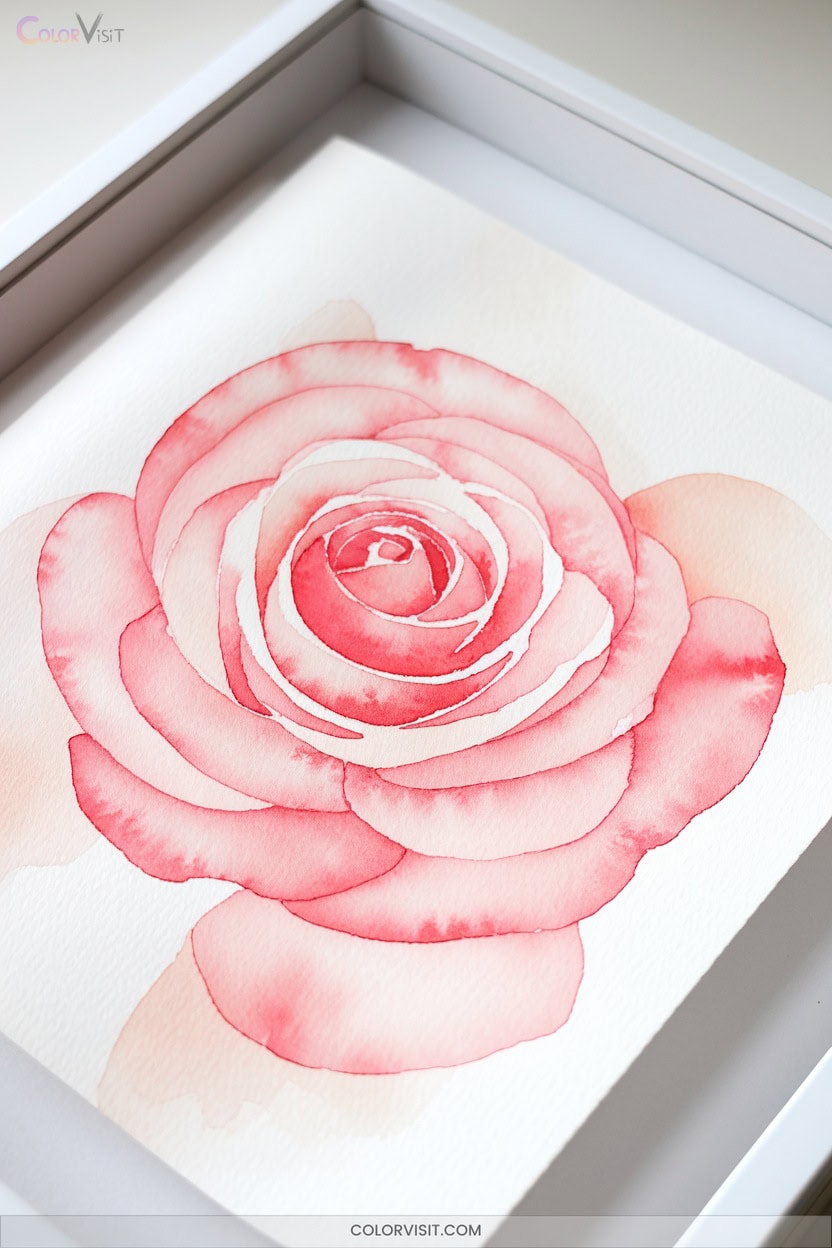
After exploring the lightness of butterfly wings, you can capture the gentle elegance of a rose with the dragging technique.
Start by stretching cold press paper, then load a round brush with diluted pastel pinks. Drag the brush across damp paper, letting colors softly blend.
Begin at the rose’s center, radiating loose, expressive petals outward. Vary your pressure to create depth and texture, and lift pigment where you desire soft highlights.
Let layers dry between passes, adding gentle shades for dimension. Don’t overwork—embrace the forgiving, organic flow.
Practice these innovative strokes, and soon, ethereal roses will bloom from your brush.
20. Watercolor Balloons With Crisp Edges
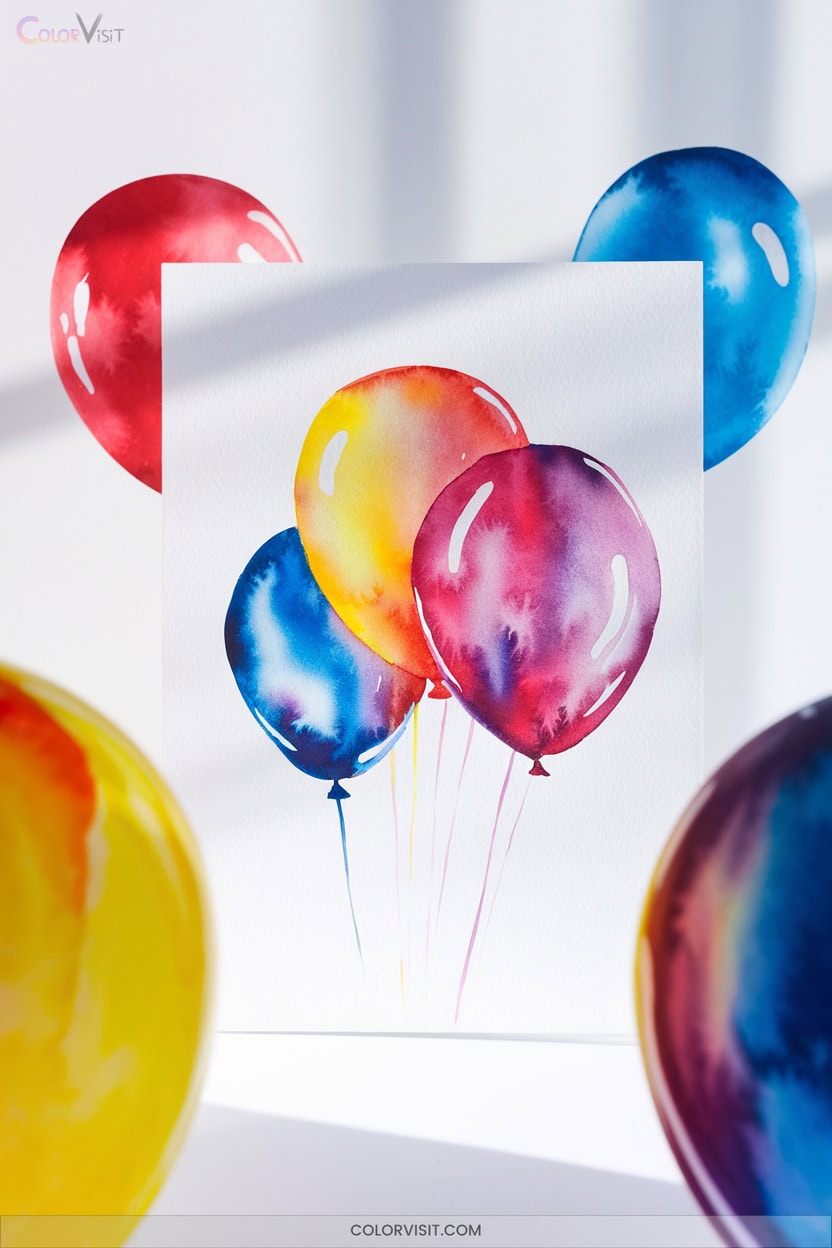
A crisp-edged watercolor balloon pops off the page with luminous color and playful precision.
Start by selecting cold pressed paper and sketching your balloon’s outline lightly.
Let the paper reach a subtle dampness before painting—this gives you razor-sharp edges.
Work from the center outward, using a fine round brush and pasty pigment for maximum control.
For innovative clarity, remember:
- Stretch or block your paper to avoid warping.
- Choose non-granulating pigments for smooth, even color.
- Squeeze excess water from your brush for defined marks.
- Lift pigment gently with a damp brush to clean up any edge mishaps.
Let your creativity soar!
Frequently Asked Questions
How Do I Prevent My Watercolor Paper From Buckling While Painting?
To prevent your watercolor paper from buckling, choose thick cotton paper, secure it to a board with clips or tape, and gently pre-wet it. Experiment with block paper or even creative tools like puppy training pads for even saturation.
What’S the Best Way to Store Finished Watercolor Paintings?
Treat your finished watercolor paintings like treasures in a vault—store them flat, separated by acid-free tissue, in a cool, dark place. Don’t let plastic sleeves touch them, and use archival varnish for added innovation and protection.
Can I Use Regular Printer Paper for Watercolor Painting?
You can experiment with watercolor on regular printer paper, but expect buckling, bleed-through, and limited layering. Embrace its unpredictability for creative sketches, but if you crave vibrant, lasting results, upgrade to proper watercolor or mixed-media paper.
How Do I Fix Mistakes or Unwanted Marks in Watercolor?
Don’t cry over spilled paint! If you spot a mistake, quickly blot or lift it with a brush or sponge. For dry errors, paint over with a darker color, or embrace the surprise and innovate boldly.
What Are the Differences Between Student and Artist Grade Watercolors?
When you choose between student and artist grade watercolors, you’ll notice artist grade paint explodes with vibrant, pure pigment, blends effortlessly, and endures over time, while student grade offers affordability, basic hues, and a forgiving platform for experimental creativity.
Conclusion
You thought watercolor painting was only for seasoned artists, didn’t you? Yet here you are, brushes in hand, mastering gradients and sunsets with nothing but water and a splash of color. Each petal, balloon, and sky wash proves how approachable creativity can be—if only you let go of perfection. So, whenever someone insists it’s “too hard,” just smile, dip your brush, and show them how easy beauty can flow from a little willingness to try.